Posey's Tips & Tricks
Improving Copilot Searches with Acronyms and Bookmarks 2
Let's take a look at how Microsoft 365 Copilot Search bookmarks let admins pin trusted resources to the top of results using titles, descriptions, keywords, reserved keywords and optional targeting controls.
In the first part of this article series, I talked about creating a dictionary of acronyms that Copilot Search could use in order to produce better search results. Now, I want to turn my attention to Copilot Search bookmarks.
Rather than just hoping that Copilot Search will take users to the resource that they are looking for, you can use bookmarks to make sure. That way, if a user searches for a resource and there is a bookmark that matches the user's search, the bookmark appears at the top of the search results. This can be useful for helping users to locate things like HR forms or documents.
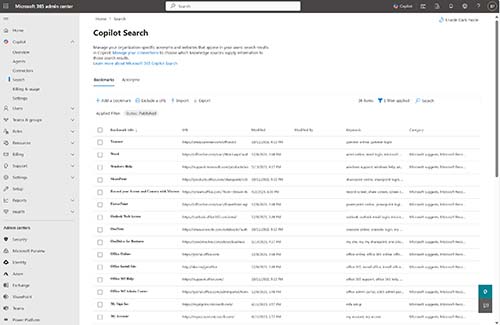
To get started, open the Microsoft 365 Admin Center and expand the Copilot tab. Now, select the Search tab and then make sure that the Bookmarks option is selected. You can see what the Bookmarks page looks like in Figure 1.
 [Click on image for larger view.]
Figure 1. The Bookmarks tab is prepopulated with Microsoft 365 related bookmarks.
[Click on image for larger view.]
Figure 1. The Bookmarks tab is prepopulated with Microsoft 365 related bookmarks.
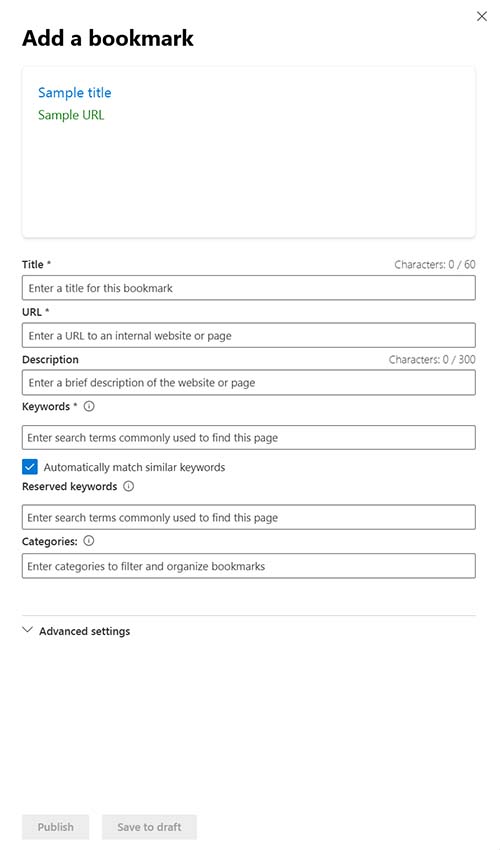
Click on the Add a Bookmark link and you will be taken to the Add a Bookmark page, which you can see in Figure 2. As you can see in the figure, there are several fields that you can populate, but only the Title, URL, and Keywords fields are mandatory.
 [Click on image for larger view.]
Figure 2. This is the page used to add a new bookmark
[Click on image for larger view.]
Figure 2. This is the page used to add a new bookmark
The first thing that you will need to enter when creating a bookmark is the bookmark title. Microsoft recommends using a title that consists of about eight words or sixty characters, although you can use less. Microsoft also strongly cautions admins to use titles that are descriptive and informative, but that do not sound like clickbait. As an example, a link to an organization's time off request form might use a title such as "Official Paid Time Off Request Form" rather than "You won't believe what happens when you fill out this simple form (PTO Request Inside)."
Once you have come up with a good title for the bookmark, the next step in the process is to enter a description. The description should be about 300 characters in length and should provide additional information about the bookmarked resource's purpose.
When you finish entering a name and description for the bookmark, the next thing that you will need to enter is a list of keywords that users might use in an effort to locate the resource. Microsoft recommends that you provide at least five keywords (although you can use short phrases instead of just relying on single words). Microsoft also recommends that you choose varied phrases that are based on how a user might look for something. To continue the time off request form example, some possible keywords might be PTO Request Form, Vacation Request Form, Time Off Request, Personal Days, Travel, Absence, Leave, and the list goes on.
If you look back at the previous figure, you will notice that there is a checkbox that you can select in order to automatically add similar matching keywords to the list.
The interface also contains a field that you can use to enter a list of reserved keywords. A reserved keyword is basically a high priority keyword. If a user enters a query that matches a reserved keyword that has been assigned to a bookmark, then the reserved keyword will override all other keywords. Reserved keywords have to be unique. As such, if you want to make absolutely sure that a user is taken to the correct resource if they enter a particular search phrase, then use that phrase as a reserved keyword. As an example, if your organization uses time sheets, then you could use the phrase "Time Sheet" as a reserved keyword. That way, if a user enters the words "Time Sheet," then they will be taken directly to the bookmark associated with your time sheets.
The last thing that Microsoft recommends adding to the bookmark is a list of one or more categories that the bookmark could be classified within. The important thing to note is that the list of categories only serves to help you to keep the bookmarks organized. The end users will never see the categories.
When you finish entering the required information, you can create the bookmark by clicking Publish. As an alternative, you could save the bookmark as a draft, which allows you to save your work without making the bookmark active. As with acronyms, Microsoft also gives you the option of importing bookmarks from a CSV file.
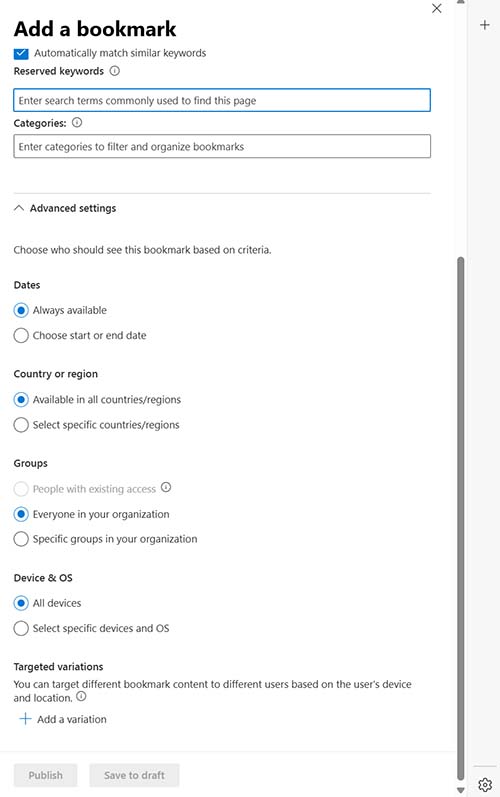
If you look back at Figure 2, you will notice that there is an Advanced Settings option at the bottom of the page. Clicking on Advanced Settings reveals several other configuration options related to the bookmark. These options, which you can see in Figure 3, allow you to make a bookmark only available on certain dates, only available in specific countries or regions, only available for users on specific device types, or only available for specific groups.
 [Click on image for larger view.]
Figure 3. You can use the advanced options to control when a bookmark is available and who the bookmark is available to.
[Click on image for larger view.]
Figure 3. You can use the advanced options to control when a bookmark is available and who the bookmark is available to.
About the Author
Brien Posey is a 22-time Microsoft MVP with decades of IT experience. As a freelance writer, Posey has written thousands of articles and contributed to several dozen books on a wide variety of IT topics. Prior to going freelance, Posey was a CIO for a national chain of hospitals and health care facilities. He has also served as a network administrator for some of the country's largest insurance companies and for the Department of Defense at Fort Knox. In addition to his continued work in IT, Posey has spent the last several years actively training as a commercial scientist-astronaut candidate in preparation to fly on a mission to study polar mesospheric clouds from space. You can follow his spaceflight training on his Web site.