Posey's Tips & Tricks
Taking Microsoft Loop for a Spin
Brien walks you through getting started in the latest Microsoft 365 feature, currently in preview.
One of the big announcements coming out of Microsoft Ignite in November was that of Microsoft Loop. Microsoft Loop is based on Microsoft’s Fluid Framework and allows Microsoft 365 users to create connected components such as tables and lists that are always up to date and can be used in multiple locations simultaneously. Although Microsoft Loop has yet to be released, some parts of Loop have already been added to Microsoft Teams. In this blog post, I will show you how you can check out the early stages of Loop.
Enabling Public Preview
The first thing that you will need to do is to enable Public Preview for Microsoft Teams. To do so, log into Microsoft 365 as an administrator, and then open the Teams Admin Center. In the tree view on the left side of the screen, expand Teams and then click on the Teams Update Policies option. You can see what this looks like in Figure 1.
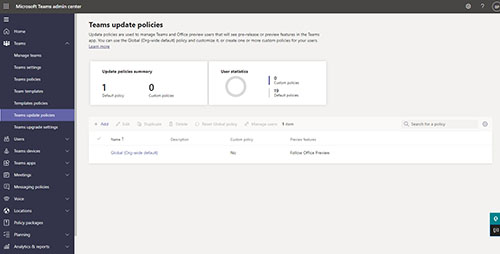 [Click on image for larger view.] Figure 1. Select the Teams Update Policies tab.
At this point, you will need to either click Add to create a new policy or you will have to edit an existing policy. In either case, the update policy will include a Show Preview Features option. You should set this option to Enabled, as shown in Figure 2.
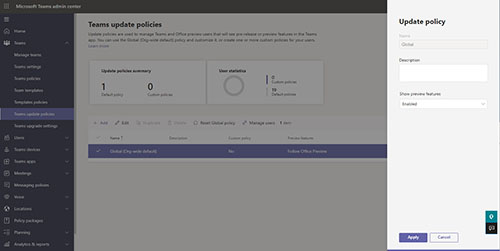 [Click on image for larger view.] Figure 2. Set the Show Preview Features option to Enabled.
Enabling the Show Preview Features option simply grants administrative approval for users to access Microsoft Teams preview features. It does not actually cause those preview features to be automatically revealed within Teams. You will need to tell Teams that you want to turn on the preview features.
To do that, open Teams and then click on the More icon (the icon with the three dots, just to the left of your profile at the top of the screen). Choose the About option from the resulting menu, and then click on Public Preview, as shown in Figure 3.
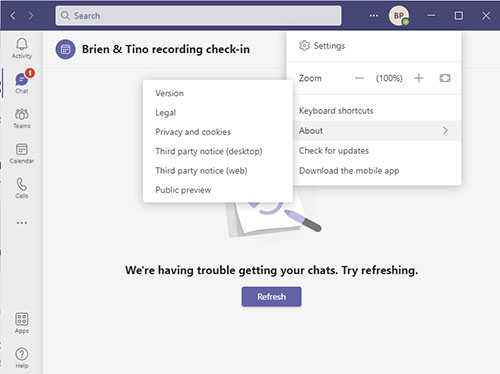 [Click on image for larger view.] Figure 3. Click About, followed by Public Preview.
At this point, you will see a rather somber warning message telling you that Microsoft isn’t responsible for all of the problems that you might run into by enabling public preview. If you still want to move forward, click on the Switch to Public Preview button, shown in Figure 4. Teams will now restart with public preview enabled.
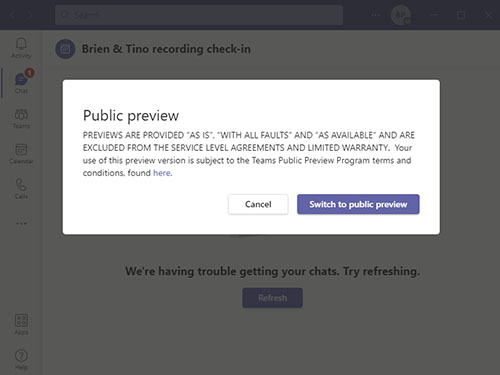 [Click on image for larger view.] Figure 4. Click the Switch to Public Preview button.
Test Driving Loop
Now that Teams has been configured to allow for the use of preview features, it’s time to take a look at Loop, or at least the parts of Loop that have been added to Teams so far. If you look at the figure below, you can see that I have started a new conversation within Microsoft Teams. You will also notice that there is a row of icons just beneath the Type a New Message box. If you hover over the third icon from the left, you will see that a label appear that says Insert Live Component. Live components are the old name for Loops.
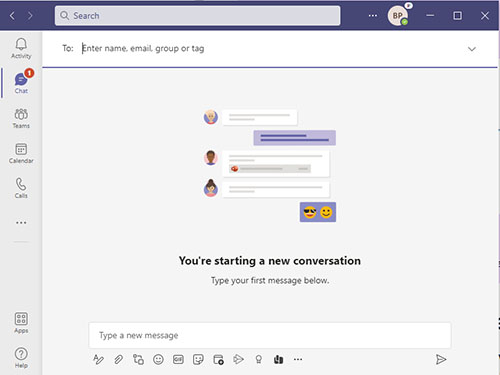 [Click on image for larger view.] Figure 5. The third icon from the left (at the bottom of the screen) allows you to insert live components, or Loops.
The live components that exist so far include bulleted lists, checklists, numbered lists, paragraphs, tables and task lists. You will notice that this list of items is very similar to the one that appeared in Microsoft’s Fluid Framework Preview.
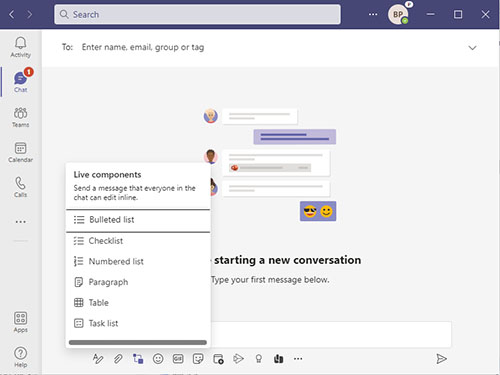 [Click on image for larger view.] Figure 6. These are the live components that are currently available.
Regardless of which data type you choose to insert, you will have to provide a name for the data. Remember, Loop centralizes bits of data so that they can be used in multiple locations. In Figure 7 for example, I picked the Paragraph option from the list, which resulted in the creation of a live paragraph. I named this paragraph Live Paragraph.
 [Click on image for larger view.] Figure 7. Each Loop component that you create requires a name.
So now that I have shown you how to access Loop components in Teams, there are two more things that I want to show you. First, you can created nested Loop components. In the previous figure for example, I created a live paragraph. If I were to type a slash / within the paragraph, Teams would give me the chance to insert another live component into the paragraph. For example, I could insert a live table into the live paragraph. You can see what this looks like in Figure 8.
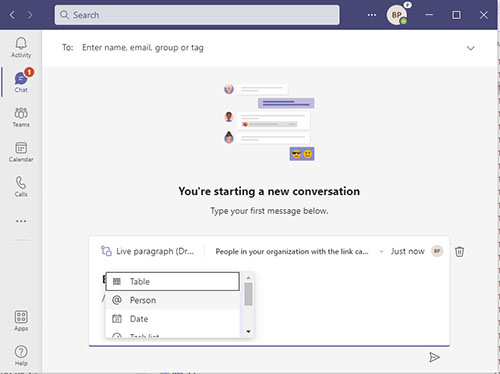 [Click on image for larger view.] Figure 8. You can insert a live component into another live component.
The other thing that I wanted to show you is that Loop components are available in OneDrive. If you look at Figure 9, you can see that my live paragraph shows up in OneDrive. I didn’t do anything to put it there, it just showed up automatically. I have the option of saving the paragraph, or of viewing it online.
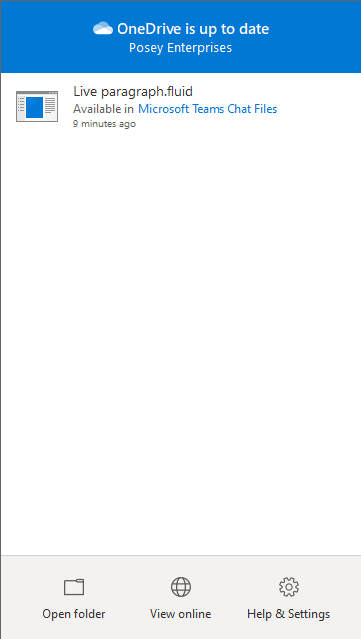 [Click on image for larger view.] Figure 9. Loop components show up in OneDrive.
About the Author
Brien Posey is a 22-time Microsoft MVP with decades of IT experience. As a freelance writer, Posey has written thousands of articles and contributed to several dozen books on a wide variety of IT topics. Prior to going freelance, Posey was a CIO for a national chain of hospitals and health care facilities. He has also served as a network administrator for some of the country's largest insurance companies and for the Department of Defense at Fort Knox. In addition to his continued work in IT, Posey has spent the last several years actively training as a commercial scientist-astronaut candidate in preparation to fly on a mission to study polar mesospheric clouds from space. You can follow his spaceflight training on his Web site.