Posey's Tips & Tricks
Automating Microsoft 365 Installation, Part 1
While you can install Microsoft Office applications (Word, Excel, etc.) directly from the Microsoft 365 management console, many administrators prefer to automate and customize the deployment process. In this two-part series, I will show you how.
The first thing you need to do is create an XML file that can be used to enable the download process. The XML file shown below is a modified version of the one provided by Microsoft. This XML file will help you download the 64-bit version of Microsoft Office 2019 ProPlus (in English):
<Configuration>
  <Add OfficeClientEdition="64" Channel="Monthly">
      <Product ID="O365ProPlusRetail">
         <Language ID="en-us" />
      </Product>
      <Product ID="VisioProRetail">
        <Language ID="en-us" />
      </Product>
  </Add>
</Configuration>
There are three things I want to point out about the XML file shown above. First, the product ID sections are configured for retail licensing. If you have a volume license, just change the word "Retail"
to "Volume." Second, I am using the Monthly channel, but you can use a different channel if you prefer. Third, the section that references VisioProVolume is normally unnecessary. I included it to show that you can use the XML file to download and deploy ancillary Office products such as Visio and Publisher.
To keep things simple, here is the XML file that I will be using going forward:
<Configuration>
  <Add OfficeClientEdition="64" Channel="Monthly">
      <Product ID="O365ProPlusRetail">
         <Language ID="en-us" />
      </Product>
   </Add>
</Configuration>
Once you have created an XML file, the next step is to download and install the Office Deployment Tool. You can download this tool here. The download consists of a self-extracting executable. When you run the file, you will need to extract its contents to an empty folder on your hard disk. You will also need to copy the XML file that you created earlier to this same folder.
Incidentally, you can use the XML files included with the Office Deployment Kit as a model for creating your own XML file, rather than using the XML code shown above.
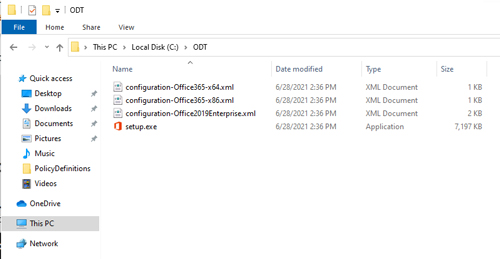 [Click on image for larger view.] Figure 1: These are the files that are included in the Office Deployment Tool.
The most important thing to understand about these files is that even though the Office Deployment Tool contains a Setup.exe file with an icon that looks like the Office logo, this file is not Microsoft Office Setup. In fact, if you try to execute the file by double-clicking on it, Windows will spend a moment "getting things ready" and will then display the error message shown in Figure 2.
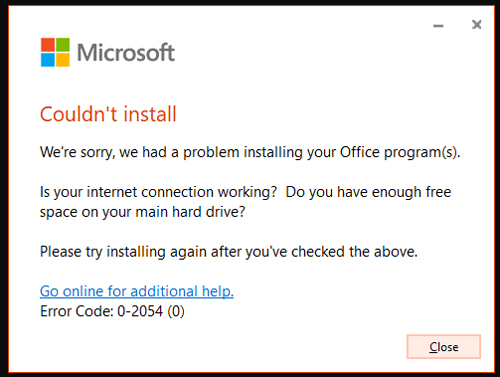 Figure 2: This is the error that is displayed if you try to run Setup by itself.
This is where the XML file you created earlier comes into play. You will need to use that XML file in conjunction with the Setup file shown in Figure 1 to download the Office Setup files.
To do so, open an elevated Command Prompt window. You can do this by clicking the Start button, expanding the Windows System section, then locating the Command Prompt section. Next, right-click on the Command Prompt option and choose the More | Run As Administrator options from the shortcut menus.
When the Command Prompt opens, navigate to the folder that contains the Office Deployment Kit's Setup.exe file and the XML file that you created earlier. Be sure to make note of the name you used for your XML file. I called mine Basic.xml, but you can call your XML file anything you want as long as you remember the name.
Now, enter the Setup command, followed by the Download parameter and the name of the XML file that you created. If you called your XML file Basic.xml as I did, then the command would be:
Setup /download basic.xml
You can see what this looks like in Figure 3.
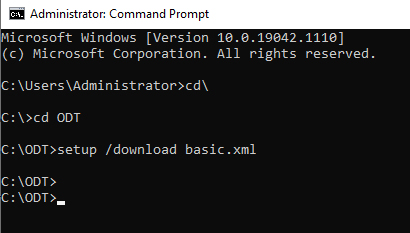 Figure 3: This is the command that is used to download the Office Setup files.
When you press Enter, the Command Prompt window will appear to lock up. However, Setup is actually downloading the Office Setup files in the background. As you can see in Figure 4, Setup has created a folder called "Office" within the folder containing Setup.exe. This folder contains the Office setup files.
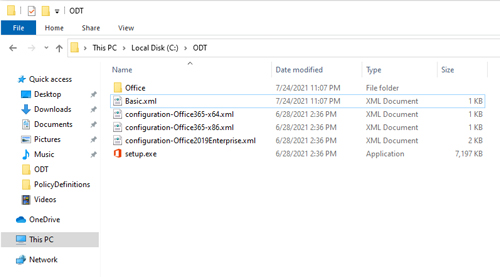 [Click on image for larger view.] Figure 4: The Office folder contains the Office installation files.
Now that I have shown you how to download the Office Setup files, I want to show you how to perform an automated Office installation. Stay tuned for Part 2.
About the Author
Brien Posey is a 22-time Microsoft MVP with decades of IT experience. As a freelance writer, Posey has written thousands of articles and contributed to several dozen books on a wide variety of IT topics. Prior to going freelance, Posey was a CIO for a national chain of hospitals and health care facilities. He has also served as a network administrator for some of the country's largest insurance companies and for the Department of Defense at Fort Knox. In addition to his continued work in IT, Posey has spent the last several years actively training as a commercial scientist-astronaut candidate in preparation to fly on a mission to study polar mesospheric clouds from space. You can follow his spaceflight training on his Web site.