Posey's Tips & Tricks
Automating Microsoft 365 Installation, Part 2
In Part 1 of this series, I explained how to acquire the Microsoft Office Setup files. Now, I want to show you how to use these files to perform a custom deployment.
The easiest way to set up a custom Office deployment is to use the Office Customization Tool. This is an online tool, so you don't have to worry about downloading or installing it; just go here. When you arrive at this site, click on the Create button, shown in Figure 1.
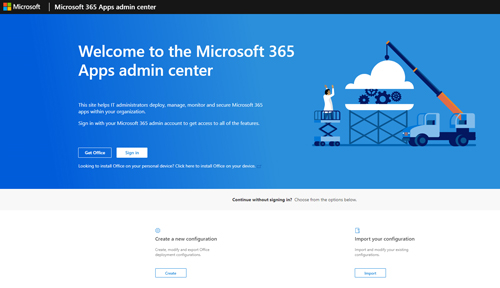 Figure 1: Click the Create button beneath Create a New Configuration.
At this point, you will be taken to the main Office Customization Tool screen, which you can see in Figure 2.
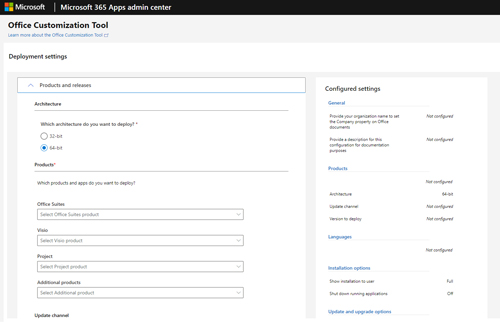 [Click on image for larger view.] Figure 2: This is what the Office Customization Tool looks like.
As you can see in the figure, using this tool is relatively straightforward. You simply need to fill in the blanks with information about how you want Office to be installed. You don't have to answer all of the questions, but there are some that are required. For example, you must select your architecture and your language.
When you finish answering any questions that are applicable to your organization, click the Export button. When you do, you will be taken to the dialog box shown in Figure 3. This dialog box asks if you want to configure Office to use the default settings, use the Open XML format or use the OpenDocument format. If you are unsure of what to choose, I recommend either keeping your current settings or choosing the Office Open XML formats.
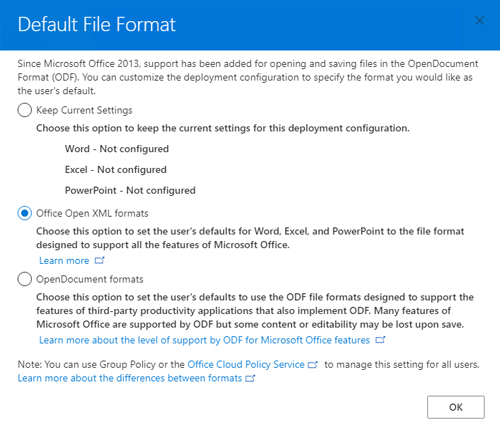 Figure 3: Choose the Office document format that you want to use.
Click OK and you will be taken to a screen like the one shown in Figure 4 that prompts you to accept the licensing agreement and to provide a filename for the XML file you are creating. When you are done, click the Export button to export the file.
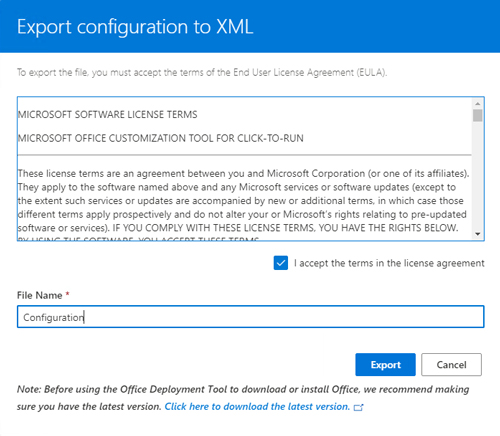 Figure 4: You will need to accept the license agreement and provide a filename before clicking Export.
When you create the configuration file, there is a good chance your browser will report it as unsafe. Go ahead and let your browser save a copy of the file in your Downloads folder.
The last step in the process is to install Office based on the XML file you have created. To do so, there are two things you will need to do. First, you must copy the XML file you just created to the folder containing the Office setup files. The second is to tell Windows to install Office using the XML file.
To install Office, open a Command Prompt window and navigate to the folder containing both the Office setup files and the XML file that you created earlier. Next, enter the following command:
Setup /configure configuration.xml
You will, of course, need to substitute the name of your own configuration file for the configuration.xml file that I am referencing in the command above. You can see an example of this in the figure below.
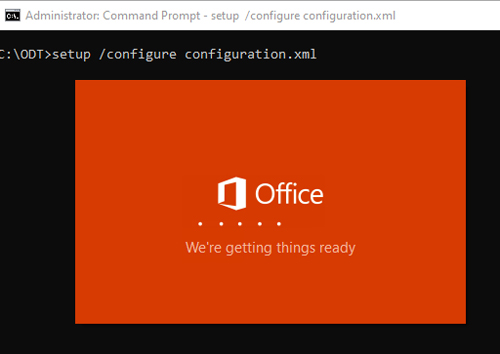 Figure 5: This is the command used to install Office.
At this point, Office will be installed according to your specifications. Once you have verified that your configuration file works properly, you can easily build a script that will install Office to large numbers of tools. As an alternative, you can configure any software deployment tools that your organization happens to be using to deploy Office in this way.
About the Author
Brien Posey is a 22-time Microsoft MVP with decades of IT experience. As a freelance writer, Posey has written thousands of articles and contributed to several dozen books on a wide variety of IT topics. Prior to going freelance, Posey was a CIO for a national chain of hospitals and health care facilities. He has also served as a network administrator for some of the country's largest insurance companies and for the Department of Defense at Fort Knox. In addition to his continued work in IT, Posey has spent the last several years actively training as a commercial scientist-astronaut candidate in preparation to fly on a mission to study polar mesospheric clouds from space. You can follow his spaceflight training on his Web site.