Posey's Tips & Tricks
How To Use .CSV Files with PowerShell, Part 1
When it comes to bulk administration, few things are handier than .CSV files. In this two-part series, Brien demos his top techniques for working with .CSV files in PowerShell. First up: How to create a .CSV file.
Windows PowerShell is probably best-known for its ability to allow Windows admins to operate at scale. For instance, it would take forever to create a thousand user accounts through the GUI, but PowerShell can get the job done in a matter of minutes.
When it comes to bulk administration, few things are handier than .CSV files. For instance, you can write a script to create user accounts based on the contents of a .CSV file. PowerShell isn't limited to just reading .CSV files, though. It can also create them.
In this two-part series, I want to show you some of my favorite techniques for working with .CSV files in PowerShell. I will start out by showing you how to create a .CSV file, then I will show you how to read the contents of a .CSV file into an array.
Creating a .CSV File
Using PowerShell to create a .CSV file couldn't be easier. All you have to do is get the data that you want to export into the command pipeline and then use the Export-CSV command. You can export data from a Get cmdlet (Get-Service, Get-Process, Get-VM, etc.) or you can use other sources such as the contents of an array.
To show you how this works, let's create a .CSV file based on the processes that are running on a Windows computer. You can use the Get-Process cmdlet to retrieve the process list and use the Export-CSV cmdlet to write those processes to a .CSV file. Here is an example of such a command:
Get-Process | Export-CSV C:\Temp\Process.csv
You can see the resulting .CSV file in Figure 1.
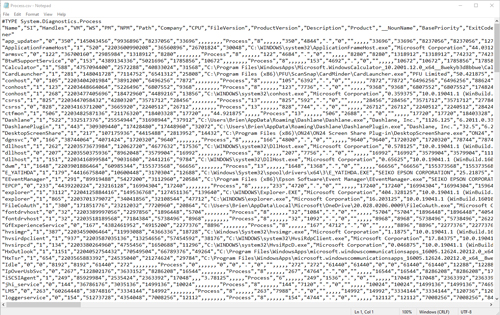 [Click on image for larger view.] Figure 1: This is what the .CSV file looks like.
As you look at the .CSV file, you will notice that it contains a row that defines the column headers, followed by rows listing the individual processes. The other thing you will probably notice is that the .CSV file is hard to read because it contains so much data.
If you don't want to dump all of the available information to a .CSV file, you can use the Select-Object cmdlet to narrow things down. Suppose for a moment that I wanted to create a .CSV file containing only the process name, description and vendor (company). You could create the file by using a command like this one:
Get-Process | Select-Object Name, Description, Company | Export-CSV C:\Temp\Process.csv
You can see the resulting file in Figure 2.
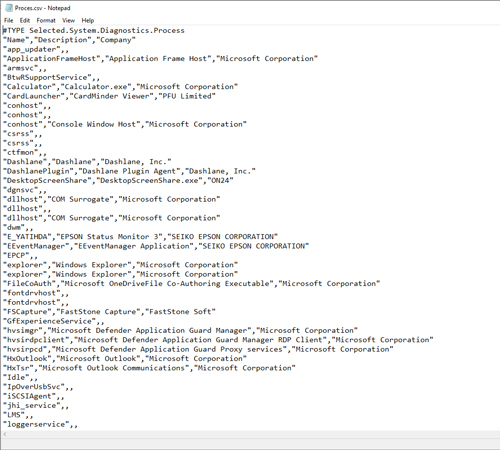 [Click on image for larger view.] Figure 2: This is what it looks like when you use the Select-Object cmdlet to filter the data.
As you can see, the file shown in the figure above is a lot easier to read. As previously mentioned, though, you can also use PowerShell to import a .CSV file so that you can perform administrative actions or calculations based on the file's contents.
When you import a .CSV file into PowerShell, PowerShell expects the file to be in a specific format. The top row of the file needs to contain the column names and the remaining rows are supposed to contain the actual data. If you look back at the previous two figures, you will notice that the top row contains a type statement (#TYPE System.Diagnostics.Process). You can get rid of this line by appending the NoTypeInformation switch to the Export-CSV cmdlet.
To show you how this works, here is the previous command again with the NoTypeInformation switch included:
Get-Process | Select-Object Name, Description, Company | Export-CSV C:\Temp\Process.csv -NoTypeInformation
Figure 3 shows what the resulting file looks like.
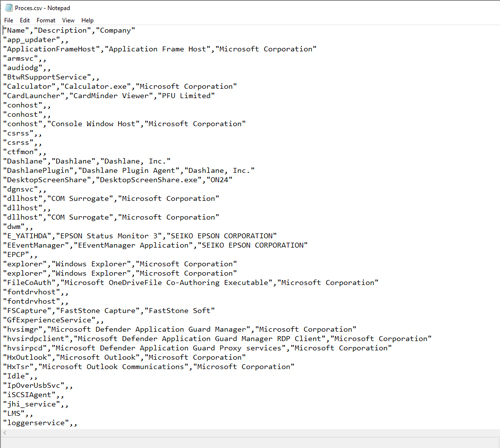 [Click on image for larger view.] Figure 3: This file does not contain the type statement.
There is one more thing you need to know about creating .CSV files through PowerShell. Earlier, I mentioned that PowerShell lets you take whatever data is in the command pipeline and write it to a .CSV file. One big caveat to this is that you can create problems if you try to format the data's appearance.
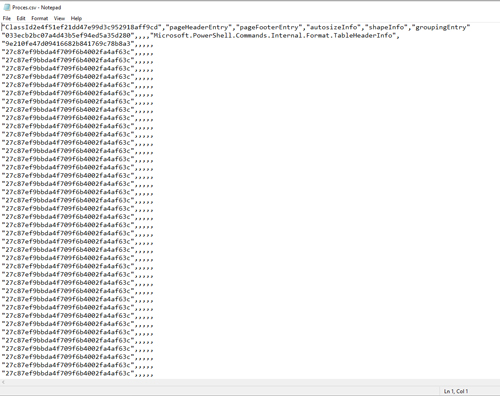
For example, take a look at Figure 4. This is what happens when I use the same command that I used to create the the image on Figure 3, but attempt to format the data as a table (using the Format-Table cmdlet) before creating the .CSV file.
 [Click on image for larger view.] Figure 4: This is what happens when you try to create a .CSV file from data that has been formatted as a table.
As you can see, the data is useless. The lesson is to avoid formatting the data as a table if you are going to create a CSV file.
Now that I have shown you how to create a .CSV file, I want to show you how to import a .CSV file into PowerShell. I will cover that in Part 2 here.
About the Author
Brien Posey is a 22-time Microsoft MVP with decades of IT experience. As a freelance writer, Posey has written thousands of articles and contributed to several dozen books on a wide variety of IT topics. Prior to going freelance, Posey was a CIO for a national chain of hospitals and health care facilities. He has also served as a network administrator for some of the country's largest insurance companies and for the Department of Defense at Fort Knox. In addition to his continued work in IT, Posey has spent the last several years actively training as a commercial scientist-astronaut candidate in preparation to fly on a mission to study polar mesospheric clouds from space. You can follow his spaceflight training on his Web site.