Posey's Tips & Tricks
How To Attach Windows Server to an iSCSI Target
Windows Server includes a built-in iSCSI (short for Internet Small Computer System Interface) initiator that it can use to connect to an iSCSI target. In order to connect to such a target, however, you will need to enable and configure the initiator.
To get started, open the Server Manager and then choose the iSCSI Initiator command from the Tools menu. This will cause Windows to display a dialog box like the one shown in Figure 1. As you can see, Windows indicates that the Microsoft iSCSI service is not running, and that the service must be started if iSCSI is to function correctly. Clicking the Yes button will enable the service, and will ensure that it starts automatically each time that Windows is booted.
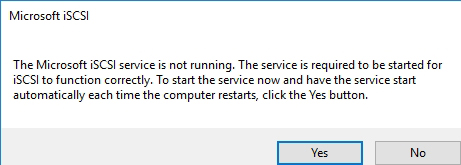 Figure 1: The iSCSI Service must be enabled.
Now that the iSCSI Service is running, you will need to collect a bit of information before you can finish configuring the iSCSI initiator. One of the first things that you will need to know is the iSCSI Qualified Name (IQN) for your iSCSI target. The IQN is essentially just a name by which the target can be accessed. If you look at Figure 2, for example, you can see my storage array's configuration wizard, which prompts you to create an IQN.
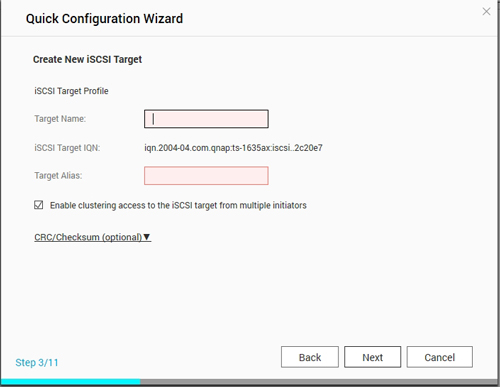 [Click on image for larger view.] Figure 2: Every iSCSI target has an IQN associated with it.
You will also need to know the credentials used for accessing the iSCSI target. iSCSI targets generally use either the Challenge Handshake Authentication Protocol (CHAP) or Mutual CHAP authentication. In either case, you will need to know the user name and password.
One more thing that you will need before you get started is IP connectivity between the Windows Server machine and the iSCSI target. iSCSI communications usually occur across Port 3260, so you will need to make sure that this port is open.
The first step in establishing connectivity to the iSCSI target is to go to the Targets tab on the iSCSI Initiator Properties sheet, then enter the IP address of your intended iSCSI target. Click the Quick Connect button, and the iSCSI Initiator should discover your iSCSI target. As you can see in Figure 3, however, the target is initially listed as Inactive.
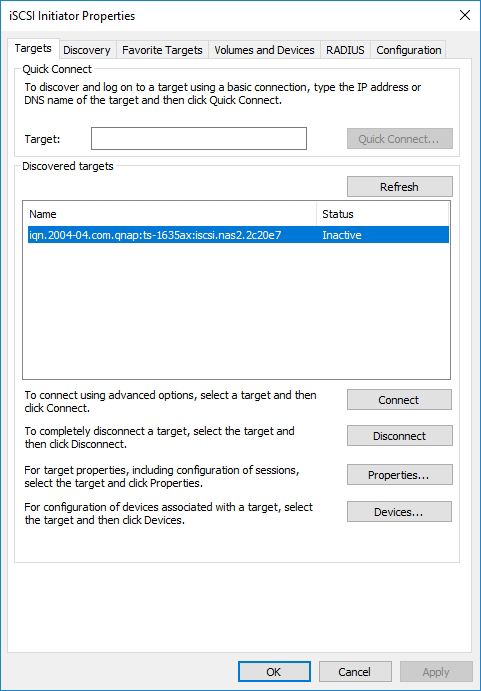 Figure 3: The target has been discovered, but is listed as being inactive.
Now, select the discovered target and click the Connect button. The resulting dialog box, which you can see in Figure 4, makes it seem as though you can simply click OK. Assuming that the target is configured with CHAP authentication, however, you will need to click the Advanced button and then provide the CHAP credentials before clicking OK. The Advanced screen also contains options for Mutual CHAP and Remote Authentication Dial-In User Service (RADIUS) authentication.
While you are on the Advanced screen, be sure to set the Local Adapter to Microsoft iSCSI Initiator and set the Initiator and Target IPs.
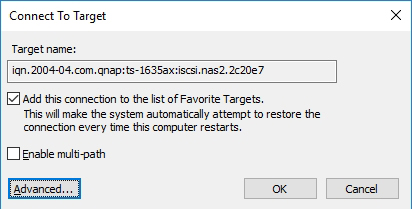 Figure 4: Click Advanced and then provide your CHAP credentials.
At this point, the iSCSI target should be connected, as shown in Figure 5. The next step is to prepare the target for use.
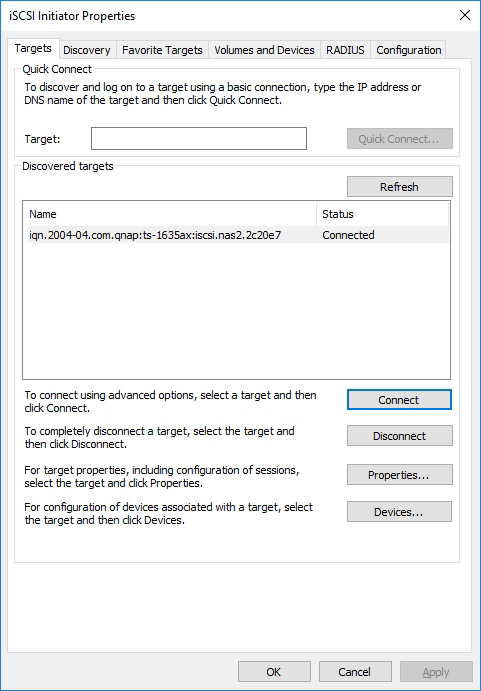 Figure 5: The iSCSI target is connected.
Now, go to the Volumes and Devices tab and click on Auto Configure. When you do, you should see a list of iSCSI volumes, as shown in Figure 6. Once you see this list, you can click OK to close the iSCSI Initiator Properties sheet.
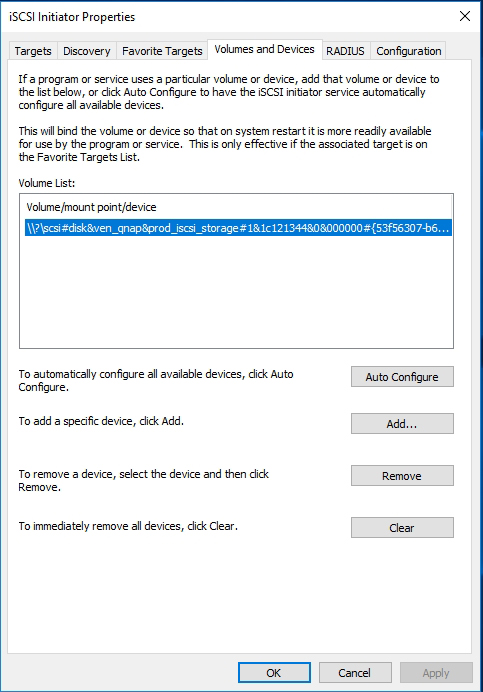 Figure 6: Make sure that your iSCSI volume appears on the list.
Finally, open the Disk Management console by entering the DISKMGMT.MSC command at the Run prompt. As you can see in Figure 7, your iSCSI disk should be listed within the console. By using a series of right-click actions, you will need to bring the disk online and then initialize the disk. From there, you can create a volume and format the disk.
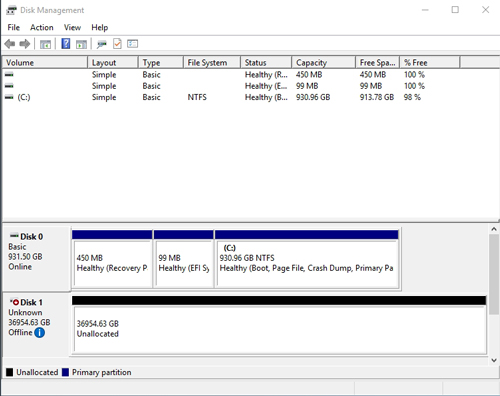 [Click on image for larger view.] Figure 7: The iSCSI disk should be listed in the Disk Management console.
About the Author
Brien Posey is a 22-time Microsoft MVP with decades of IT experience. As a freelance writer, Posey has written thousands of articles and contributed to several dozen books on a wide variety of IT topics. Prior to going freelance, Posey was a CIO for a national chain of hospitals and health care facilities. He has also served as a network administrator for some of the country's largest insurance companies and for the Department of Defense at Fort Knox. In addition to his continued work in IT, Posey has spent the last several years actively training as a commercial scientist-astronaut candidate in preparation to fly on a mission to study polar mesospheric clouds from space. You can follow his spaceflight training on his Web site.