Posey's Tips & Tricks
Upgrading to System Center Virtual Machine Manager Version 1807, Part 2
Now that you've cleared all the system requirements, the next step is to install SCVMM version 1801 and then update from there. Brien shows you how.
In the first part of this series, I showed you how to check which version of System Center Virtual Machine Manager (SCVMM) you are currently running. I also talked about some of the prerequisites to upgrading.
In this article, I am going to walk you through an upgrade from SCVMM 2016 release-to-manufacturing (RTM) to SCVMM version 1801, then show you how to update the server to version 1807.
The first step in the process is to insert the version 1801 installation media and run Setup. When the SCVMM splash screen appears, click Install. As you can see in Figure 1, Setup will not allow you to perform an in-place upgrade. Instead, you will have to remove the existing SCVMM features before installing version 1801.
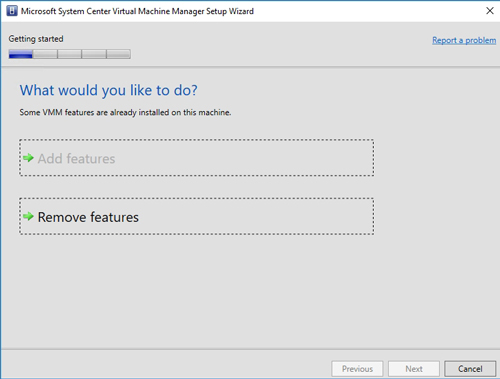 [Click on image for larger view.] Figure 1: You will need to remove any existing SCVMM features prior to installing version 1801.
When you uninstall the previous version, be sure to retain the database, as shown in Figure 2. Otherwise, you will have to start over at square one.
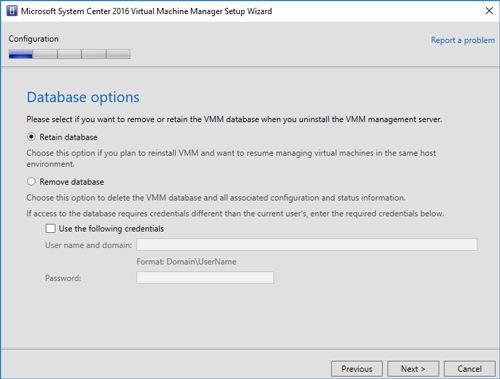 [Click on image for larger view.] Figure 2: Be sure to retain the SCVMM database.
Assuming that the previously installed features have been removed, clicking Install will take you to a screen asking you which features you wish to install. Select the VMM Management Server and the VMM Console options, as shown in Figure 3, and then click Next.
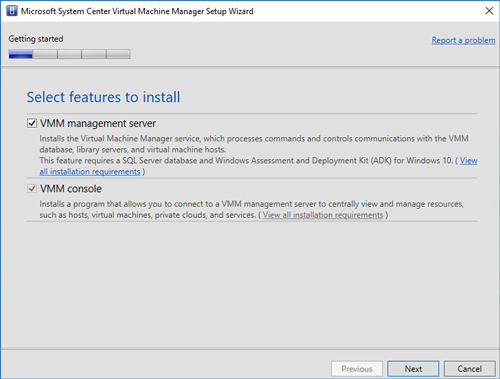 [Click on image for larger view.] Figure 3: Select the VMM Management Server and the VMM Console options and click Next.
At this point, you will be taken to a screen asking you to enter your name, your organization name and your product key. After entering this information, click Next.
The next screen that you will see asks you to accept the license agreement. After doing so, click Next.
Click Next on the Diagnostic and Usage Data screen, and then verify your installation location, as shown in Figure 4.
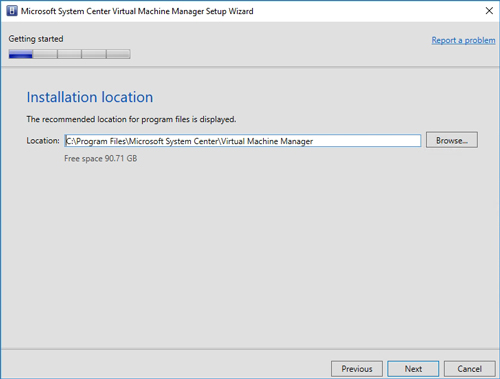 [Click on image for larger view.] Figure 4: Verify your installation location and click Next.
Click Next, and Setup will perform a prerequisite check. Take a moment to address any prerequisite errors or warnings, and then recheck the prerequisites until Setup takes you to the Database Configuration screen.
The Database Configuration screen is used to link SCVMM to a back-end SQL Server database. As previously noted, you can (and should) reuse the previously existing database. To do so, you will need to provide the name of the database server, the name of the SQL Server instance and the name of the previously existing database. You can see what this looks like in Figure 5.
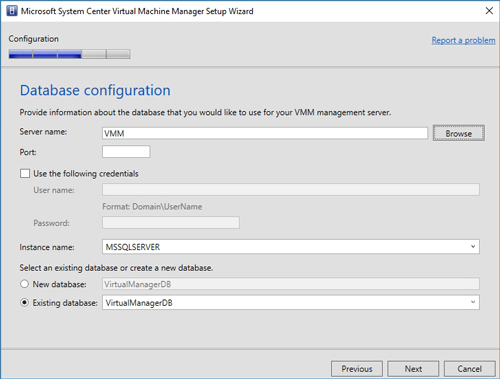 [Click on image for larger view.] Figure 5: Use the Database Configuration screen to attach SCVMM to the previously existing database.
Click Next and you will see a message indicating that the database was created by an older version of SCVMM. Click Yes to upgrade the database, as shown in Figure 6.
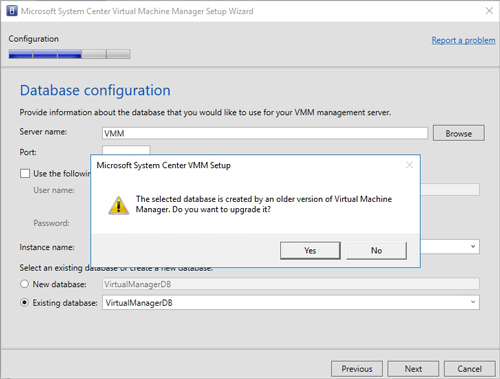 [Click on image for larger view.] Figure 6: You will need to upgrade the database.
The next screen that you will see asks which account should be used by the SCVMM service. It's a good idea to use a domain account regardless of your configuration, but a domain account is absolutely required if you are going to be running SCVMM in a highly available configuration.
One more thing that is worth noting about this screen is that you don't have to worry about setting up your key location. The key location should already be defined within the database, as shown in Figure 7.
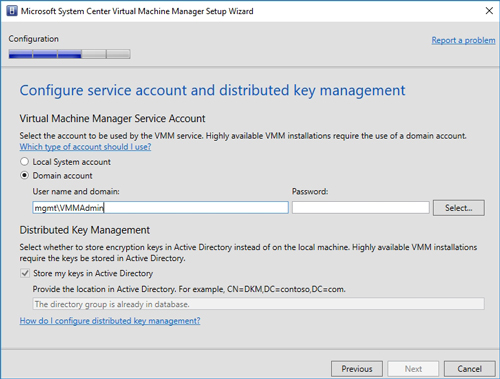 [Click on image for larger view.] Figure 7: You will need to provide a set of credentials to be used by the SCVMM service.
Click Next, and you will be prompted to choose the ports that will be used by the management server. The default values are normally fine, and should not be changed unless you have a compelling reason for doing so.
Click Next again, and you will see a screen asking if you want to create a new library share, or if you would prefer to use an existing library share. Since SCVMM is replacing an earlier version, you should use your existing library share, as shown in Figure 8.
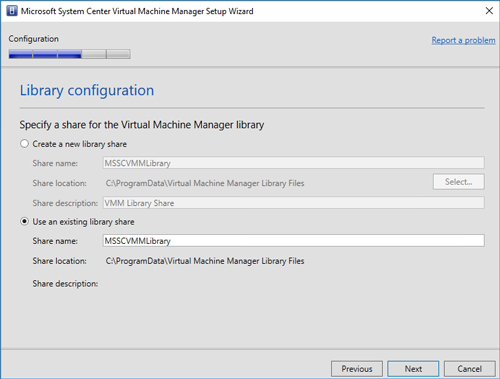 [Click on image for larger view.] Figure 8: You should use your existing library share.
Click Next, and you will be taken to the upgrade compatibility report. Make note of any issues that are reported, and click Next.
Now take a moment to review the installation summary. Assuming that everything looks good, click Install. SCVMM will now be installed. Once Setup completes, you should see a message indicating that the installation has completed successfully, as shown in Figure 9. Click Close to complete the process.
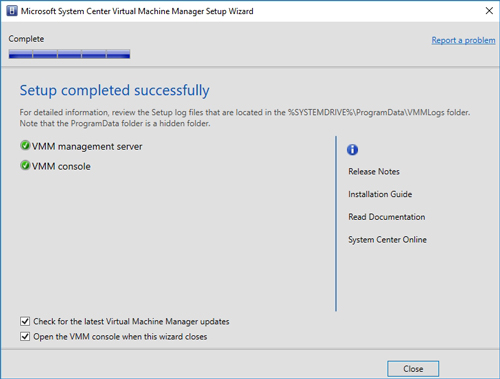 [Click on image for larger view.] Figure 9: Click Close to complete Setup.
The actions performed so far result in SCVMM version 1801 being installed. In order to bring SCVMM up to version 1807, you will need to run Windows Update.
About the Author
Brien Posey is a 22-time Microsoft MVP with decades of IT experience. As a freelance writer, Posey has written thousands of articles and contributed to several dozen books on a wide variety of IT topics. Prior to going freelance, Posey was a CIO for a national chain of hospitals and health care facilities. He has also served as a network administrator for some of the country's largest insurance companies and for the Department of Defense at Fort Knox. In addition to his continued work in IT, Posey has spent the last several years actively training as a commercial scientist-astronaut candidate in preparation to fly on a mission to study polar mesospheric clouds from space. You can follow his spaceflight training on his Web site.