Posey's Tips & Tricks
Test Driving Microsoft's ClipChamp, Part 2: The Nitty Gritty
Let's take a look at some of the features that makes Microsoft's video editing offering special.
In the first part of this series, I introduced you to a Microsoft video editing tool called ClipChamp. As I explained in that article, ClipChamp is designed specifically for social media use. As such, I wanted to show you some of the finer points of using ClipChamp.
When you open ClipChamp, there are a number of templates that are available for your use (with additional templates available on the Templates tab). The templates that are listed are actually high-level categories rather than being the actual templates used in the video creation process. If for example, you were to click on the YouTube template, then you would be taken to a screen like the one shown in Figure 1, where you can pick the general style of YouTube video that you want to create.
 [Click on image for larger view.] Figure 1. You can choose the type of YouTube video that you want to create.
As you can see in the figure, there are templates for creating everything from gameplay videos to reaction videos, and much more. The thing that you need to know is that while ClipChamp will help you to create these various types of videos, your videos will not look exactly like the template unless you want them to.
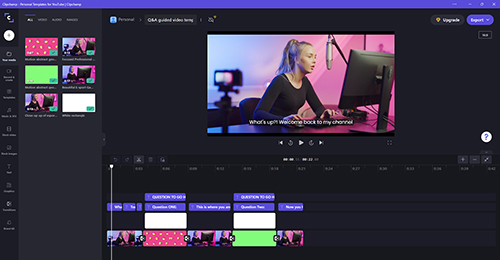
To show you what I mean, check out Figure 2. I clicked on the Q&A Guided Video template and was taken to this screen.
 [Click on image for larger view.] Figure 1. This is an example of a YouTube template.
As you can see in the figure, the video currently shows a random YouTuber saying, "What's up? Welcome back to my channel." If you are trying to create content for your own channel, you would obviously want to replace this stock footage with a clip of your own. Fortunately, that's really easy to do. The stock footage only exists as a means of showing you what type of clip you should record on your own and where you should insert it.
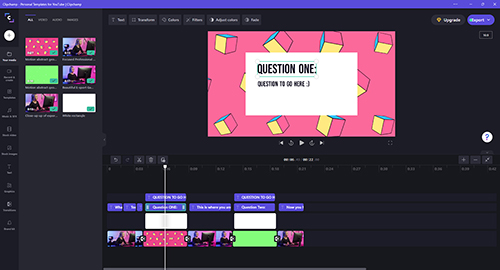
The interface itself is not unlike other video editors. It features a multi-track time line to which you can add various elements. If you look at Figure 3, for example, you can see that the bottom element is a colorful background. The element above that is a white box, the element above that is text (Question One), and the element at the top is sub text (Question to go here).
 [Click on image for larger view.] Figure 3. Individual elements can be stacked on one another.
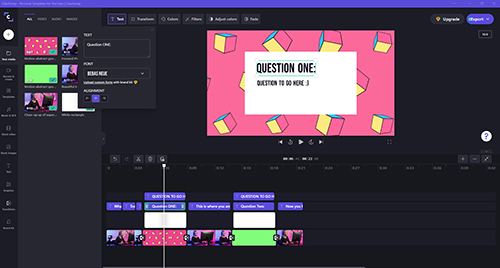
You can edit any of these elements by clicking on them. A single click gives you the ability to change the size and position of text blocks. Double clicking on a text block presents options to change the alignment, font and text. You can see what this looks like in Figure 4.
 [Click on image for larger view.] Figure 4. This is how you edit text within the video.
As you can see, ClipChamp templates are designed to guide you through the process of creating various types of videos. Before I wrap up this post, there are two more things that you need to know.
First, you can link ClipChamp directly to your social media accounts, thus helping to simplify the process of getting your video onto social media. All you have to do is go to Settings and then add your social media accounts. By clicking the Export button, you can choose the video resolution and where you want to export the video to.
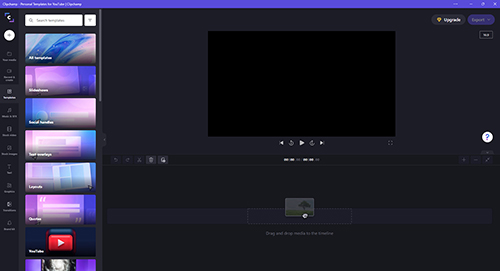
The other thing that I wanted to mention is that if you need a bit more flexibility in the video creation process, then you should click the Create a Video button. Doing so takes you to a screen like the one shown in Figure 5.
 [Click on image for larger view.] Figure 5. This is the screen used to create a video from scratch.
As you can see, clicking on the Create a Video button does not prevent you from using templates. The templates are still there. What it does do is to give you the option of creating a video without templates. The left side of the interface contains a series of icons corresponding to various containers where you can import and store elements such as text images, and other types of media. If you have one of the paid plans, then this is also where you will find stock content. All you have to do is to drag the elements to the timeline and those elements will be added to your video.
About the Author
Brien Posey is a 22-time Microsoft MVP with decades of IT experience. As a freelance writer, Posey has written thousands of articles and contributed to several dozen books on a wide variety of IT topics. Prior to going freelance, Posey was a CIO for a national chain of hospitals and health care facilities. He has also served as a network administrator for some of the country's largest insurance companies and for the Department of Defense at Fort Knox. In addition to his continued work in IT, Posey has spent the last several years actively training as a commercial scientist-astronaut candidate in preparation to fly on a mission to study polar mesospheric clouds from space. You can follow his spaceflight training on his Web site.