Posey's Tips & Tricks
Troubleshooting 101: Repairing Office 365 When Things Go Wrong
Reimaging might be the easiest option but, as Brien explains, there are certain situations where that just won't work.
Microsoft Office is one of very few applications that I can think of that has been around for decades. In fact, I can remember using the DOS version of Office back in the early 1990s. Next year, Office will celebrate its 30th anniversary, if you can believe that one. Where does the time go?
Because Office has been around for almost 30 years, Microsoft has had plenty of time to work out the bugs. Of course, as we all know, Office still has its quirks, but I definitely do not think of Office as being overly buggy. The Office 365 applications tend to be really stable, especially when compared to ancient versions such as Office 95 and Office 97.
But despite Microsoft's best efforts, things can and sometimes do go wrong with Office. This can be especially true when a machine suffers hard disk corruption, a malware infection or some other calamity. Fortunately, whenever these types of problems occur, there are some tools available to help you fix the problem.
Before I talk about what is involved in repairing Office, I want to quickly point out that if you experience problems with Office on a corporate desktop, then it is usually going to be quicker and easier to simply reimage the machine than to try to repair Office. Even so, there are some situations in which reimaging just isn't going to be an option.
Consider, for example, an organization that allows users to work from their own personal devices. If a user is working from their own device, then that device probably has personal data on it. You obviously would not want to overwrite that data or the user's other applications by applying an image to the device. Never mind all of the issues that reimaging would cause. For example, you may not want to use up software licenses by applying a stock corporate image to a user's personal device. There is also a good chance that your image will be missing some of the device drivers that are required by the user's device.
Perhaps more importantly, imaging someone's BYOD device potentially puts you in a situation in which you are obligated to start providing OS-level support for that device. Because BYOD devices are generally outside of an organization's direct control, it is far better to limit your support offerings to those applications that are officially sanctioned by (and provided by) the organization. Office is a prime example of such an application.
With that said, let's go back to the original question: How can you repair an Office (specifically, an Office 365 ProPlus) deployment without reimaging the machine?
The solution is actually far easier than you might assume it to be. When you install Office, the setup program actually installs an Office repair tool that you can use to fix any problems that might occur. This repair tool can run in two different ways: There is a quick and easy option that does a pretty good job of fixing most problems, and then there is the more time-consuming and invasive option for really difficult repairs.
To fix Office, log into the machine using administrative credentials. Once logged in, enter the Control command at the machine's Run prompt. This will cause Windows to open the Control Panel. Now, click on Programs, followed by Programs and Features. This will bring up a list of all of the various applications that are installed on the machine.
Now, scroll through the list of applications until you find Office. The way that Office is listed will vary a bit depending on which edition you have, but on my machine it is listed as "Microsoft Office 365 ProPlus -- en-us." Click on the listing for Office and then click on the Change line, shown in Figure 1.
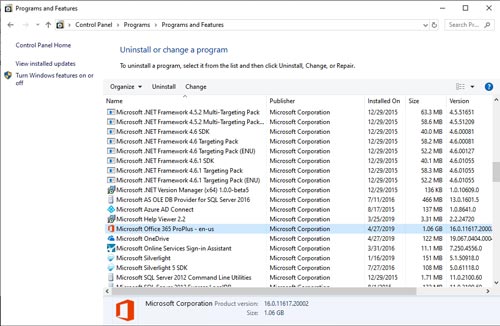 [Click on image for larger view.] Figure 1: Click on Microsoft Office and then click Change.
Upon clicking on the Change link, you will be taken into the Office repair tool, which you can see in Figure 2. As you can see in the figure, you can perform either a quick repair or an online repair. As previously mentioned, the quick repair fixes most issues and doesn't take very long, while the online repair is the more exhaustive option.
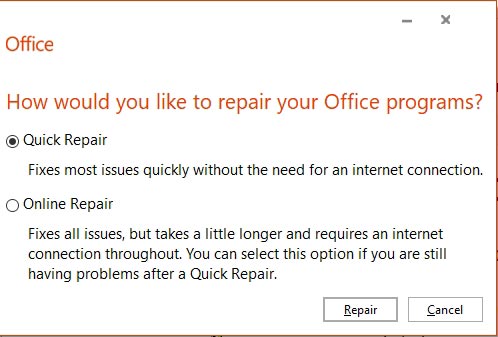 Figure 2: You can perform either a quick or an online repair.
My advice would be to try the quick repair first, and then use the online repair option if a quick repair fails to fix the problem.
About the Author
Brien Posey is a 22-time Microsoft MVP with decades of IT experience. As a freelance writer, Posey has written thousands of articles and contributed to several dozen books on a wide variety of IT topics. Prior to going freelance, Posey was a CIO for a national chain of hospitals and health care facilities. He has also served as a network administrator for some of the country's largest insurance companies and for the Department of Defense at Fort Knox. In addition to his continued work in IT, Posey has spent the last several years actively training as a commercial scientist-astronaut candidate in preparation to fly on a mission to study polar mesospheric clouds from space. You can follow his spaceflight training on his Web site.