Posey's Tips & Tricks
Synchronizing SharePoint to the OneDrive for Business Client
Although it is tempting to think of SharePoint as a Web-based platform for collaboration, it is possible to synchronize the contents of a SharePoint document library to your PC using the OneDrive for Business client.
In this column, I will show you how it's done.
Installing the OneDrive for Business Sync Client
In order to perform SharePoint/OneDrive for Business synchronization, your users will need to have the OneDrive for Business Sync Client installed. This client is not included with Windows 10, but you can easily download the required client from Microsoft here.
The most important thing to understand about the OneDrive for Business Sync Client is that the client component has to be matched to the version of Office that you have installed. The Web page linked above provides one download link for PCs that have Office 2013 and a separate download link for those who are using Office 2016.
It is also worth noting that the Office 2013 version of the client sometimes asks for a product key, but the download page contains a product key that you can use if necessary.
Enabling SharePoint Synchronization
The exact steps that you will have to perform in order to enable synchronization between SharePoint and the OneDrive for Business client vary depending on the version of SharePoint that you are using and the client that you are using. The instructions listed in this column are based on using SharePoint Online and the OneDrive for Business 2016 client.
So with that said, setting up synchronization is usually really easy to do. Begin the process by logging in to your SharePoint site. From there, navigate into the SharePoint document library that you want to synchronize. You can see an example of such a library in Figure 1.
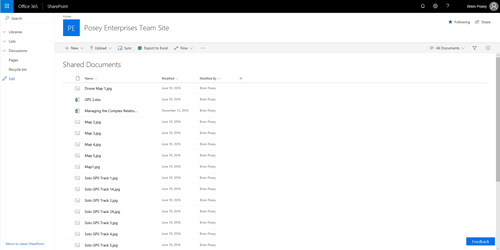 [Click on image for larger view.] Figure 1: Log in to SharePoint and then navigate to the document library that you want to synchronize.
As you look at the figure above, you will notice that SharePoint's toolbar contains a Sync button. Click on the Sync button. When you do, you will see a message indicating that SharePoint is opening OneDrive. You may also end up seeing a warning message asking you if it is OK for your browser to open OneDrive, as shown in Figure 2.
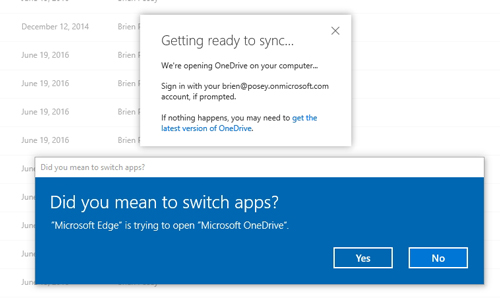 [Click on image for larger view.] Figure 2: Clicking on the Sync button causes various warnings to be displayed.
If this is the first time that you have used OneDrive, then you will be presented with a brief tour (you may also be required to log in to OneDrive). You can move from page to page within the tour by clicking on the right arrow icon. When the tour completes, click on the Open my OneDrive Folder button.
After a brief delay, you should see a pop-up message appear and tell you that you are now synchronizing your SharePoint document library to OneDrive for Business. Actually, the message does not say that exactly. Instead, it lists the exact resource that you are synchronizing. In Figure 3, for example, you can see that the pop-up indicated that I am synchronizing the Posey Enterprises Team Site's shared documents.
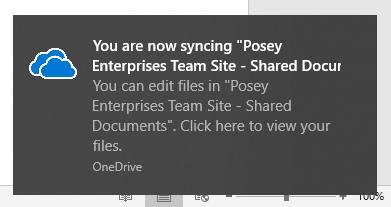 Figure 3: We are now synchronizing SharePoint content.
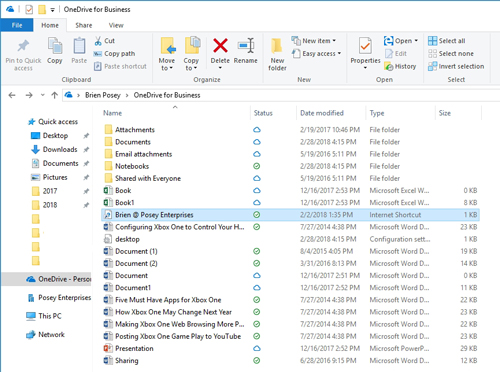
At this point, you will also see File Explorer open, as shown in Figure 4. As you can see in the folder, the OneDrive folder is selected and, at first glance, the Status column would appear to indicate the synchronization status.
 [Click on image for larger view.] Figure 4: File Explorer is currently displaying the wrong folder.
Notice, however, that just beneath the OneDrive folder that is selected (on the left side of the screen) is a folder called Posey Enterprises. This is the folder to which the SharePoint content is being synchronized. Clicking on this folder reveals the data that has been synchronized from SharePoint.
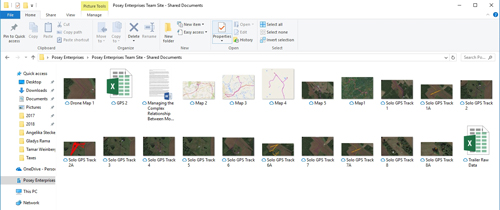 [Click on image for larger view.] Figure 5: The Posey Enterprises folder contains the data that was synchronized from SharePoint.
As you can see in Figure 5 above, everything that exists in my selected SharePoint document library is now available through File Explorer. The cloud icon next to the filename indicates that the data resides in the cloud, but you can work with the files as if they were local. In fact, if you copy a file to another location, Windows will seamlessly download the file, so that the copy that you create is a full copy of the file, and not just a pointer to a cloud resource.
About the Author
Brien Posey is a 22-time Microsoft MVP with decades of IT experience. As a freelance writer, Posey has written thousands of articles and contributed to several dozen books on a wide variety of IT topics. Prior to going freelance, Posey was a CIO for a national chain of hospitals and health care facilities. He has also served as a network administrator for some of the country's largest insurance companies and for the Department of Defense at Fort Knox. In addition to his continued work in IT, Posey has spent the last several years actively training as a commercial scientist-astronaut candidate in preparation to fly on a mission to study polar mesospheric clouds from space. You can follow his spaceflight training on his Web site.