Posey's Tips & Tricks
Populating a SharePoint Document Library by E-Mail, Part 1
While Microsoft doesn't allow you to build a SharePoint Online document library using e-mail, there is a roundabout way of getting the job done using the tools that are included with Office 365. Brien shows you how.
Many years ago, I owned an online retail business. Because of the nature of the business, there were a few different forms that were generated whenever a customer placed an order.
I ended up turning to SharePoint as a tool for storing these forms. My e-commerce site was designed to e-mail copies of the forms to a mail-enabled SharePoint document library. SharePoint would automatically extract the attachment from the message and then store it in the document library.
Much more recently, I have been helping a friend with an altogether different type of Web application. Like the online store that I owned so long ago, my friend's Web application automatically creates PDF documents in response to certain user activities. Initially, e-mailing those PDF documents to a SharePoint document library seemed like a good way to address my friend's document-retention requirements.
However, there was one major problem with that idea: SharePoint Online (the version of SharePoint that is included with an Office 365 subscription) does not allow you to use e-mail as a mechanism for adding documents to a document library.
Even though SharePoint Online lacks the ability to accept e-mailed documents, there is a roundabout way of getting the job done using only the tools that are included with Office 365.
If you want to use e-mail as a tool for populating a SharePoint document library, the first thing that you are going to need is an e-mail address. I strongly recommend using a dedicated e-mail address that is used solely for this purpose. Also, if you need to place documents into multiple document libraries, you will need to create a separate e-mail address for each library.
Thankfully, you don't need to increase your Office 365 license count in order to create these extra e-mail addresses. The trick is to create shared mailboxes, not mail-enabled users. Let me show you how this part of the process works.
To get started, log into the Office 365 administrative portal as an administrator, then launch the Exchange Admin Center. Next, click on the Recipients tab on the left side of the screen, then click on the Shared tab at the top of the screen. You can see what this looks like in Figure 1.
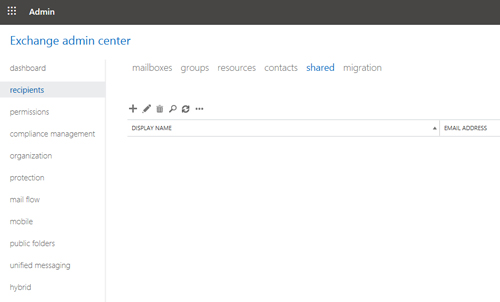 [Click on image for larger view.] Figure 1: Click on the Exchange Admin Center's Recipients tab, followed by the Shared tab.
The next thing you will need to do is to click on the Add button. As you can see in Figure 2, you will need to enter a display name for the new shared mailbox, as well as an e-mail address. You will also need to add at least one user who will be allowed to access the shared mailbox.
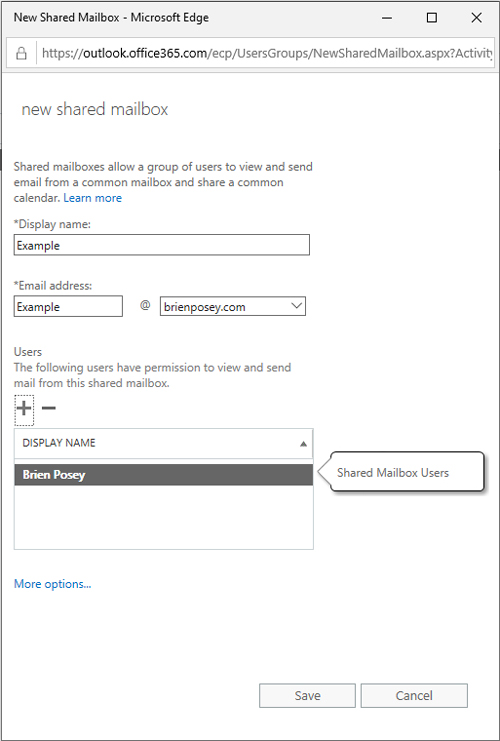 Figure 2: This is how you create a shared mailbox.
Once your newly created shared mailbox is in place, the next thing you will need to do is create a SharePoint team site if you haven't already. When you create a new team site, SharePoint automatically creates a document library, but depending on the scope of your project, you may need to create additional document libraries.
Creating a team site is a simple process. Just open SharePoint and click on the Create Site link, located in the upper-left corner of the screen. When SharePoint asks you what type of site you want to create, choose the Team Site option. From there, just follow the prompts. As you can see in Figure 3, it's a simple process. You will need to provide a name for the site, then specify who the site owners and site members will be.
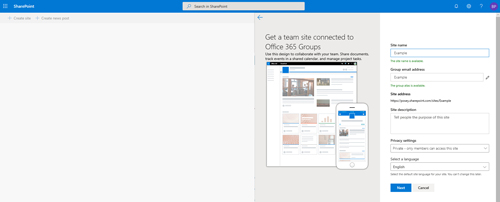 [Click on image for larger view.] Figure 3: Creating a SharePoint team site is a simple process.
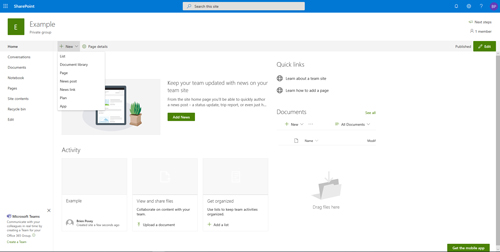
You can see what the new site looks like in Figure 4. Normally, you would want to customize the site prior to putting it into use. For the sake of this article, though, I am going to use the site as-is.
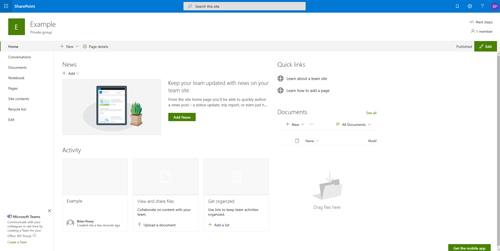 [Click on image for larger view.] Figure 4: This is what a default SharePoint site looks like.
If you look at the tabs on the left side of the figure above, you can see that there is already a document library in place (its's called Documents). If you need additional document libraries, you can create them by clicking the New button and selecting the Document Library option, as shown in Figure 5.
 [Click on image for larger view.] Figure 5: SharePoint allows you to create additional document libraries.
Now that I have shown you how to create a shared mailbox and a SharePoint team site, it's time to route e-mail from the mailbox into the SharePoint document library. I will show you how in Part 2.
About the Author
Brien Posey is a 22-time Microsoft MVP with decades of IT experience. As a freelance writer, Posey has written thousands of articles and contributed to several dozen books on a wide variety of IT topics. Prior to going freelance, Posey was a CIO for a national chain of hospitals and health care facilities. He has also served as a network administrator for some of the country's largest insurance companies and for the Department of Defense at Fort Knox. In addition to his continued work in IT, Posey has spent the last several years actively training as a commercial scientist-astronaut candidate in preparation to fly on a mission to study polar mesospheric clouds from space. You can follow his spaceflight training on his Web site.