Posey's Tips & Tricks
How To Use PowerShell To Locate a Specific Application
Recently, I wrote a column about how you can use PowerShell to uninstall an unwanted application. The problem with the technique described in that article is that it can be tough to locate the application that is to be uninstalled. The query process can return a huge list of applications, even if the machine contains a relatively modest application set.
Therefore, I wanted to take the opportunity to show you a few techniques that you can use to find the application that you are looking for.
Alphabetize the Application List
One of the ways you can simplify the process of locating an application is to alphabetize the list of applications. PowerShell includes native sort capabilities, and you can leverage those capabilities when creating an application list. Here is how it works:
Get-Wmi-Object -Class Win32_Product | Sort-Object -Property Name | Select-Object Name
If you look at Figure 1, you can see that the list of applications has been sorted alphabetically.
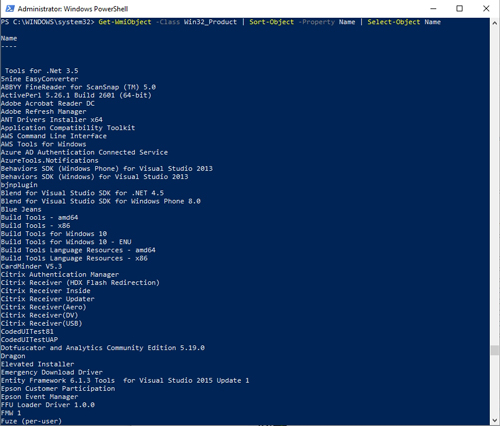 [Click on image for larger view.] Figure 1: The list of applications has been sorted alphabetically.
Sort the List by Vendor
Another way that you can narrow down a list of applications is by locating applications from a particular vendor.
There are a couple of different ways you can do this. One possible option is to simply list the vendor name alongside the application name and alphabetize the list not by application name, but by vendor name. Here is a command that you can use to accomplish the task:
Get-WmiObject -Class Win32_Product | Sort-Object -Property Vendor | Select-Object Vendor, Name
You can see what the output looks like in Figure 2.
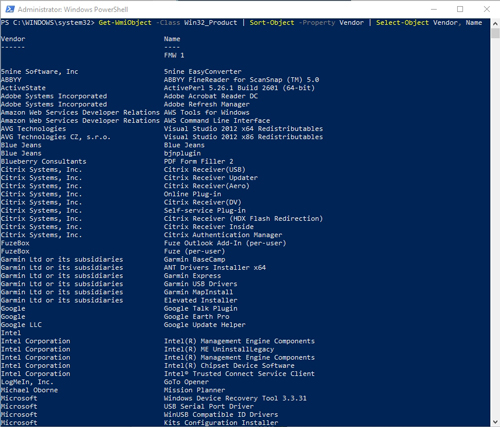 [Click on image for larger view.] Figure 2: I am displaying a list of the application vendor and application name, sorted by vendor.
As an alternative, you can search for a specific vendor by name. Let's suppose for a moment that, for whatever reason, I needed to find out what VMware software was installed on my machine. To do so, I could use the following command:
Get-WmiObject -Class Win32_Product | Where-Object {$_.Vendor -Match "VMware"} | Select-Object Vendor, Name
You can see what the command's output looks like in Figure 3.
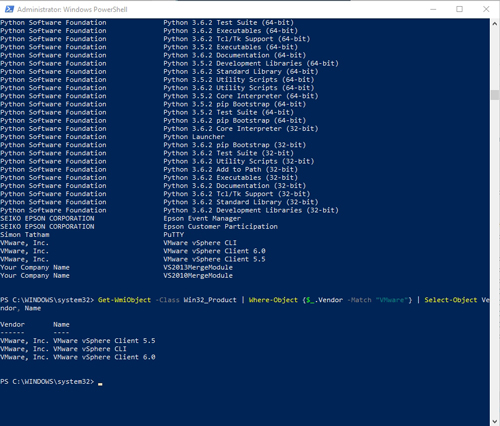 [Click on image for larger view.] Figure 3: I have located all of the VMware software that is installed on my computer.
Before I move on, there is something that I want to point out about the figure above. If you look at the top portion of the figure, you will see the bottom half of the application list sorted by vendor that I generated earlier. As you look at this list, you will see that VMware is actually listed as "VMware, Inc." In contrast, the command that I used to return a list of the VMware software that is installed on my computer looks for the word "VMware," not "VMware, Inc."
The reason I was able to get away with doing this is because I used the -Match operator within the command, rather than using the -EQ operator. The -EQ operator requires an exact match, whereas the -Match parameter simply requires the specified text to appear somewhere within the property that you are searching. Had the command used -EQ instead of -Match, it would not have returned any results because "VMware" is not an exact match for the names of any of the vendors on the list. If I wanted to use -EQ, I would have had to specify "VMware, Inc." as the vendor name.
One More Trick
Let me wrap things up by showing you one more trick that may be helpful to those who don't have such a great memory.
Let's pretend for a moment that I want to uninstall an application, but I can't remember the name of the application or who makes it. All I remember was that there was a "V" in the vendor's name. Maybe the vendor was VMware. Maybe it was AVG. I can't remember.
One way you could deal with this sort of situation is to use the same technique that I just showed you, but use the letter "V" followed by an asterisk. This will locate any vendor with a V in its name. Here is the command:
Get-WmiObject -Class Win32_Product | Where-Object {$_.Vendor -Match "VM*"} | Select-Object Vendor, Name
As you look at this command, you will notice that I am searching on VM* and not V*. The reason for this is that PowerShell seems to have a bug. If you simply use V*, it seems to ignore the letter V. If you use VM*, PowerShell ignores the letter M, and gives you the output that you would expect to see if you had used V*. You can see the command's output in the figure below.
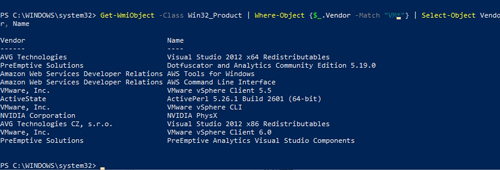 [Click on image for larger view.] Figure 4: You can look for vendors with a specific letter in their name.
About the Author
Brien Posey is a 22-time Microsoft MVP with decades of IT experience. As a freelance writer, Posey has written thousands of articles and contributed to several dozen books on a wide variety of IT topics. Prior to going freelance, Posey was a CIO for a national chain of hospitals and health care facilities. He has also served as a network administrator for some of the country's largest insurance companies and for the Department of Defense at Fort Knox. In addition to his continued work in IT, Posey has spent the last several years actively training as a commercial scientist-astronaut candidate in preparation to fly on a mission to study polar mesospheric clouds from space. You can follow his spaceflight training on his Web site.