Posey's Tips & Tricks
How To Get Started with Windows Admin Center
The one feature in Windows Server 2019 that has received the most attention is the Windows Admin Center. The Windows Admin Center is a tool that allows you to manage Windows machines in an entirely new way. In this column, I will show you how to get started with this tool.
The Windows Admin Center isn't actually included with Windows Server 2019. Microsoft's assumption is that you will run it from a separate machine (such as a dedicated management server or a Windows 10 workstation). As such, you will need to download the Windows Admin Center before you will be able to use it. You can download the software here.
The installation process is based around a fairly typical installation wizard. The one aspect of the deployment process that might warrant a bit of explaining, however, is the portion that asks for a certificate.
Because the Windows Admin Center is a Web-based tool, Windows needs an X.509 certificate that can be used to provide SSL encryption. The installation wizard gives you the option to either use a self-signed certificate or provide your own SSL certificate. The self-signed certificate option will get the job done, but it is intended to be a temporary solution. In fact, the certificate expires 60 days after it is created. You can see what the certificate options look like in Figure 1.
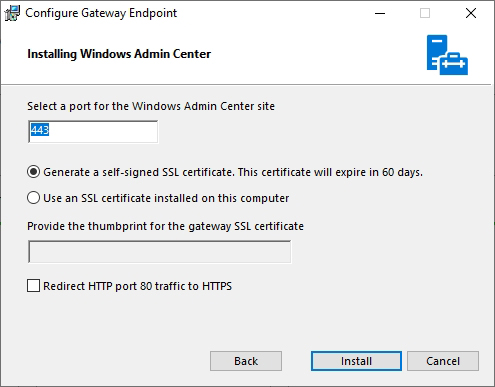 Figure 1: The Windows Admin Center requires an SSL certificate.
Once the deployment process completes, the wizard's final screen will provide you with a URL that you can use to access the Windows Admin Center. When you use this URL for the first time, you will be prompted for your credentials and then taken to the screen shown in Figure 2, which offers to give you a tour of the new interface.
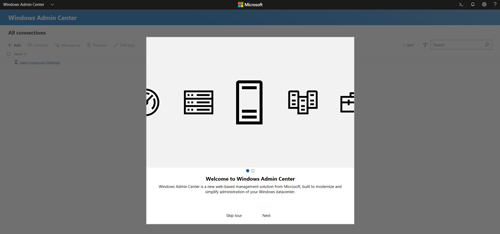 [Click on image for larger view.] Figure 2: You can take a guided tour of the Windows Admin Center.
If I am to be perfectly honest, the tour provides very little information and isn't exactly helpful. Even so, it is there for you to look at if you so choose. With the tour out of the way, you will be taken to the All Connections screen, which you can see in Figure 3.
 [Click on image for larger view.] Figure 3: This is where you manage Windows Admin Center's connections.
The All Connections page shown in the figure above allows you to add the servers that you wish to manage through the Windows Admin Center. You will notice in Figure 3, however, that one of my servers is already listed. This is because I installed the Windows Admin Center directly onto the server. If I had installed the Windows Admin Center elsewhere, I would have had to add the server to the Windows Admin Center.
I plan to talk about adding servers in a separate column. There is nothing overly difficult about the process, but I want to show you some techniques for adding servers in bulk. For right now, though, let's take a look at how to use the Windows Admin Center.
Clicking on the server within the list of connections takes you to the Overview screen shown in Figure 4.
 [Click on image for larger view.] Figure 4: Clicking on a server brings up the Overview screen.
The Overview screen provides you with a bit of basic information about the server. In this figure, for instance, you can see my server's make and model, as well as the CPU, memory and network utilization. A series of tabs along the left side of the screen provide access to configuration settings related to things like the Windows Firewall, Remote Desktop and system services.
As helpful as this interface may be, the Windows Admin Center offers additional capabilities. If you look at the upper-left portion of Figure 4 above, you will notice that the black bar at the top of the screen says Windows Admin Center, followed by Server Manager. This indicates that Windows Admin Center is currently providing the same basic functionality as the Windows Server Manager. If you click on the down arrow next to Server Manager, you will see the drop-down list shown in Figure 5. This menu allows you to perform management tasks that go beyond what you can do in Server Manager.
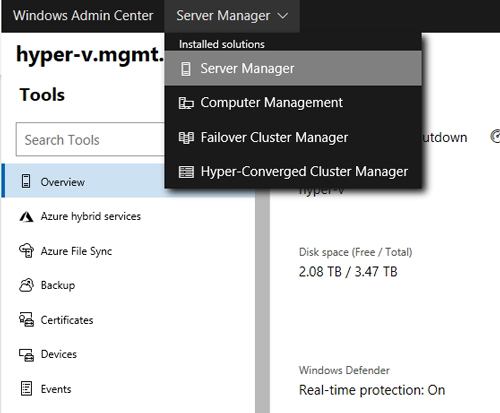 Figure 5: You can use this menu to access different management tools.
One last thing that I want to mention is that although the server shown in the above figures is a Hyper-V host, Hyper-V is conspicuously absent from the menu shown in Figure 5. That's because Hyper-V virtual machines are exposed through the Virtual Machines tab, rather than through the drop-down menu. You can see the Virtual Machines Summary screen in Figure 6.
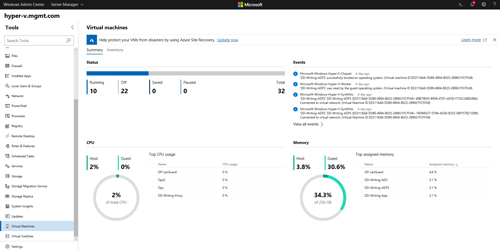 [Click on image for larger view.] Figure 6: Microsoft provides an overview of the virtual machines running on a host.
About the Author
Brien Posey is a 22-time Microsoft MVP with decades of IT experience. As a freelance writer, Posey has written thousands of articles and contributed to several dozen books on a wide variety of IT topics. Prior to going freelance, Posey was a CIO for a national chain of hospitals and health care facilities. He has also served as a network administrator for some of the country's largest insurance companies and for the Department of Defense at Fort Knox. In addition to his continued work in IT, Posey has spent the last several years actively training as a commercial scientist-astronaut candidate in preparation to fly on a mission to study polar mesospheric clouds from space. You can follow his spaceflight training on his Web site.