Posey's Tips & Tricks
Customizing Microsoft Office 365
While the overall look and feel of Office 365 is pretty standard across organizations, there are several ways to personalize it and make it fit better with your company's specific needs.
Because Microsoft provides the same Office 365 services to untold numbers of customers, it's easy to assume that everyone is given the exact same Office 365 experience.
However, although much of the Office 365 experience is consistent across its customer base, Microsoft does allow you to perform a surprising degree of customization.
If you want to change the look and feel of the Office 365 portal, log into the Microsoft 365 Admin Center and go to Settings | Organization Profile. You can see what this screen looks like in Figure 1.
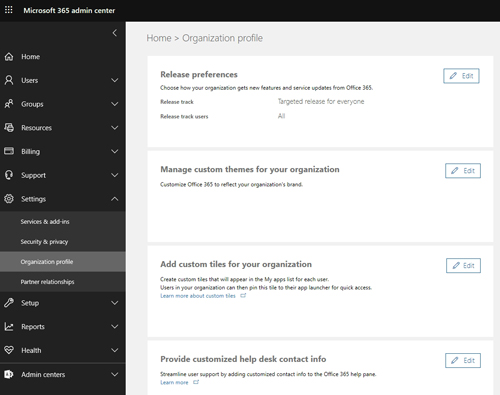 [Click on image for larger view.] Figure 1: The Microsoft 365 Admin Center provides several customization options.
As you can see in the figure, one of the sections is labeled Manage Custom Themes for Your Organization. If you click the Edit button in this section, you will be taken to a screen that allows you to control the look and feel of the Office 365 interface. As you can see in Figure 2, you can add a logo and a background image to the Office 365 portal (you can even make the logo clickable).
There are also options for controlling the color of the navigation bar, text and icon colors, and accent colors. Users do have the ability to use their own themes, but there is an option to prevent the users from overriding your specified theme.
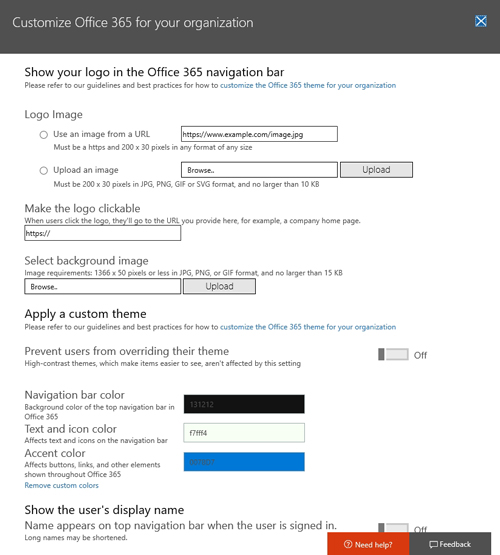 Figure 2: You can provision Office 365 with your own custom theme and images.
If you look back at Figure 1, you can see that the next option on the page is to add custom tiles for your organization. As you have no doubt seen, the Office 365 portal presents users with a series of clickable tiles that they can use to access things like Power BI, OneNote and Planner. The Custom tiles option gives you the ability to augment Microsoft's stock tiles with some tiles of your own.
Unfortunately, you can't simply upload a tile for use by Office 365. Both the tile and the application that is associated with the tile must be accessible through a URL. As you can see in Figure 3, adding a custom tile involves entering a name for the tile (this is typically going to be the name of the Web application or Web site), a URL for the application or site, a description to be associated with the tile and the tile's URL.
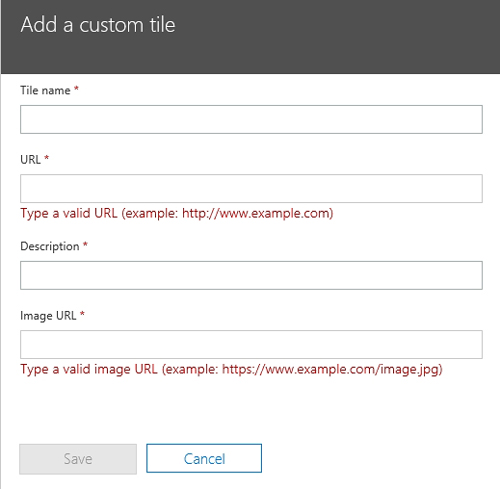 Figure 3: Microsoft gives you the ability to add custom tiles to the Office 365 portal.
It is worth noting that despite what the above figure might lead you to believe, you are not limited to creating just one custom tile. If your organization uses a variety of Software as a Service (SaaS) applications, you could conceivably create a tile for each one, thereby making all of the applications accessible through the Office 365 portal. That would give the users one central location from which they can launch all of the Web applications that they use each day.
The last option shown back in Figure 1 is an option to provide customized help desk contact information. This option is disabled by default, but if you click on the Edit button and then set the Help Desk Card switch to On, you are provided with the ability to enter the contact information for your organization's help desk. You can see what this looks like in Figure 4.
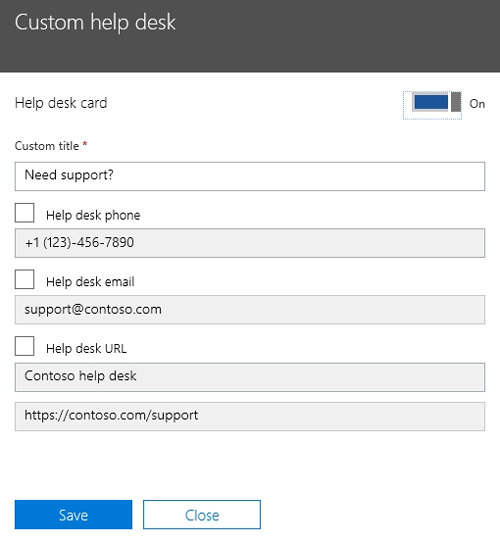 Figure 4: Office 365 gives you the option to enter custom help desk information.
I think the reason why Microsoft disables this option by default is that it probably isn't suitable for every organization. If a user in a really small organization runs into problems, for example, they would probably just call Microsoft's technical support service. In larger organizations with an in-house help desk, however, this option gives the users a place to go for help.
One of the things I really like about the Custom Help Desk screen is that you are given the option of either displaying or hiding the various options by using the corresponding checkbox. This means that if you want users to contact the help desk by phone, then you can select the Help Desk Phone checkbox and leave the other checkboxes unselected. On the other hand, you could opt to display the help desk's e-mail address or perhaps the help desk's URL. In any case, you can choose to display the contact options that are most suitable for your own organization.
About the Author
Brien Posey is a 22-time Microsoft MVP with decades of IT experience. As a freelance writer, Posey has written thousands of articles and contributed to several dozen books on a wide variety of IT topics. Prior to going freelance, Posey was a CIO for a national chain of hospitals and health care facilities. He has also served as a network administrator for some of the country's largest insurance companies and for the Department of Defense at Fort Knox. In addition to his continued work in IT, Posey has spent the last several years actively training as a commercial scientist-astronaut candidate in preparation to fly on a mission to study polar mesospheric clouds from space. You can follow his spaceflight training on his Web site.