Posey's Tips & Tricks
How To Create a Windows Deployment Image, Part 1
Although there are various methods for creating custom Windows deployment images, the process has gained a reputation for being somewhat tedious and convoluted.
That being the case, I wanted to take the opportunity to show you the method that I use. The process is relatively straightforward and the end result is an ISO file that you can use to install Windows (as opposed to leaving you to figure out what to do with a WIM file).
In order to create a custom Windows deployment image, you will need to download the Windows Assessment and Deployment kit. When you install the Assessment and Deployment Kit, you will be prompted to select the features that you want to install. Choose the Deployment Tools option, as shown in Figure 1, and then complete the installation process.
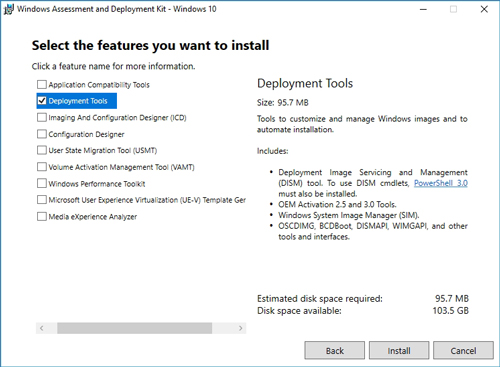 [Click on image for larger view.] Figure 1: Install the Deployment Tools option.
The next thing that you will need to do is download and install the Windows PE add-on for the Assessment and Deployment Kit, and the Microsoft Deployment Toolkit (you can use the default options when installing this toolkit).
By this point, you have downloaded all of the tools necessary for creating a custom Windows deployment image. The only other thing that you will need is a copy of the Windows installation media. For the purposes of this column, I have copied the contents of the Windows 10 Enterprise x64 installation DVD to a folder named C:\Downloads\Windows 10 Enterprise x64. You can see the files that I am using in Figure 2.
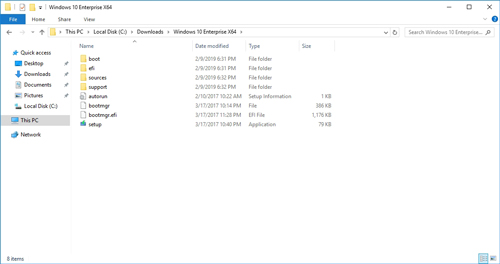 [Click on image for larger view.] Figure 2: These are the Windows installation files that I will be using as the basis for my custom Windows deployment image.
Now that all of the software components are in place, the first thing that we have to do is create a deployment share. A deployment share is essentially just a UNC file share that can act as a file repository for the items used in the custom deployment image.
To create the deployment share, open the Deployment Workbench (it should be on the Start menu) and right-click on the Deployment Shares option. Now, choose the New Deployment Share option, as shown in Figure 3.
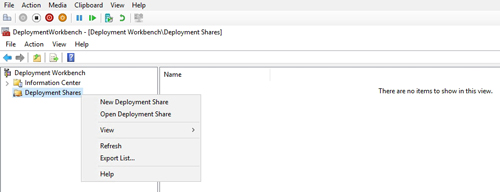 [Click on image for larger view.] Figure 3: You will need to create a new deployment share.
At this point, Windows will launch the New Deployment Share wizard. The wizard's initial screen asks you to provide a deployment share path. You can use the default option, or you can enter a custom path.
Click Next, and you will be prompted to provide a share name. The share name that you use must conform to UNC naming requirements, and you will want to make sure that the share name ends with a dollar sign. The tool provides you with a default share name that you can use, or you can come up with a share name of your own if you prefer.
Click Next, and you will be asked to come up with a more descriptive name for the share. Once again, you can use the default name or you can enter a name of your own.
Click Next again, and you will be taken to the Options screen. This screen, which you can see in Figure 4, includes a variety of check-boxes that you can use to control the Deployment Wizard's behavior. The default options will work just fine, but you can certainly make changes if you need to.
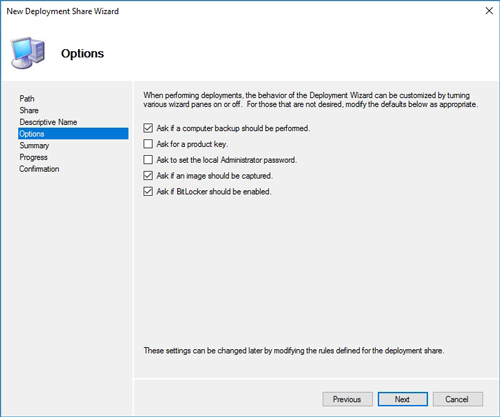 [Click on image for larger view.] Figure 4: Choose the deployment options that you want to use.
Click Next, and you will be taken to the Summary screen. Make sure that the information shown on this screen is correct and then click Next. This will cause the share to be created. When the process completes, I recommend making note of the share name so that you can test your ability to access the share.
This brings up another point. A lack of the necessary permissions is one of the big things that can cause problems during the creation of a custom deployment image. That being the case, I recommend using Windows Explorer to grant all local users full access to the deployment share.
Now that we have created a deployment share, it is time to begin adding the Windows installation files to that share. I will show you how in Part 2 of this series.
About the Author
Brien Posey is a 22-time Microsoft MVP with decades of IT experience. As a freelance writer, Posey has written thousands of articles and contributed to several dozen books on a wide variety of IT topics. Prior to going freelance, Posey was a CIO for a national chain of hospitals and health care facilities. He has also served as a network administrator for some of the country's largest insurance companies and for the Department of Defense at Fort Knox. In addition to his continued work in IT, Posey has spent the last several years actively training as a commercial scientist-astronaut candidate in preparation to fly on a mission to study polar mesospheric clouds from space. You can follow his spaceflight training on his Web site.