Posey's Tips & Tricks
How To Control Your Microsoft Office Metadata
Metadata can say a lot about a given document -- as well as the document's creator. Here's how to manage what types metadata appear in your Office documents to protect your security while still giving useful information.
I have been thinking a lot about document metadata recently. Metadata refers to information that is embedded into the document file, but that is not a part of the document itself.
Essentially, the metadata contains information about the document. Depending on the information it contains, document metadata can be quite useful. Let me give you an example.
Just before the holidays, someone I know asked for help with documenting some property boundaries. The boundaries were well-marked but difficult to find because they were in a heavily wooded area. An adjacent property had just been purchased and was slated for development, and there was a fear that the boundary markers might be moved or destroyed.
We documented the property boundaries by hiking through the woods and photographing each boundary marker with a GPS-enabled camera that embeds GPS coordinates into each picture taken. These GPS coordinates are not visible within the photograph but rather are stored within the image file as metadata. Therefore, the metadata (the GPS coordinates) gives context to the document (a photograph).
Now consider the metadata that is attached to a Microsoft Office document. For the sake of demonstration, I created a Word document and saved it as Sample.docx. Next, I right-clicked on the document within File Explorer and selected the Properties command from the shortcut menu. Take a look at the file's Details tab, which is shown in Figure 1.
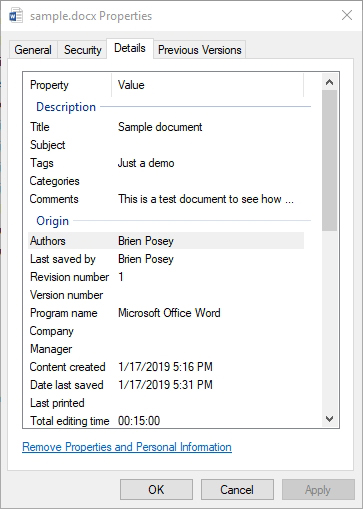 Figure 1: Microsoft Word stores a lot of metadata in its document files.
As you can see in the figure, Word stores a significant amount of metadata within a .DOCX file. There is so much metadata, in fact, that you would have to scroll down to see a lot of it. This metadata reveals everything from the name of the document's author to the amount of time that has been spent editing the document. There are even fields that can store things like comments, categories and tags.
Keep in mind that although I am using Word for the purposes of this column, all of Microsoft's Office apps generate metadata. The inclusion of significant amounts of metadata in Office documents raises two questions. First, where does this metadata come from? Second, does the metadata pose any sort of threat to your security or identity?
Some of the metadata that is shown in Figure 1 is automatically generated by Word, which keeps track of document revisions, time spent editing the document, word count, when the document was created and last saved, and that sort of thing. These are just basic statistics and probably do not pose a threat to anyone.
Values such as the document subject and document comments must be manually populated from within Word. The author name is based on the name that you provided when you used Word for the first time.
You can access a document's metadata from within Word by clicking on File, followed by Info. Doing so takes you to a screen like the one shown in Figure 2. As you can see in the figure, this screen displays much of the same information that was shown back in Figure 1.
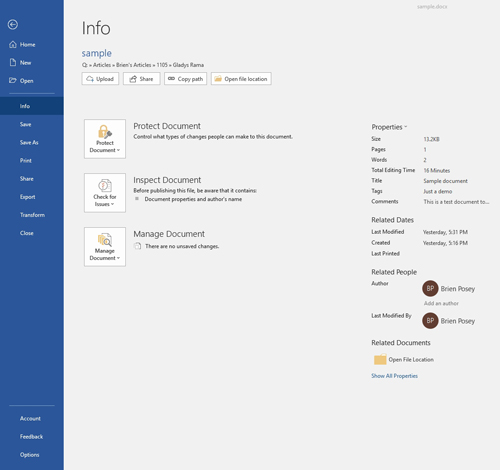 [Click on image for larger view.] Figure 2: You can view document metadata from within Word.
As you look at the figure above, you will notice that there is a link near the bottom of the screen that you can click on to show all of the document's properties. Clicking on this link reveals additional document properties such as the document's tags and comments. You can see what this looks like in Figure 3. Most of these fields can be edited simply by clicking on the field and entering the desired information.
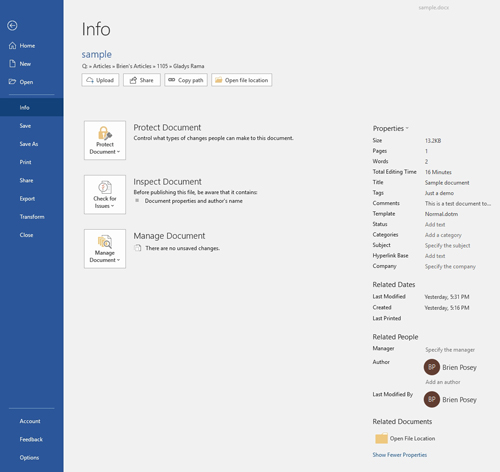 [Click on image for larger view.] Figure 3: These are all of the document's properties.
There might occasionally be situations in which you need to remove some of a document's properties. For example, if you are preparing a document for public release, you might not want your name listed as the document's author.
If you look back at the previous figure, you can see that Word provides a Check for Issues button. Just to the right of this button, Word explicitly tells you that the document contains properties and the author's name. Clicking on this button reveals a menu containing options such as Inspect Document, Check Accessibility and Check Compatibility. Clicking this button brings up a screen that lets you tell Word what types of information you want to check for. Make your selection and then click the Inspect button.
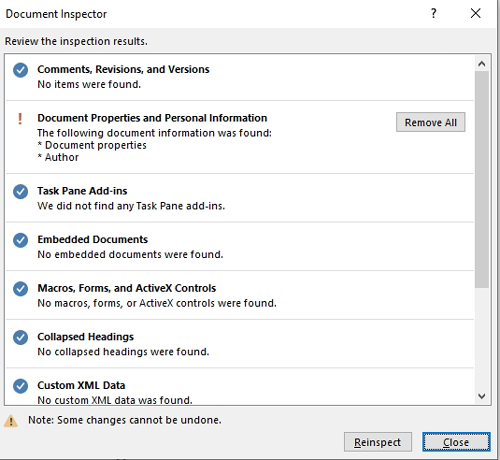 Figure 4: You can remove metadata from your documents.
When the inspection completes, Word shows you the information that you asked for and gives you the option of removing unwanted properties, as shown in Figure 4.
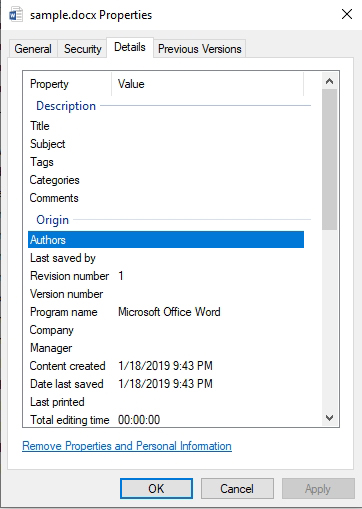 Figure 5: The metadata has been removed from the document.
As you can see in Figure 5 above, removing the selected properties essentially anonymizes the document by stripping potentially sensitive metadata.
About the Author
Brien Posey is a 22-time Microsoft MVP with decades of IT experience. As a freelance writer, Posey has written thousands of articles and contributed to several dozen books on a wide variety of IT topics. Prior to going freelance, Posey was a CIO for a national chain of hospitals and health care facilities. He has also served as a network administrator for some of the country's largest insurance companies and for the Department of Defense at Fort Knox. In addition to his continued work in IT, Posey has spent the last several years actively training as a commercial scientist-astronaut candidate in preparation to fly on a mission to study polar mesospheric clouds from space. You can follow his spaceflight training on his Web site.