Posey's Tips & Tricks
Working with Office Lens for Windows 10
The application makes it (somewhat) easy to upload photographic data to Office 365.
Between speaking at IT events, training and personal travel, it often seems that I am constantly on the road. I learned long ago that the key to keeping my relentless travel schedule from spiraling out of control is organization. As you can imagine, there are a number of apps that I run on my Windows Phone and on my Surface tablet to help make my travels more manageable.
Earlier this week, I stumbled onto a Microsoft app that seems like it will be really useful in my travels. The app is called the Office Lens. It is essentially a tool for converting photographic data into a more useful format, and then importing that data into Office 365. This app could prove to be useful for capturing travel schedules, expenses, training notes and other information.
Office Lens is primarily designed for use with paper documents, but it also has a whiteboard mode. The whiteboard mode is designed to capture data that is written on a whiteboard, and make that whiteboard data easier to read. Let me show you what I mean.
Technically, the Office Lens is designed to capture text by using the device camera. However, it can also import photos that were taken previously. Since I don't have a whiteboard handy, I pulled a whiteboard image from my Windows Phone. This image, which you can see in Figure 1, is an aerobatic flight training schedule that was written on a whiteboard. At the time, I snapped the picture of the whiteboard so that I would know which plane I was supposed to be flying, and when.
This particular photo actually doesn't look too bad, but photographing a whiteboard tends to be problematic. Whiteboards are reflective surfaces, so lights often create bright spots in the photo where the whiteboard contents are illegible. I didn't really have that problem with this particular photo because the room was dimly lit.
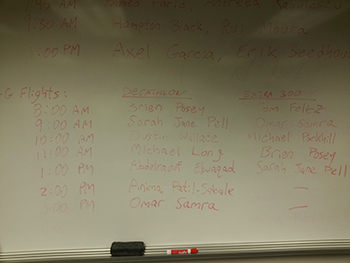 [Click on image for larger view.] Figure 1. This is an original whiteboard photo.
When I imported this photo into Office Lens, the Office Lens app automatically adjusted the contrast in an effort to make the text more legible, and to get rid of any excessively bright spots. Remember, I am using a previously captured photo, but Office Lens is really designed to do this in real time without the user having to capture a photo first.
You can see how Office Lens displays the photo in Figure 2. Notice that the background is now uniform, and that the light reflections are gone.
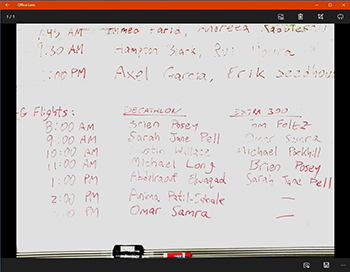 [Click on image for larger view.] Figure 2. This is how Office Lens displays the flight schedule.
Office Lens defaults to saving whiteboard data to OneNote, but you don't have to use OneNote. You can just as easily save the document as a Word document, a PowerPoint document, or a PDF file, as shown in Figure 3. OneNote probably is the best Office application for storing whiteboard data, but if you import the image into Word, Word will attempt to perform optical character recognition and turn the whiteboard contents into text that can be edited.
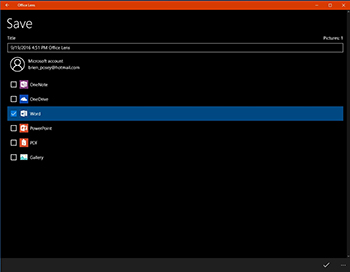 [Click on image for larger view.] Figure 3. The image can be exported to a variety of Office formats.
To be perfectly honest, Office Lens made a mess of the optical character recognition in the whiteboard image. The red ink used on the whiteboard simply was not dark enough to provide adequate contrast for successful character recognition. But remember that whiteboards are not the only data source that you can use. You can also use paper documents, business cards, receipts, and more.
To show you how this works, check out Figure 4. I used a webcam to take a picture of a portion of my Microsoft Ignite registration. Of course I already have this document in an electronic format, but let's pretend that all I have is the print out.
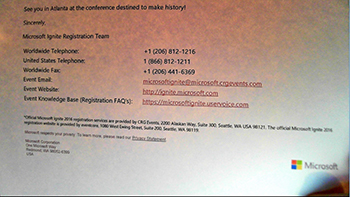 [Click on image for larger view.] Figure 4. I am using a webcam to capture a paper document.
This time, when I open Word, the contents of the document are displayed, as shown in Figure 5. Granted, the optical character recognition isn't perfect, but much of the misrecognized text was blurry in my original image capture. Hence, the misrecognition is mostly my fault.
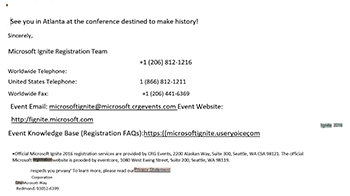 [Click on image for larger view.] Figure 5. Office Lens has converted my paper document into a Word document.
Personally, I think that Office Lens will end up being something that I use frequently. I suspect that I will probably use it primarily to capture whiteboard notes and contact information. Although Office Lens can also capture receipt images, I will probably continue to use Neat Receipts for capturing and itemizing travel expenses.
About the Author
Brien Posey is a 22-time Microsoft MVP with decades of IT experience. As a freelance writer, Posey has written thousands of articles and contributed to several dozen books on a wide variety of IT topics. Prior to going freelance, Posey was a CIO for a national chain of hospitals and health care facilities. He has also served as a network administrator for some of the country's largest insurance companies and for the Department of Defense at Fort Knox. In addition to his continued work in IT, Posey has spent the last several years actively training as a commercial scientist-astronaut candidate in preparation to fly on a mission to study polar mesospheric clouds from space. You can follow his spaceflight training on his Web site.