Customizing PowerShell for SQL Server
To wrap up this series of PowerShell articles, let's take a look at a few tips and tricks for working with PowerShell in SQL Server on a regular basis.
- By Joshua Jones
- 01/18/2010
To wrap up this series of PowerShell articles, let's take a look at a few tips and tricks for working with PowerShell in SQL Server on a regular basis.
Obviously, working with PowerShell and SQLPS requires some basic installation. Depending on your operating system, you may need to download PowerShell, or just "enable" it.
For SQLPS, you'll need to install the SQL Server 2008 Client tools at the very least. Beyond just the command line, there's also a scripting tool, called powershell_ise.exe (see Fig. 1). This is a very simple IDE for PowerShell; it provides basic syntax help so you can write scripts a little more efficiently. It also provides an interactive command window in the interface, so you can alternate between testing syntax and functionality and building your script.
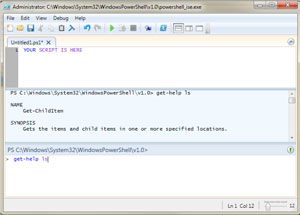 |
| Figure 1. The IDE for PowerShell can get you started on the way to automating tasks with SQL Server. (Click image to view larger version.) |
If you're looking for something with a little more functionality, Quest software (whom many of you may already know because of their SQL tools) has a free scripting IDE for PowerShell, called PowerGUI. I'm not a representative of Quest's, nor do I have any relationship with them; this tool is simply one I've found to be very helpful in the development of PowerShell scripts. They have a few “PowerPacks” that are pre-built shells designed for working with specific products, such as Exchange and Active Directory (no SQL pack yet), and has a little more in the way of script management.
Besides tools, you will likely need to customize your PowerShell and SQLPS consoles so that every time you start them, you have a prebuilt environment that suits your needs. Things like mapping drives, importing namespaces, etc., can all be done by creating a PowerShell profile.
In order to create a profile, you'll need to make that the following folder and files exists:
C:\Users\uname\Documents\WindowsPowerShell\Microsoft.SqlServer.Management.PowerShell.sqlps_profile.ps1
C:\Users\uname\Documents\WindowsPowerShell\Microsoft.PowerShell_sqlps_profile.ps1
My example shows the C: drive, but if you've installed Windows on D: drive, make sure the path starts there instead. If the files aren't there now, simply create them (the files should be empty text files with the .ps1 extension). Then, open a PowerShell (or SQLPS) command window, and type:
$profile
This should show you the path to the files you just created. Then type:
notepad $profile
This should actually open the file you just created. Now you can enter PowerShell commands into the file, and save it when finished. Then, every time you launch PowerShell, these commands will be run. For example, if you want to map a virtual drive to a database in SQLPS, you'd enter the following command into your Microsoft.SqlServer.Management.PowerShell.sqlps_profile.ps1 file:
New-PSDrive -Name PerfDB -PSProvider SqlServer -Root SQLSERVER:\SQL\CSSRVSQLTST\Default\Databases\perfstats
Now, when you open SQLPS.EXE, you'll see that drive get mapped, and it'll be available to you.
Using this method, you can actually customize the default PowerShell shell to include all of the functionality that's built in to the SQLPS shell. This can be done by using this script:
$assemblylist =
"Microsoft.SqlServer.Smo",
"Microsoft.SqlServer.Dmf ",
"Microsoft.SqlServer.SqlWmiManagement ",
"Microsoft.SqlServer.ConnectionInfo ",
"Microsoft.SqlServer.SmoExtended ",
"Microsoft.SqlServer.Management.RegisteredServers ",
"Microsoft.SqlServer.Management.Sdk.Sfc ",
"Microsoft.SqlServer.SqlEnum ",
"Microsoft.SqlServer.RegSvrEnum ",
"Microsoft.SqlServer.WmiEnum ",
"Microsoft.SqlServer.ServiceBrokerEnum ",
"Microsoft.SqlServer.ConnectionInfoExtended ",
"Microsoft.SqlServer.Management.Collector ",
"Microsoft.SqlServer.Management.CollectorEnum"
foreach ($asm in $assemblylist)
{
$asm = [Reflection.Assembly]::LoadWithPartialName($asm) | out-host
}
This script simply creates an array, which holds all of the SQL Server related assemblies, and then uses that array to run a foreach loop, loading each assembly. Once saved into a profile, this will load these assemblies every time PowerShell is launched, helping you get access to SQL Server from the shell that has all of the functionality missing from SQLPS.
It's also possible to actually configure the console window itself, to change fonts, colors, and sizes. A simple Web search will yield dozens of articles on how this is done; explore and customize to your heart's content. Have fun!
About the Author
Joshua Jones is co-author of A Developer's Guide to Data Modeling for SQL Server: Covering SQL Server 2005 and 2008 (Addison-Wesley Professional, 2008) and is a principal with Denver-based Consortio Services LLC.