Posey's Tips & Tricks
Windows 11 Configuration Checklist, Part 1: Personalization
From cutting the bloat to setting your preferred Start menu items, here are some of the basics everyone should run through after installing a clean version of Windows.
At the moment, I am in the middle of refreshing all of the PCs in my office . Since Windows tends to accumulate a lot of junk (old program fragments and that sort of thing) over time, I decided to perform a clean installation of Windows 11 onto each machine.
Like previous Windows versions however, a default Windows 11 deployment probably isn't going to get the job done for most people. As such, I wanted to share with you the individual tasks that I perform in preparation for getting Windows 11 ready for production use. Keep in mind that these tasks assume that Windows 11 has been installed and activated. It also assumes that Windows 11 is being manually deployed from Microsoft installation media, as opposed to using a customized unattended installation. It's also worth noting that several of the tasks that I will be discussing are based on personal preference.
Remove the Bloatware
Even business editions of Windows 11 come preloaded with loads of bloatware. As such, the first thing that I do when configuring Windows 11 is to get rid of the bloatware. It is worth noting however, that you should enter the product key before you start removing the bloatware. In some situations, if you remove the bloatware first and then enter the product key (particularly when you are upgrading from Windows 11 Home to Windows 11 Pro), the bloatware can come back.
To get started, open Settings and then click Apps, followed by Installed Apps. Here, you can remove most of the bloatware, as shown in Figure 1.
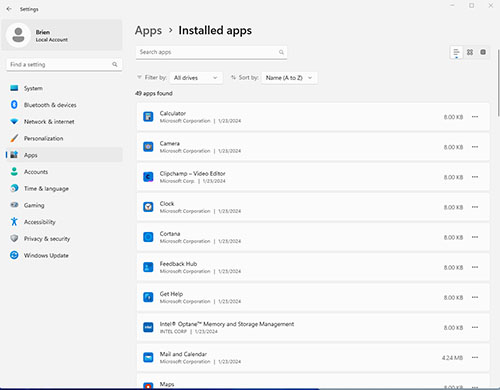 [Click on image for larger view.] Figure 1. You can use the Installed Apps screen to remove most of the bloatware.
There may also be bloatware that is pinned to the Start menu, but that does not appear in the list of apps. You can remove these items by right clicking on them and selecting the Uninstall command, as shown in Figure 2.
 [Click on image for larger view.]
Figure 2. There may be other items that you will need to remove from the Start menu.
Rename the PC (if necessary)
[Click on image for larger view.]
Figure 2. There may be other items that you will need to remove from the Start menu.
Rename the PC (if necessary)
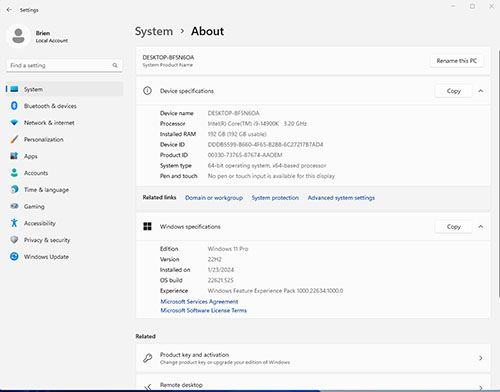
To rename the PC, go to Settings and then click on System, followed by About. Then click Rename This PC.
 [Click on image for larger view.]
Figure 3. The About screen contains an option for renaming the PC.
Unpin Items from the Start Menu
[Click on image for larger view.]
Figure 3. The About screen contains an option for renaming the PC.
Unpin Items from the Start Menu
Another thing that I like to do is to personalize the Start menu. Just right click on Start Menu items and choose either the Pin to Start or the Unpin From Start commands. Everyone has their own Start menu configuration preferences, but I like to keep the Start menu clean. Generally I will pin the Edge browser, PowerShell, File Explorer and Settings -- and that's about it.
Change the Time Zone
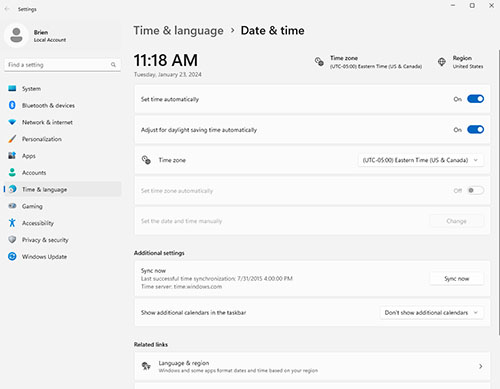
Windows defaults to the Pacific Time zone. Being that I live in the Eastern Time zone, one of the required post deployment tasks is to change the time zone so that the clock will display the correct time. To do so, right click on the clock and select the Adjust Date and Time command. From there, you can use the Date and Time screen to choose a time zone.
 [Click on image for larger view.]
Figure 4. he Date and Time screen contains a Time Zone option.
Choose a Power Configuration
[Click on image for larger view.]
Figure 4. he Date and Time screen contains a Time Zone option.
Choose a Power Configuration
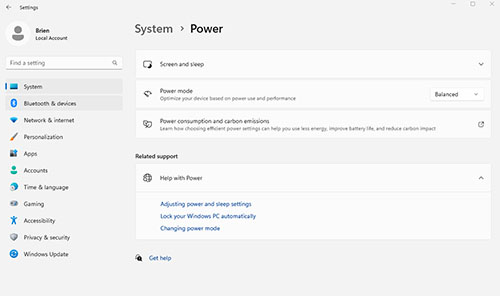
The next thing that I like to do when setting up Windows 11 is to choose a power profile. To do so, open Settings and then click on System, followed by Power. You can then select a power mode from the Power screen shown in
Figure 5.
 [Click on image for larger view.]
Figure 5. Choose a power mode that aligns with your needs.
Turn Off Notifications
[Click on image for larger view.]
Figure 5. Choose a power mode that aligns with your needs.
Turn Off Notifications
Another thing that I typically do when setting up Windows 11 is to turn off notifications. While I freely admit that notifications have their place, Windows 11 produces way too many notifications for my tastes. More importantly, I tend to do a lot of screencast recordings and if an unwanted notification pops up during a recording, the recording is ruined.
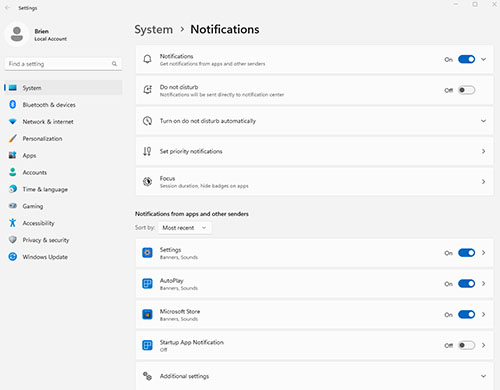
To disable notifications, right click on the Notifications icon in the taskbar and then choose the Notification Settings option from the shortcut menu. You will then be taken to the Notifications screen that allows you to turn notifications on or off, as shown in Figure 6. Incidentally, Windows 11 gives you granular control over notifications, so if you don't want to disable all of the notifications you can pick and choose which to disable.
 [Click on image for larger view.]
Figure 6. You can use the Notifications screen to disable notifications.
[Click on image for larger view.]
Figure 6. You can use the Notifications screen to disable notifications.
Although I have covered the first several post deployment tasks that I like to perform, there are several more. I will cover these additional tasks in Part 2.
About the Author
Brien Posey is a 22-time Microsoft MVP with decades of IT experience. As a freelance writer, Posey has written thousands of articles and contributed to several dozen books on a wide variety of IT topics. Prior to going freelance, Posey was a CIO for a national chain of hospitals and health care facilities. He has also served as a network administrator for some of the country's largest insurance companies and for the Department of Defense at Fort Knox. In addition to his continued work in IT, Posey has spent the last several years actively training as a commercial scientist-astronaut candidate in preparation to fly on a mission to study polar mesospheric clouds from space. You can follow his spaceflight training on his Web site.