Posey's Tips & Tricks
What To Do After a PC Refresh
Keep your accounts and data secure before discarding your old machine.
One of the aspects of the PC refresh process that I rarely hear anyone talk about is what to do with the old hardware once the new hardware has been installed. Most people that I know send their old PCs to an electronics recycling center, but certainly that isn’t the only option. An organization that I once worked for would routinely donate its old PCs to various charities, schools, churches, and other community organizations. Regardless of what you do with an old PC however, it’s important to fully deprovision the machine before disposing of it.
Microsoft 365 Licenses
If an old computer has Microsoft 365 licenses installed, then you will need to remove those licenses before disposing of the hardware. The first step in the process is to determine which licenses are currently applied to the PC. To do so, open an elevated PowerShell session and enter the following command:
Cscript “$Env:ProgramFiles\Microsoft Office\Office16\OSPP.VBS” /dstatus
You can see what this looks like in Figure 1.
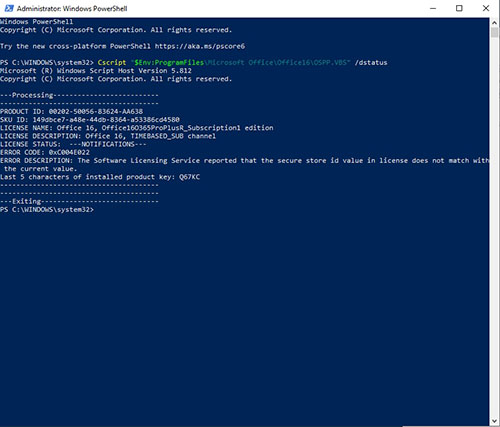 [Click on image for larger view.] Figure 1. This is how you check to see if Microsoft 365 licenses are present on the PC.
Although locating a Microsoft 365 license is usually a straightforward process, you may occasionally find that multiple Microsoft Office licenses have been applied to a machine. This can be especially true if you have installed supplemental Office products such as Publisher or Visio.
There may also be Office licenses present that are either expired or that are about to expire. Those licenses are generally listed as Grace Period Expired or you may see the remaining grace period before the license fully expires.
In any case, you will need to determine which license it is that you need to remove. Once you find the license that needs to be taken off of the PC, make note last five characters of the product key that is associated with that particular license (it’s included in the output).
Now it’s time to actually remove the unwanted Microsoft Office license. To do so, enter the following command:
Cscript “$Env:ProgramFiles\Microsoft Office\Office16\OSPP.VBS” /unpkey:<your key>
Figure 2 shows what the removal process looks like. You can rerun the first command that I showed you in order to confirm that the license has indeed been removed, as shown in Figure 3.
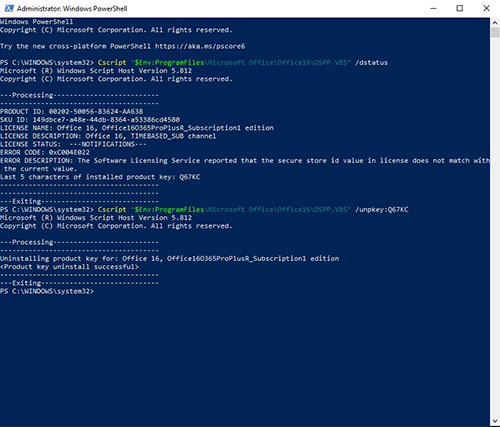 [Click on image for larger view.] Figure 2. The license is being removed.
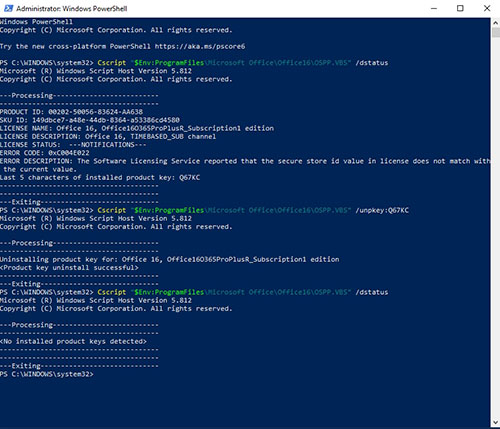 [Click on image for larger view.] Figure 3. The license removal was successful.
The Windows License
If the PC’s Windows license is a part of a volume licensing subscription then your best option is probably going to be to securely erase the machine’s hard disk before disposing of the PC. Another option however, might be to destroy the hard disk. The previously mentioned organization that I once worked for had a policy of removing and destroying all hard disks before donating old PCs. The recipients were told in advance that they would need to supply their own hard disk.
If the Windows license came with the PC then you may be able to reset Windows to its factory defaults, although you do have to consider the risk of sensitive data being recovered off of the hard disk at a later time. To reset Windows, open Settings and then click on Update and Security. Now, select the Recovery tab and click the Get Started button shown in Figure 4.
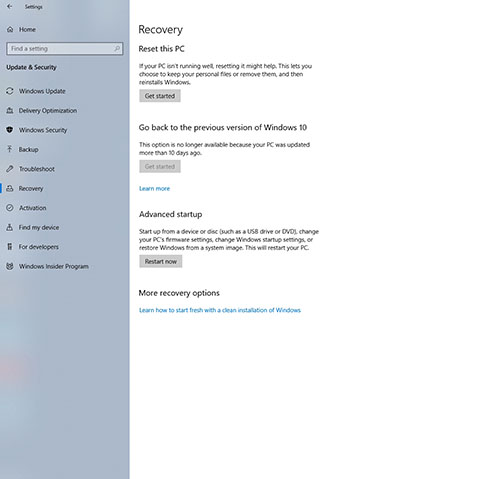 [Click on image for larger view.] Figure 4. Click the Get Started button to begin the process of resetting the PC.
Click the Get Started button to begin the process of resetting the PC.
At this point, Windows will ask you if you want to remove everything or if you want to keep your files. Assuming the goal is to prepare the machine for donation or disposal, choose the Remove Everything option, shown in Figure 5.
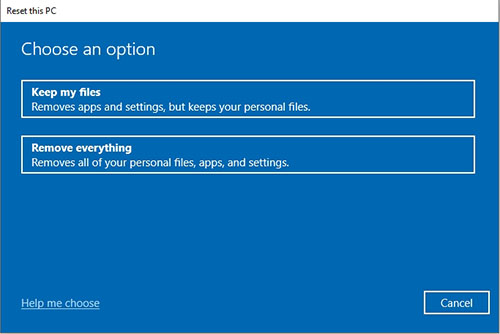 [Click on image for larger view.] Figure 5. Choose the option to remove everything from the PC.
Now Windows will ask you how you want to reinstall Windows. You can perform a local installation or a cloud based installation, as shown in Figure 6.
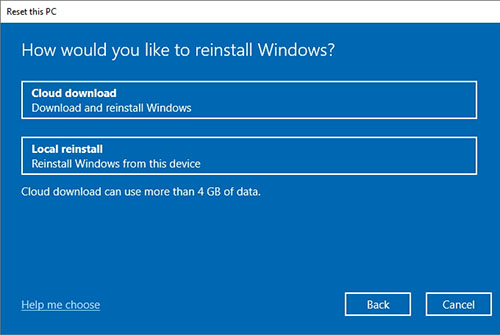 [Click on image for larger view.] Figure 6. Choose how you want to reinstall Windows.
The next screen that Windows displays, which you can see in Figure 7, asks you to confirm the settings that you have chosen. Take a moment to verify that everything shown on this screen is correct and then click Next.
 [Click on image for larger view.] Figure 7. Make sure the settings are correct and click Next.
You are now ready to begin resetting the PC. Click the Reset button, shown in Figure 8, to initiate the reset process. Make sure that you don’t close Settings because doing so can cause the reset process to fail. Just let Windows do its thing and reboot as is required.
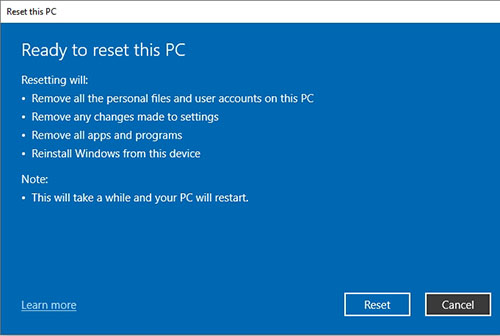 [Click on image for larger view.] Figure 8. Click Reset to begin resetting the PC.
About the Author
Brien Posey is a 22-time Microsoft MVP with decades of IT experience. As a freelance writer, Posey has written thousands of articles and contributed to several dozen books on a wide variety of IT topics. Prior to going freelance, Posey was a CIO for a national chain of hospitals and health care facilities. He has also served as a network administrator for some of the country's largest insurance companies and for the Department of Defense at Fort Knox. In addition to his continued work in IT, Posey has spent the last several years actively training as a commercial scientist-astronaut candidate in preparation to fly on a mission to study polar mesospheric clouds from space. You can follow his spaceflight training on his Web site.