Posey's Tips & Tricks
How To Rename Files in Bulk the Easy Way
With a little creativity, Brien was able to use PowerShell to greatly simplify a bulk renaming task.
A few years back, someone gave me a collection of IT training videos on DVD. At least some of the information on those DVDs is still relevant, but DVD drives are in short supply these days. As such, I wanted to convert the videos to .MPG so I could watch them on my computer anytime I wanted (I have the publisher's permission and am not violating any copyright laws).
The process of ripping a DVD is simple; there are a countless utilities available that will allow you to do it. The real trick is dealing with the aftermath once the ripping process is complete.
In my case, for example, the tool I used to rip the DVDs placed each disc's contents into a separate folder. All of the .MP4 files within that folder have names like Title_1, Title_2 and so on. You can see an example of this in Figure 1.
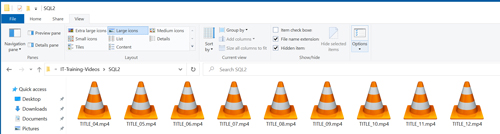 [Click on image for larger view.] Figure 1: This is what the file structure looked like when I got done ripping the DVDs.
Obviously, I wanted to give these files more descriptive names, but I really didn't want to manually rename hundreds of files by hand. With a little bit of creativity, I was able to use PowerShell to greatly simplify the task.
But why stop there? Rather than just creating a throwaway script that would work for this one project and nothing else, I created a script that should work for nearly any bulk renaming task.
Here is what the script looks like:
$Path = Read-Host "Please enter the file path"
$Filename = Read-Host "Please enter new file name"
$Extension = Read-Host "Please enter the file extension"
[uInt16]$StartingPoint = Read-Host "Please enter a starting number"


$i = 0
Get-ChildItem -Path $Path -Filter *.$Extension |
ForEach-Object {
   $NewName = $Filename + " " + $StartingPoint + "." + $Extension
   $StartingPoint++

Write-Host "Old Name: " $_.FullName  " New Name: " $NewName
Rename-Item -Path $_.FullName -NewName $NewName
}

Write-Host "The files have been renamed:"
Get-ChildItem -Path $Path -Filter *.$Extension
The script starts out by prompting you to enter four pieces of information: the path where the files reside, the new base file name you want to use, the file extensions and a starting number (which I will explain in a second).
With this information, the script checks the specified path for the existence of any file with the extension provided. If it finds files with the specified extension, it renames them using the base file name you provided. But here is where the starting number comes into play.
Remember when I said that I had ripped multiple training DVDs, and the contents of each one were stored in its own folder? Well, some of the training classes span multiple DVDs. That means I have multiple SQL Server folders, for example, each with duplicate titles. If I designed the script to simply replace the old base file name (Title_) with a new file name (MS SQL Server), I would still have folders containing duplicate file names.
Since I would eventually like to merge some of these folders together (such as putting all of the SQL Server videos into one folder), I needed to come up with a renaming method that would not create any duplicate file names.
That's why the script asks for a starting number. The script appends an integer to the end of the file name (beginning with the starting number that you specify), then increments the number for each subsequent file in the folder.
To give you a more concrete example, I have one SQL Server-related folder that contains five videos, and a second folder that contains nine videos. I ran the script against the first folder and used 1 as the starting number. The script produced files named MS SQL Server 1, MS SQL Server 2 and so on. When I ran the script against the second folder, I used 6 as the starting point number. This resulted in files named MS SQL Server 6, MS SQL Server 7 and so on. That way, I was able to merge the folders without worrying about duplicate file names.
Figure 2 shows what the script looks like when it runs.
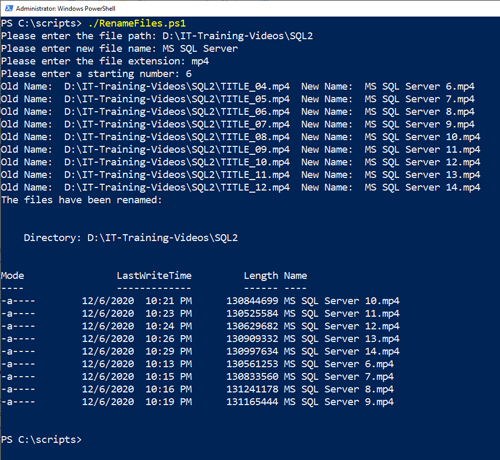 [Click on image for larger view.] Figure 2: This is what it looks like when I run the script.
You can see the folder's contents after the script has run in Figure 3.
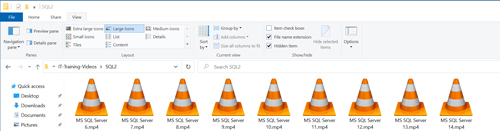 [Click on image for larger view.] Figure 3: These are the renamed files.
About the Author
Brien Posey is a 22-time Microsoft MVP with decades of IT experience. As a freelance writer, Posey has written thousands of articles and contributed to several dozen books on a wide variety of IT topics. Prior to going freelance, Posey was a CIO for a national chain of hospitals and health care facilities. He has also served as a network administrator for some of the country's largest insurance companies and for the Department of Defense at Fort Knox. In addition to his continued work in IT, Posey has spent the last several years actively training as a commercial scientist-astronaut candidate in preparation to fly on a mission to study polar mesospheric clouds from space. You can follow his spaceflight training on his Web site.