Posey's Tips & Tricks
Creating an Anti-Malware Policy for Microsoft 365
Malware is a pervasive threat to every organization's security. For those who have a business or enterprise subscription to Microsoft 365, however, there is an option to create a policy that will greatly reduce the chances of a user becoming infected due to a malicious e-mail message.
Before I show you how to create an anti-malware policy, I need to point out that an anti-malware policy is not intended to act as a substitute for anti-malware software. You should be using anti-malware policies as a tool to enhance your existing malware defenses.
With that said, you can create an anti-malware policy by opening the Microsoft 365 Security and Compliance Center, expanding the Threat Management Tab and selecting the Policy option. As you can see in Figure 1, Microsoft starts you out with a default policy. However, this policy provides only a minimal level of protection, so it's best to create your own policy.
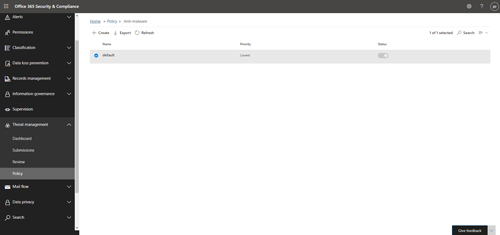 [Click on image for larger view.] Figure 1: This is where you go to create a new Anti-Malware policy.
To create a new policy, click the Create button. Upon doing so, you will be taken to a wizard that walks you through the steps required to create a policy. The first step in the process is to give your policy a name and to enter an optional description.
When you are done, click Next and you will be taken to a screen that asks if you want to notify users when they have received a message that has been quarantined. In my opinion, it's probably best not to notify the end users because enabling notifications can lead to a lot of helpdesk calls. You can reduce the burden on both the helpdesk and the administrative staff by not letting users know when they have received an infected message.
Click Next and Microsoft 365 will ask you if you want to block attachments based on their file type. I strongly recommend turning this option on. After all, no good can come from allowing a user to receive a message containing a .REG file (a registry file) or a .VBS file (a VB Script file). The wizard already contains a list of file types that could potentially be malicious, but you can use the Choose Type option to add or remove file types based on your own needs.
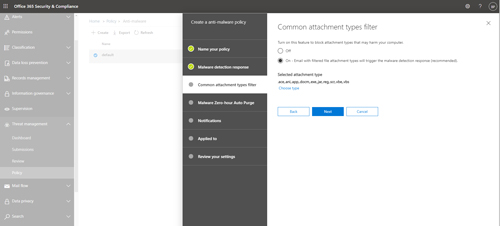 [Click on image for larger view.] Figure 2: You can block users from receiving potentially malicious files by e-mail.
Click Next, and you will be taken to a screen asking if you want to enable malware zero hour purge. The basic idea behind this option is that there is a chance that malware might not always be detected at the time of delivery. Enabling this option means that if malware slips past the initial screening, but is detected later on, it will be quarantined. Needless to say, I recommend enabling this option.
The next screen that you will be taken to asks you if you want to notify senders and administrators about malware that has been detected. The nice thing about this screen is that it differentiates between internal and external senders. My advice is to enable notifications for internal senders, but not external senders. Likewise, I recommend notifying administrators about undelivered messages from internal senders. The idea behind this is that if you have malware coming from inside your organization, then you need to notify those who are involved so that the problem can be addressed.
Click Next and you will be taken to the Applied To screen. This screen lets you choose who the policy will apply to. You can apply policies to individual users or to entire domains, and Microsoft also makes it possible to carve out exemptions.
Click Next and you will be taken to a screen that provides you with a summary of the options you have chosen. Take a moment to review the settings shown on this screen. Assuming everything looks good, click the Create This Policy button to create and enable the policy.
Often, a single anti-malware policy will be adequate for an entire organization. If you do need multiple policies, it is possible to not only create as many policies as you need, but also to prioritize the policies. That way, if multiple policies happen to apply to a specific user, that user will be subject to the policy with the highest priority.
About the Author
Brien Posey is a 22-time Microsoft MVP with decades of IT experience. As a freelance writer, Posey has written thousands of articles and contributed to several dozen books on a wide variety of IT topics. Prior to going freelance, Posey was a CIO for a national chain of hospitals and health care facilities. He has also served as a network administrator for some of the country's largest insurance companies and for the Department of Defense at Fort Knox. In addition to his continued work in IT, Posey has spent the last several years actively training as a commercial scientist-astronaut candidate in preparation to fly on a mission to study polar mesospheric clouds from space. You can follow his spaceflight training on his Web site.