Posey's Tips & Tricks
How To Improve Windows 10's Sound and Video Quality
Windows 10 comes with built-in tools that can help users get the most out of their sound and video hardware.
Most people don't give a lot of thought to sound and video settings within Windows 10 beyond making sure that the volume is at a comfortable level and that the display resolution is set correctly.
Even so, those users who work as content creators can benefit from optimized sound and video. As such, I wanted to show you some settings that can help users get the most out of their sound and video hardware.
Believe it or not, Windows 10 includes an equalizer that you can use to optimize its sound quality. Windows has long included some basic tools for adjusting sound-related properties such as balance and volume, but the Windows 10 equalizer goes beyond that and can truly enhance your computer's sound.
To get to the equalizer settings, open the Control Panel by entering Control at the Windows Run prompt. When the Control Panel opens, click on Hardware and Sound, followed by Sound. This will cause Windows to display a dialog box listing all of your computer's sound hardware. You can see what this looks like in Figure 1.
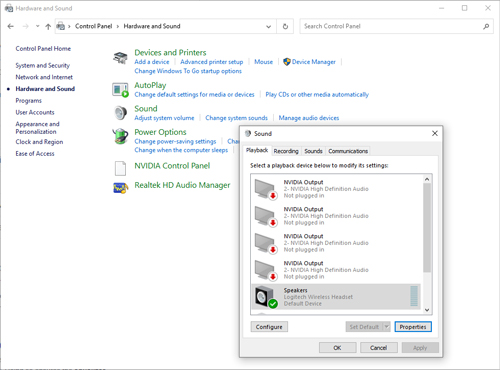 [Click on image for larger view.] Figure 1: The Sound dialog box lists all of the PC's sound related hardware.
Make sure that the Playback tab is selected, as it is in the figure above, and then select your primary sound output device. Now, click Properties to open the device's Properties sheet.
When it comes to enhancing a PC's sound quality, there are two main tabs of interest. First, select the Spatial Sound tab, which you can see in Figure 2. As you can see in the figure, spatial sound is generally turned off by default. However, depending on your sound hardware and the drivers that you have installed, you may have some options for enabling spatial sound. On my PC, for instance, there is an option called Windows Sonic for Headphones.
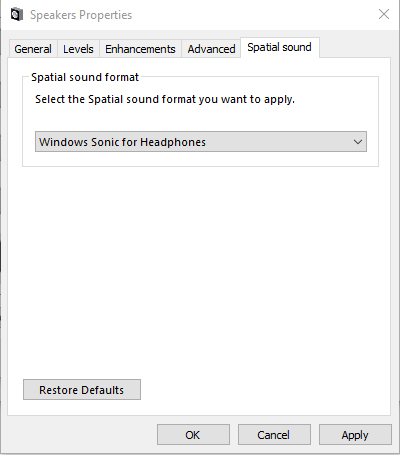 Figure 2: Choose the spatial sound format that you want to use.
Next, click on the Enhancements tab. This is where you will find Windows' built-in equalizer. It isn't quite as fancy as some of the third-party equalizers that you can get for Windows, but it does a good job nonetheless.
The equalizer currently offers four sound profiles: Bass Boost, Virtual Surround, Room Correction and Loudness Equalization. Incidentally, these profiles are not mutually exclusive; you can choose multiple profiles if you like. In most cases, all you have to do is select the corresponding checkbox, although the Room Correction profile does require some extra configuration steps.
Interestingly, the various sound enhancements are customizable. Suppose that you wanted to use the Bass Boost, but for whatever reason you don't like the way it sounds. You can adjust the Bass Boost (or any of the other profiles) by selecting it and clicking the Settings button. This causes Windows to display a dialog box that allows you to set the boost level for each individual frequency, as shown in Figure 3.
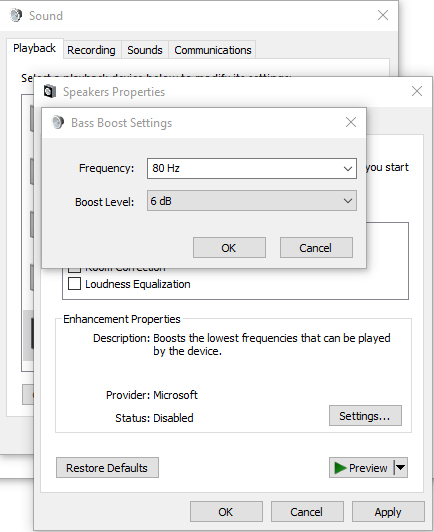 Figure 3: You can customize any of the available sound profiles.
As I mentioned at the beginning of this article, there are also some things you can do to improve your computer's video output. Before I show you this how to do this, I want to point out that just as a third-party equalizer is inevitably going to be more capable than the equalizer that is built into Windows, the best video optimization options are typically going to exist at the driver level. Video card manufacturers like NVIDIA provide extremely feature-rich drivers that you can use to fine-tune the end user experience. Even so, there is a native Windows setting that I want to show you.
To access the Windows Video Playback setting, open Settings and click on Apps, followed by Video Playback. As you can see in Figure 4, there is an option that you can use to automatically process video to enhance the way that it looks. Keep in mind that this setting only works if your hardware supports it.
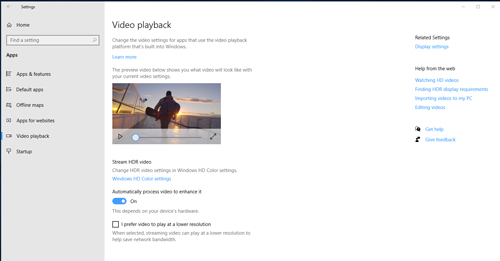 [Click on image for larger view.] Figure 4: You can enhance video playback through automatic processing.
If your PC supports it, there are also some settings accessible through this screen that allow you to adjust the HD color settings. A preview window allows you to gauge the effect of any changes that you make, as shown in Figure 5.
 [Click on image for larger view.] Figure 5: You can adjust the Windows HD color settings used for video playback.
About the Author
Brien Posey is a 22-time Microsoft MVP with decades of IT experience. As a freelance writer, Posey has written thousands of articles and contributed to several dozen books on a wide variety of IT topics. Prior to going freelance, Posey was a CIO for a national chain of hospitals and health care facilities. He has also served as a network administrator for some of the country's largest insurance companies and for the Department of Defense at Fort Knox. In addition to his continued work in IT, Posey has spent the last several years actively training as a commercial scientist-astronaut candidate in preparation to fly on a mission to study polar mesospheric clouds from space. You can follow his spaceflight training on his Web site.