Posey's Tips & Tricks
How To Enable SQL Server Reporting for System Center Operations Manager
One of the most useful features in Microsoft's System Center Operations Manager (SCOM) product is its reporting engine. Even though there is nothing overly difficult about its installation process, there are a few gotchas to watch out for. As such, I wanted to show you how to deploy the SQL Server Reporting Service and how to configure it to work with SCOM.
The first thing to do is download SQL Server Reporting Services. You will need to install SQL Server Reporting Services directly on your SCOM server, not on your SQL Server. Go ahead and click on the link to install Reporting Services.
When the download completes, you will be taken into the installer, which you can see in Figure 1.
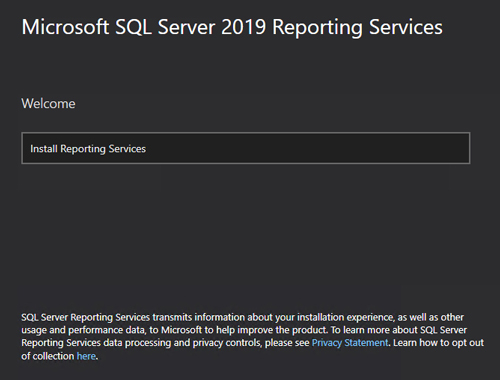 Figure 1: Click the link to install Reporting Services.
At this point, you will be prompted to either choose one of the free editions to install, or to enter your product key.
Click Next, and you will be taken to a screen that prompts you to accept the license agreement. After doing so, click Next.
Now you will see a warning message telling you that you will need a SQL Server database instance on either the reporting server or on another server. For the purposes of this article, I'm going to assume that you will be using the same SQL Server instance that is being used by SCOM. Click Next, followed by Install to complete the installation process. When the installation process completes, click on the Configure Report Server button, shown in Figure 2.
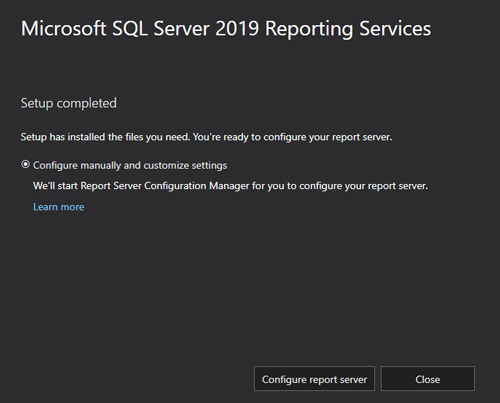 Figure 2: Click on the Configure Report Server button.
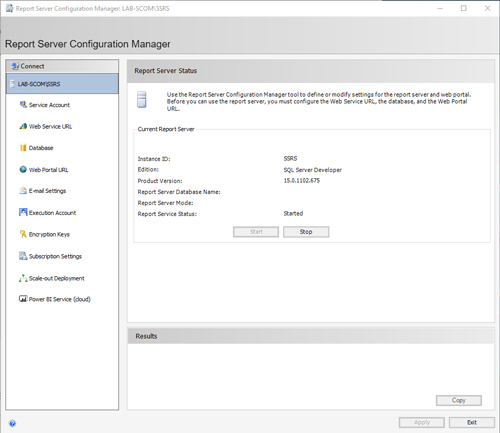
Windows will launch the Report Server Configuration Manager. This tool's initial screen prompts you to enter a server name and a Report Server instance. Since the Configuration Manager was launched directly from the installer, the server and instance names should already be populated for you. Just click the Connect button to get started.
Upon connecting to the instance, you will need to make sure that the Report Service is started. If the service doesn't start for whatever reason, click the Start button, as shown in Figure 3.
 [Click on image for larger view.] Figure 3: Make sure that the Report Service is running.
Now, go to the Database tab. Assuming that your SQL Server database is running on another server, this tab will be empty. Click the Change Database button. This will launch the Report Server Database Configuration Wizard. From the wizard's initial screen, select the option to create a new Report Server database and then click Next.
Now, enter your SQL Server's name and choose the authentication type that you want to use. If necessary, enter the credentials to be used for SQL Server authentication. When you are done, click on the Test Connection button shown in Figure 4.
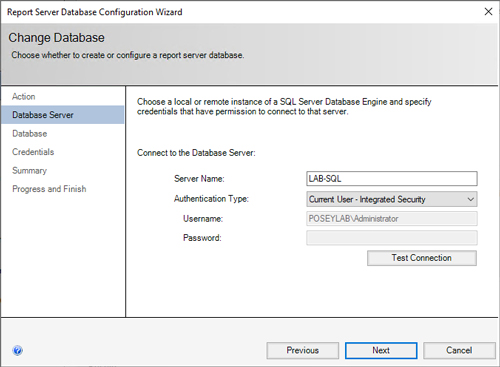 Figure 4: Enter your SQL Server name, choose the appropriate authentication type and click the Test Connection button.
Assuming that the connectivity test succeeds, click Next and then provide a name for the database that you want to create.
Click Next, and you will once again be prompted to choose your authentication type. Make your selection, enter a password if necessary, then click Next. If you are using a remote SQL Server, it is important that you don't choose the Service Credentials option as the authentication type. You will need to use either Windows Credentials or SQL Credentials.
Click Next a couple of times, followed by Finish. The Report Server Database screen should now list your database.
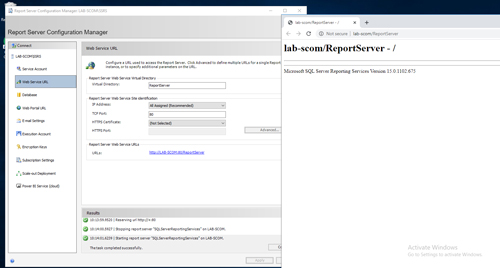
The next thing you will need to do go to the Web Service URL tab and verify your IP address (All Assigned usually works fine). You can also provide an HTTPS certificate if you like. When you are done, click the Apply button to create the virtual directory. When you are done, the Report Server Web Service URL will be hyperlinked. It's a good idea to click on the hyperlink to verify that it works, as shown in Figure 5. Incidentally, the connection process can take a while.
 [Click on image for larger view.] Figure 5: This is what you should see when you click on the URL.
Now, click on the Web Portal URL link and click Apply. Once again, the URL will be hyperlinked. Click on the hyperlink to make sure that it is working. You should see something like what is shown in Figure 6.
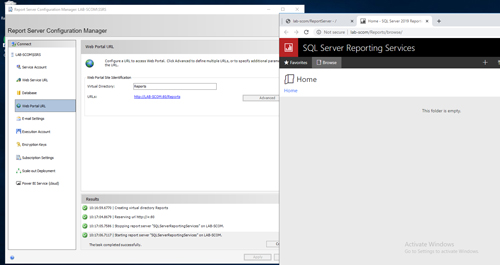 [Click on image for larger view.] Figure 6: This screen confirms that the Reporting Service is working.
The last step in the process is adding the Reporting Service to SCOM. To do so, run the SCOM Setup wizard and click the Install option. Assuming that SCOM is already installed, you will now be taken to a screen that asks if you want to add or remove a feature. Click the Add a Feature link, then select the Reporting Server option, as shown in Figure 7.
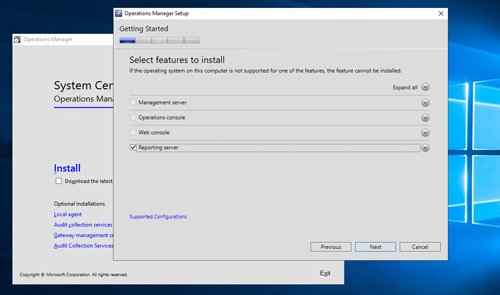 [Click on image for larger view.] Figure 7: Choose the Reporting Server option.
Click Next, and the installer will do a quick prerequisite check. If everything is good, you will be prompted to choose an instance, as shown in Figure 8. If this option is blank, double-check to make sure you have installed the Reporting Service on your SCOM server, not on your SQL Server.
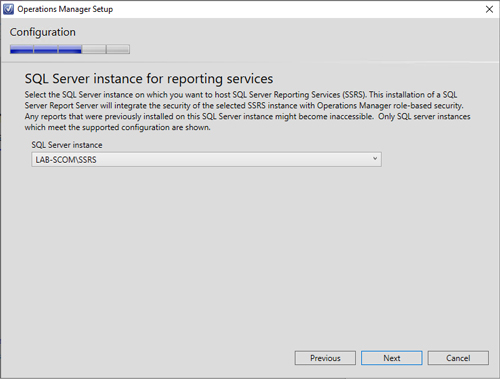 Figure 8: Choose your Reporting Service instance.
Click Next and you will be taken to a screen that prompts you to enter a set of credentials that can be used for a data reader account. Enter the required credentials, then click Next a couple of times, followed by Install. The Reporting Server option will now be installed.
About the Author
Brien Posey is a 22-time Microsoft MVP with decades of IT experience. As a freelance writer, Posey has written thousands of articles and contributed to several dozen books on a wide variety of IT topics. Prior to going freelance, Posey was a CIO for a national chain of hospitals and health care facilities. He has also served as a network administrator for some of the country's largest insurance companies and for the Department of Defense at Fort Knox. In addition to his continued work in IT, Posey has spent the last several years actively training as a commercial scientist-astronaut candidate in preparation to fly on a mission to study polar mesospheric clouds from space. You can follow his spaceflight training on his Web site.