Posey's Tips & Tricks
How To Work with Microsoft 365 Search Connectors
Microsoft now lets Microsoft 365 connect to various data sources -- whether in the cloud or on-premises -- so that those data sources can be indexed for searching.
For as long as I can remember, data has grown exponentially. One of the side effects of this rampant data growth is that it can sometimes be tough to find what you are looking for.
In my own organization, I store nearly all of my file data on-premises. Over the years, I have developed a folder structure that makes it relatively easy to find what I am looking for. For example, suppose that two years from now, someone asks me about this column. I know that I will be able to find it in the \Articles\1105\<editor's name>\archive\2020 folder.
Even though I have worked really hard to adopt a system that makes it easy to find data, my system isn't foolproof. Given the path that I provided above, you can imagine how much more difficult it would be to locate a document if I couldn't remember who I wrote it for or the year I wrote it.
Thankfully, Windows does offer a bit of help.
The Windows 10 File Explorer has its own built-in search interface, and it is actually possible to get it to search for both file names and file contents. To do so, you will need to configure Windows to search your file contents. Enter a search query into File Explorer's Search box (you can type anything; it doesn't really matter what you enter). When the search results are returned, File Explorer will display a previously hidden Search tab on File Explorer's Toolbar. Now, just click on the Advanced Options and make sure that the File Contents option is selected. You can see what this looks like in Figure 1.
 [Click on image for larger view.] Figure 1: Click on the Advanced Options and make sure that File Contents is selected.
The reason why enabling the File Contents option is so useful is it allows you to search within your documents. This morning, for instance, I was trying to find something that I had previously written about System Center Virtual Machine Manager. I entered "VMM" into the search box and Windows returned every document within the selected folder and its subfolders that either included "VMM" in the file name or mentioned "VMM" within the document.
As handy as this particular technique may be, it does have one significant shortcoming. In order for you to be able to search a document's contents, Windows has to know how to index the document. Windows does a good job of this if you happen to be looking for an Office document or perhaps a .PDF file, but there are other file types that Windows simply doesn't know how to index.
This isn't just a problem for Windows; it has also long been a problem for Microsoft 365. When a user enters a search query in Microsoft 365, the results are limited by the types of data that Microsoft 365 is able to index. For many organizations, this means that users are limited to searching for Office documents residing in the Microsoft 365 cloud.
Thankfully, the types of search limitations that I have described are gradually starting to go away. Microsoft now makes it possible to connect Microsoft 365 to various data sources (they can be in the cloud or on-premises) so that those data sources can be indexed for searching.
To connect Microsoft 365 to new data sources, log into the Microsoft 365 cloud as an administrator, then go to the Microsoft 365 Admin Center. From there, go to Settings and click on the Microsoft Search Page option. You can see the Microsoft Search page in Figure 2.
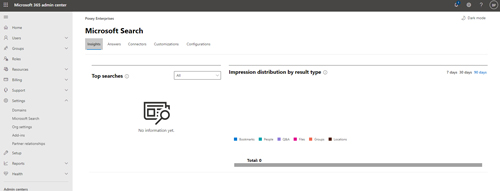 [Click on image for larger view.] Figure 2: This is what the administrative interface for Microsoft Search looks like.
There are lots of great features within the Microsoft Search page, and I encourage you to explore the various options. If your goal is to make Search aware of new data sources, select the Connectors tab and click the Add button. When you do, you will be presented with a list of various connectors that you can use to make Search aware of the data residing in various sources.
Right now, data connectors are a preview feature, so things are likely to change later on. For right now, though, you can see the existing connector options in Figure 3.
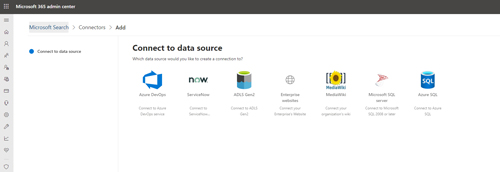 [Click on image for larger view.] Figure 3: These are the connectors that currently exist.
To link Microsoft 365 to an external data source, simply select the appropriate connector, click Next, then follow the prompts.
About the Author
Brien Posey is a 22-time Microsoft MVP with decades of IT experience. As a freelance writer, Posey has written thousands of articles and contributed to several dozen books on a wide variety of IT topics. Prior to going freelance, Posey was a CIO for a national chain of hospitals and health care facilities. He has also served as a network administrator for some of the country's largest insurance companies and for the Department of Defense at Fort Knox. In addition to his continued work in IT, Posey has spent the last several years actively training as a commercial scientist-astronaut candidate in preparation to fly on a mission to study polar mesospheric clouds from space. You can follow his spaceflight training on his Web site.