Posey's Tips & Tricks
Performing a Windows File History Backup
It won't do what most third-party backup solutions can, but Windows File History, a relic from Windows 8.1, does a reasonably good job of protecting Windows 10 data.
When it comes to protecting data created on a Windows 10 computer, the best option is usually to purchase a third-party backup solution. However, the Windows operating system does contain some native backup tools that can work in a pinch. One such tool is called File History.
File History was first introduced in Windows 8.1 but continues to be a part of Windows even today. It works by backing up documents that are stored on the Windows PC.
Before I show you how to set up and use File History, I need to discuss some of its limitations. First, File History is not a comprehensive backup solution. While it does a reasonably good job of protecting your documents, File History does nothing to protect the Windows operating system or the applications that are installed on it.
Another important thing you need to know about File history is that it has changed a bit over the years. When File History was initially introduced in Windows 8.1, it was only capable of backing up library folders. These are folders such as Documents, Music, Pictures, Videos and Desktop. If you happened to store documents in other folders, those documents would not be backed up by File History.
The current version of File History will attempt to back up the folders within your profile (C:\Users\<your name>). You can add additional folders to the list of folders to be protected, but doing so is a manual operation. Windows does not automatically protect newly created folders. That's why I said that File History will work in a pinch, but that you are usually going to be better off using a commercial backup application.
To access File History, go to the Windows Start menu and click the Settings icon. When the Settings screen appears, click on Update and Security, then click on the Backup tab. As you can see in Figure 1, the Backup tab contains an option to back up your data using File History.
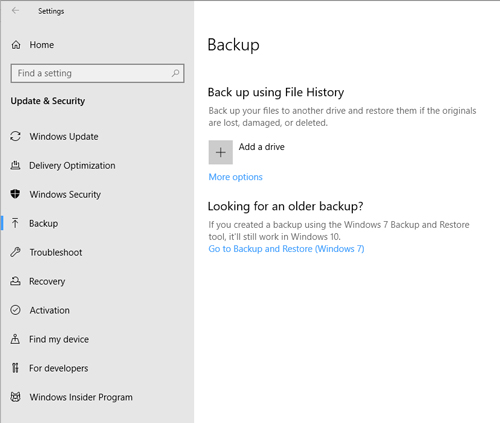 [Click on image for larger view.] Figure 1: You can find the File History option on the Backup tab.
To use File History, you are going to need a location where Windows can store a copy of your data. Most people use a USB-attached storage device for this purpose, but it is possible to write the data to a network share instead.
Begin the configuration process by clicking on the Add a Drive link shown in Figure 1 above. When you do, Windows will automatically detect any disks that are suitable for use by File History. Simply click on the disk where you want to write your backup.
It's entirely possible that when you make your selection, nothing will appear to happen. However, if you switch to a different tab (such as Windows Update) and then go back to the Backup tab, you should see that File History is now enabled, as shown in Figure 2.
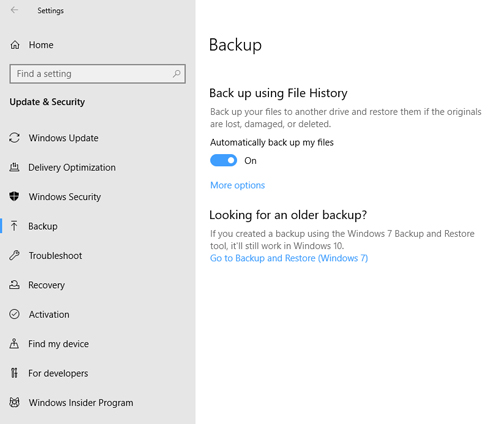 [Click on image for larger view.] Figure 2: File History is now enabled.
If you click on the More Options link shown in the figure above, you will be taken to a screen that allows you to configure the backup frequency, the backup-retention period and the folders that are to be protected. You can see what this looks like in Figure 3.
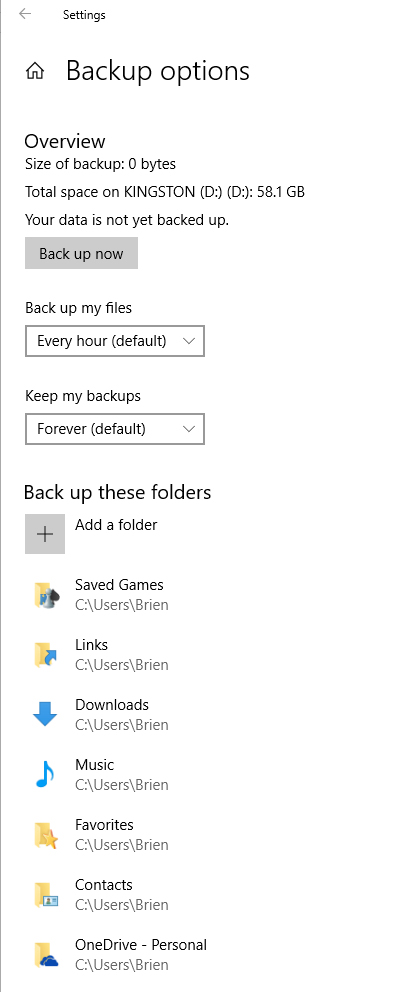 Figure 3: This is the screen that is displayed when you click on the More Options link.
So what happens if you need to restore some of the data that has been backed up by File History? File History creates a folder called \FileHistory on the media that you designate as the backup target. You can browse this folder's contents and access the files directly. Your files aren't encapsulated into a backup file or some other type of cabinet file. If you need to perform a recovery, just copy the file directly from the File History folder back to the desired location. If you prefer, however, File History does provide a link that you can click to restore files from a current backup.
One last thing I want to mention about File History is that you will need to be careful about what type of media you use as the backup target. Some USB devices (such as some flash drives or SD cards) use a file system that can only handle files up to 4GB in size. File History may not be able to protect your larger files if you use a backup target that has this type of file size limitation.
About the Author
Brien Posey is a 22-time Microsoft MVP with decades of IT experience. As a freelance writer, Posey has written thousands of articles and contributed to several dozen books on a wide variety of IT topics. Prior to going freelance, Posey was a CIO for a national chain of hospitals and health care facilities. He has also served as a network administrator for some of the country's largest insurance companies and for the Department of Defense at Fort Knox. In addition to his continued work in IT, Posey has spent the last several years actively training as a commercial scientist-astronaut candidate in preparation to fly on a mission to study polar mesospheric clouds from space. You can follow his spaceflight training on his Web site.