Posey's Tips & Tricks
How To Create Alert Policies in Office 365
Create general or custom alerts when configuration changes have been made in Office 365.
In spite of its somewhat simplistic GUI interface, Microsoft Office 365 is a large and complex environment. The Office 365 suite is made up of numerous applications, each of which has its own administrative controls. Because of the Office 365 suite's size, it can be difficult for an administrator to notice unauthorized changes that are made to the Office 365 configuration. Fortunately, Office 365 contains an alerting engine that can be used to notify administrators of significant configuration changes. Better still, administrators can create custom alert policies so that focus on configuration changes that the administrator deems to be the most important.
To create an alert policy, open the Office 365 Admin Center, and click on the Security & Compliance option. When the Security & Compliance screen appears, expand the Alerts section, and then click on Manage Alerts. This will cause Office 365 to a list of existing alert policies. To create a new alert policy, click on the aptly named New Alert Policy button, shown in Figure 1.
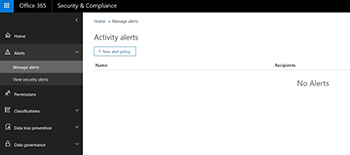 [Click on image for larger view.] Figure 1. Click the New Alert Policy button.
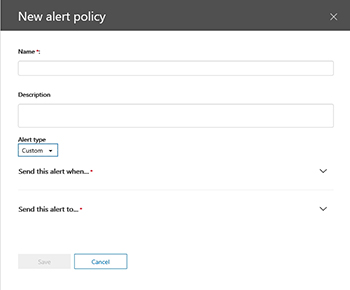
At this point, you will see the New Alert Policy window, which is shown in Figure 2. As you can see, creating an alert policy is a simple process. There are only a few configuration options. Even so, alert policies can be used to notify you to a huge variety of conditions.
 [Click on image for larger view.] Figure 2. The New Alert Policy window makes it easy to create Office 365 activity alerts.
The first two fields that are displayed within the New Alert Policy window are pretty typical of Microsoft configuration wizards. As you can see in the figure above, you will have to begin the configuration process by providing a name for the alert policy that you are creating. There is also a field where you can enter a description of the alert policy. Although entering a policy description is not mandatory, it is a good idea to enter a description any way. Over time you can accumulate a large number of alert policies, and having good descriptions will help you to identify each alert's purpose.
The third configuration option in the New Alert Policy window is the Alert Type option. If you look back at the previous figure, you will notice that the Alert Type is set to Custom. This is the default behavior. The only other option is to set the alert type to Elevation of Privilege. As you can see in Figure 3, an Elevation of Privilege alert is designed to help you monitor any functions that result in a user gaining admin privileges. For example, granting a user permission to be an Exchange administrator would result in an elevation of privilege alert being generated (assuming that you created an Elevation of Privilege alert policy).
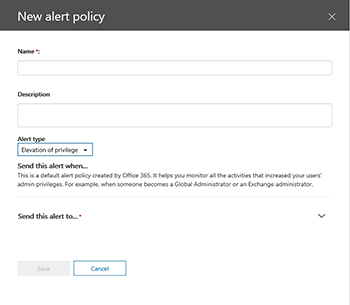 [Click on image for larger view.] Figure 3. You can configure Office 365 to watch for elevation of privilege events.
In the case of a custom alert, the next configuration option that you will need to set is the "send this alert when" option. In other words, you will need to tell Office 365 what type of event it should be watching for. The good news is that Microsoft has provided a highly granular list of Office 365 event types. You can set up an alert policy for activities corresponding to most, if not all, of the Office 365 applications. For example, you could create an alert if a SharePoint user checks out a file, or if a Sway user changes the sway sharing level.
This brings up a couple of important points. First, an alert policy does not have to be built around one specific activity. Multiple activities can be bound to a single policy. Second, it is also possible to use an alert policy to watch specific users or groups. In Figure 4, for example, a policy is being created that watches to see if User1 creates a Sway or disables Sway duplication.
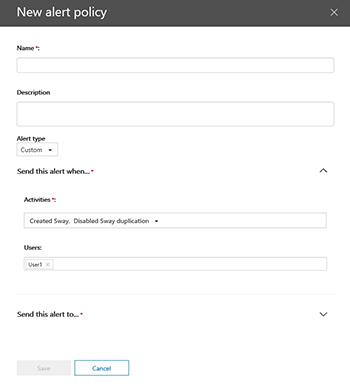 [Click on image for larger view.] Figure 4. Policies can include specific users or groups, and multiple activities.
The last step in the process is to determine who the alert should be sent to. This is simply a matter of selecting recipients from a list.
When you are done, click Save. The new alert policy will be added to the Manage Alerts screen, as shown in Figure 5. Clicking on the alert policy gives you the option of deleting, disabling, or editing the policy.
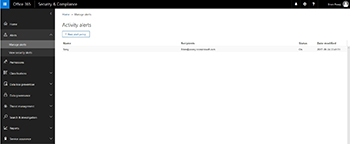 [Click on image for larger view.] Figure 5. The new alert policy has been added to the Manage Alerts screen.
About the Author
Brien Posey is a 22-time Microsoft MVP with decades of IT experience. As a freelance writer, Posey has written thousands of articles and contributed to several dozen books on a wide variety of IT topics. Prior to going freelance, Posey was a CIO for a national chain of hospitals and health care facilities. He has also served as a network administrator for some of the country's largest insurance companies and for the Department of Defense at Fort Knox. In addition to his continued work in IT, Posey has spent the last several years actively training as a commercial scientist-astronaut candidate in preparation to fly on a mission to study polar mesospheric clouds from space. You can follow his spaceflight training on his Web site.