SSIS Package Builds
Jump the gun on your SSIS packages and you'll be doing one crucial thing wrong. Let's step through the process.
- By Eric Johnson
- 11/16/2009
So you have written an SSIS package and now it's time to package it up and send it off to your QA department. Excellent; you need to use the build function in Business Intelligence Development Studio.
On the surface, it's pretty simply to do but there are a few things to understand. You can't just right click your project and select Build, or even use the Build Solution menu option. Before you can do either of these things, you need to adjust your project's build settings. To do that, right-click the project in Solution Explorer, select Properties, and then select Deployment Utility. You should be seeing what's in Fig. 1.
 |
| Figure 1. Setting up the the properties for your Package Builds. |
Notice that the CreateDeploymentUtility option is set to False. This must be set to true before you can build your project. The other setting of interest is DeploymentOutputPath which controls where the build will be written. Set CreateDeploymentUtility to True and click OK. Now you can right-click the project in Solution Explorer and select Build. This will write several files out to your deployment directory. The number of files will vary based on your project; in the case of my test project, three files were written:
- Package.dtsx: The actual SSIS package that was developed. You should have one DTSX file for each package in your solution.
- Config.dtsConfig: This is the XML configuration file for my package. You could have several of these, or none, depending on whether your packages uses them
- Test.SSISDeploymentManifest: This is the Deployment Manifest file. You will have one of these per project. This file defines all the pieces of your project and is what you use to deploy the SSIS package to a server.
Now that you have built your package, you can send all the files in your deployment directory to another person or group so that your package can be installed on an SSIS server. That process is simple; just double-click the SSISDeploymentManifest file on a machine that has the SQL Server client tools installed and this will launch the Package Installation Wizard (Fig. 2).
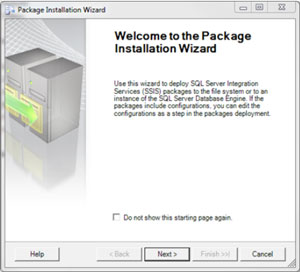 |
| Figure 2. Now that the properties for your package are set, it's time to build them. |
This is a pretty simple wizard, but let's quickly run through it.
First you specify whether you want a File System Deployment or a SQL Server deployment. For this example I will choose SQL Server. Next you choose the location for the package, in our case the SQL Server and the path in MSDB. You can also choose to Rely on Server Storage for Encryption if you want sensitive information that was encrypted in the package to remain after the package has been deployed. Last, you must specify the directory on the server where you want dependencies files, such as configuration files, to be stored.
If you have configurations, you will also be allowed to modify the configuration values during the wizard. Keep in mind these can also be modified later.
That's it! Click Finish and the package will be installed on your SQL Server where it can be scheduled and run.
About the Author
Eric Johnson, SQL Server MVP, is the owner of Consortio Services in Colorado Springs providing IT systems management and technology
consulting. He is also the President of the Colorado Springs SQL Server
User Group. He can be contacted at www.consortioservices.com.