Practical App
Using MDT and Single-Instance Storage
Learn how to manage and consolidate multiple custom deployment images.
Content provided by TechNet Magazine, Microsoft's premier publication for IT Professionals
You have been using the Microsoft Deployment Toolkit (MDT) to create, maintain and deploy your custom Microsoft Windows operating systems for some time now. You have multiple desktop images ranging from Windows XP to Windows 7, as well as multiple server images like Windows Server 2003, Windows Server 2008. For each of these OSes you might have more than one image. For example, you may have Windows Server 2008 Standard and Enterprise images, 32-bit and 64-bit images -- the combinations could go on and on. With all the images you're creating and maintaining, the size of your distribution share is growing rapidly. You're using multiple CDs or DVDs to distribute individual images. Do you wish you could consolidate your images? Since Windows Vista, Microsoft has been able to place multiple OS installations onto one DVD, so why can't you? Does this sound like your scenario?
I've seen this scenario multiple times and have had these same concerns and questions. The answer is: You can consolidate your custom images, and potentially even fit multiple image installations onto one disc, but before we talk about how you can do this, let's first discuss what changed with imaging once Windows Vista was introduced.
WIM Format
The Microsoft Windows Imaging File (WIM) format was first introduced in Windows Vista. The WIM format is a file-based disk format that was designed to replace the more commonly used sector-based disk format. A sector-based format was previously used with Microsoft Automated Deployment Services (ADS), MicrosoftXP Embedded (XPe), and is still commonly used across most other commercial imaging solutions. The two file formats differ in that the sector-based format is captured based on the actual sectors of a physical disk, while the file-based format is captured based on just the files on the disk.
When Microsoft created the WIM format, it wanted more flexibility and control. The WIM format is completely hardware-agnostic. You can capture and deploy from any system. A WIM can also be serviced offline, meaning you can selectively add, copy and delete files, drivers or even apply patches without having to re-create your image. WIM images can also be marked bootable, allowing the ability to start a machine from an image within the WIM. You can apply WIM images to partitions of any size regardless of the size from which the disk the image was captured. WIMs also allow for the option of non-destructive deployment, meaning application of the WIM won't erase the pre-existing data of the disk.
The WIM format also provides the ability to store multiple images within one file, and it takes advantage of the single-instance storage of file resources and file compression techniques to decrease the actual image size. A WIM can also be spanned across multiple discs, allowing you to use a different medium for storage, CD versus DVD.
Single-Instance Storage
You can probably identify the features that will help you reach your goals of image consolidation: the ability to store multiple images within a single WIM, file compression and single-instance storage (SIS). What exactly is SIS? SIS is a technique that used to be referred to as single-instance store. This technique has been used across multiple Microsoft products to include Microsoft Storage Server and Microsoft Exchange, and has been around since Windows 2000 Server.
SIS provides the ability to remove file duplication to optimize storage capacity. Using the secure hash algorithm 1 (SHA-1) a hash value is determined for each file within the image. SIS will then identify duplicate files based on this hash value and transparently replace the duplicate files with file system links to a single copy of the file retained in a common store. When combining like OS images, it is not uncommon to see a more than 60 percent reduction in size in comparison to multiple separate image files (see Figure 1, where W2k8.wim represents three WIMs combined into one).

[Click on image for larger view.] |
| Figure 1. Individual WIM size versus combined WIM size. |
Creating a Single WIM from Multiple Images
You can create a single WIM with multiple images directly in MDT, using the same standard image capture process. To do this you launch an image deployment and proceed through the Deployment Wizard. Once on the Capture screen, select Capture and provide a name for the WIM or accept the default, then begin the deployment. Once the deployment and capture have finished, launch another image deployment and proceed through the Deployment Wizard. Once on the Capture screen, select Capture and provide the exact same name and location as the previous capture. The MDT ZTIBackup script, which completes the actual capture of an image, will recognize the WIM already exists, and it will append the new image to the existing WIM. When doing this the ZTIBackup script uses the Task Sequence ID and the Drive letter to create the image name. Because each image within a WIM must have a unique image name, you cannot use the same Task Sequence to append multiple images to the same WIM without customizing the default MDT scripts or manual modification to the WIM. However, using separate task sequences provides the ability to append images to a WIM within MDT without any customization.
Now let's go back to our initial scenario. You now know you can consolidate your custom images and you can do this when you create and capture a new image using MDT, but how do you do it for WIMs that you have already created? You have already done so much work; does this mean you have to start over again? Do you have to recapture all your custom images again? The answer is no. You can consolidate all your existing custom images using ImageX.
ImageX is a free command-line tool that is part of the Microsoft Windows Automated Installation Kit (WAIK). MDT is actually using ImageX in many of its processes for creating, managing and deploying your custom images. MDT uses the ImageX append switch to append an image into an existing WIM.
However, there's another option within ImageX that will allow you to create a single WIM that contains multiple images -- the export switch. The export switch is used to export an image file from one WIM and create a new WIM based on that export. For example, you have a WIM named W2K8ENTX64.wim and you want to create a new WIM called W2K8.wim. To do this you would run the following command:
ImageX /export W2K8STD
SP2X64.wim 1 W2K8.wim "Win
dows Server 2008 Standard SP2 X64"
In this command, "Windows Server 2008 Standard SP2 X64" represents the name being assigned to the image being imported. Now let's say you want to add another image to the W2K8.wim. To do this you would run the following command:
ImageX /export W2K8ENT
SP2X64.wim 1 W2K8.wim "Win
dows Server 2008 Enterprise SP2 X64"
As mentioned previously, when you combine multiple images into a single WIM, each image must have a unique image name. Along with a unique image name, each image will be also assigned an image index number. These numbers are assigned in chronological order as the images are imported into the WIM file, and cannot be modified. In our example the Windows Server 2008 Standard SP2 X64 will have an index number of 1 and Windows Server 2008 Enterprise SP2 X64 will have an index number 2. Whether you're modifying or installing an image from a single WIM with multiple images, the image index number will be required to correctly identify the image within the WIM.
Whether you're using MDT or ImageX from the command line, you can only merge one image to an existing WIM at a time. So for each proceeding capture you want to merge into your existing WIM, you must wait for the previous deployment and capture process to complete before beginning the next one. Both ImageX switches will use the hashing algorithm described earlier to de-duplicate any files when storing the images within the WIM.
Deploying Multiple Images
Now that you know how to create a single WIM with multiple OSes, how do you deploy it? To deploy the WIM, you need to follow three steps:
- Import the WIM into MDT
- Create a New Task Sequence or Modify the Existing One
- Create the Media
Step 1: Import the WIM into MDT
The first thing you need to do is import the WIM as an OS in MDT as you would for any other custom OS image. After completing the Operating System import wizard, select the Operating Systems folder and you now should see all the images located within your WIM file listed as individual OSes. The display name for each OS will be dependent on how you added the images to the WIM. For example, if you used MDT to create the SIS WIM, each unique image will assume the title of the Task Sequence ID used to create the image (W2K8STDSP2X64CDrive, W2K8ENTSP2X64CDrive and W2K8DATACSP2X64CDrive) whereas our previous example we would see Windows Server 2008 Standard SP2 x64, Windows Server 2008 Enterprise SP2 x64 and
Windows Server 2008 Datacenter SP2 x64. The Display name within MDT can also be updated directly from within the MDT console after they have been imported into the Operating Systems folder.
Step 2: Create a New Task Sequence or Modify the Existing One
Once the OSes are in MDT you can create Deployment task sequences that deploy these images. If you want to update existing Task Sequences this can be a bit tricky but manageable. First you have to go into the properties of the Task Sequence. For
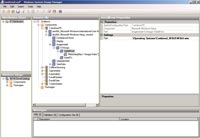
Windows Vista and newer Microsoft OSes you'll have to modify the Unattend.xml file to reflect the new WIM and image index number for the image to be applied. You can update the Unattend.xml file by selecting the OS Info tab in the existing Task Sequence properties window and selecting the edit unttend.xml file button. This will open the Windows System Image Manager (WSIM) application, as shown in Figure 2. Within WSIM, modify the following entries to reflect the new WIM file and image index number:
Unattend | Components | 1 win
dow sPE | Microsoft-Windows-Setup |
ImageInstall | OSImage | Install From |
Path:	.\Operating Systems\<WIMFile>
Unattend | Components | 1 window sPE | Microsoft-Win
dows-Setup |ImageInstall | OSImage | Install From |
Path |MetaData[Key="/image/index"] | Value: 1
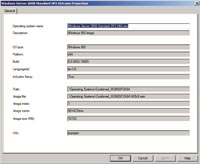
The Value 1 represents the image index number. You can determine the image index number by looking on the General tab of the OS properties within MDT.

[Click on image for larger view.] |
| Figure 2. The Windows System Image Manager application showing Unattend.xml. |
After updating the Unattend.xml file, locate the Install Operating System step on the Task Sequence tab of the Task Sequence properties and select the new Operating System to install. For OSes prior to Windows Vista, you do not need to modify the Unattend.xml. You will only need to update the Install Operating System step.

[Click on image for larger view.] |
| Figure 3. Operating system properties in MDT. |
Step 3: Create the Media
Now we've created a new WIM with all of our custom images within it, and we updated our existing Task Sequences to deploy images from this WIM or we created new Task Sequences entirely. The next step is to deploy all of the OSes within our new WIM from one CD or DVD. First, create a new media deployment point (MDT 2008) or selection profile (MDT 2010) depending on the version of MDT being used. In the properties for your media deployment point or selection profile, select all the deployment task sequences that are part of your WIM, the drivers needed for your deployment task sequences and any applications required by your deployment. After selecting all the appropriate properties for your media point, select update to generate your new ISO.
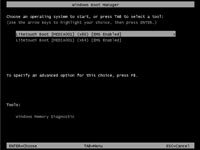
With the release of MDT 2010, when you select to generate both 32- and 64-bit media, a new prompt will be provided during the WINPE boot process (see Figure 4). This prompt will allow you to choose between a 32- and 64-bit-based WINPE environment, which will allow you to further consolidate your media-based deployments by supporting both 32- and 64-bit environments. You will no longer need separate LiteTouch_x86 and LiteTouch_x64 ISOs for your media deployments.

[Click on image for larger view.] |
| Figure 4. WINPE boot options: enabling deployment of a single WIM containing 32- and 64-bit images. |
You have created separate 32- and 64-bit WIMs, but can you consolidate further? Is there any benefit to creating a single WIM that contains 32- and 64-bit images? All Microsoft 64-bit OSes contain WoW64, which is a subsystem of the OS that enables the ability to run 32-bit applications on a 64-bit OS. The WoW64 subsystem shares many of the same files as a 32-bit version of the OS, so with SIS there are benefits to combing these two architectures.
There is one problem with this: MDT does not support deploying a single WIM containing 32- and 64-bit images out-of-the-box. You may now be asking yourself, if MDT doesn't support it, then why even mention it? Well let's first look at why this won't work out-of-the-box.
When deploying Windows Vista and newer Microsoft OS images with MDT, the original setup binaries are required to complete the deployment. These setup binaries are different between 32- and 64-bit versions and when importing an OS into MDT you can only include one version of setup binaries. During deployment MDT will look for setup binaries in the OS folder for the deployment. If MDT cannot find the setup binaries it will then look through the other OSes available that match the processor architecture.
In our scenario we need to include both versions of the setup binaries in our single OS folder. To do this, import the single WIM into MDT as an OS and select the option not to include setup files. Once the import is complete, browse to the WIM folder location on your deployment share and create two new folders: x86 and x64. Within each folder copy the OEM installation media for 32 bit to the x86 folder and 64 bit to the x64 folder. After completing this, remove the install.wim from the X86\Sources and X64\Sources folders.
Now that the setup binaries for both versions will be included with our OS, modifications to MDT will be required to search these folders. Locate the LTIApply.wsf on your deployment share and open the LTIApply.wsf file with a text editor. Within the LTIApply.wsf make the following additions highlighted in black to the Function: ApplySetup() (see Figure 5 and Figure 6).

[Click on image for larger view.] |
| Figure 5. LTIApply- ApplySetup() modifications 1. |
By making these modifications MDT will now search the x86 and x64 folders based on the deployment processor architecture in addition to the original search locations. Enabling the ability to deploy 32- and 64-bit OSes from a single WIM is only supported in MDT 2010, for MDT 2008 you will still need to maintain a separate WIM for 32- and 64-bit images. When modifying default MDT scripts it's important to remember that any upgrade to MDT will overwrite the changes made.

[Click on image for larger view.] |
| Figure 6. LTIApply- ApplySetup() modifications 2. |
Unlimited Customization
With the creation of the WIM format and the distribution through MDT there have been many great enhancements to OS imaging and deployment. Within this article I reviewed one of many techniques that have been made available and can be utilized by using these two technologies. MDT is a powerful, free tool, which allows for unlimited customization and can be used to enhance and streamline your current imaging process. It's also a great way to familiarize yourself with the Microsoft imaging process and further prepare you for the next step, using Microsoft System Center Configuration Manager Operating System Deployment.