Practical App
Get Ready to Upgrade to SharePoint 2010: A Planning Guide
You may be tempted to jump right into a SharePoint 2010 upgrade, but it requires a substantial amount of planning. This will guide you through the upgrade planning process.
Upgrading to SharePoint 2010 will be like no other upgrade you've ever done. Before you start the upgrade planning process, you need to familiarize yourself with the system requirements for SharePoint 2010. Unlike previous versions of SharePoint, SharePoint 2010 is 64-bit only. As such, you'll have to install it on top of a 64-bit version of either Windows Server 2008 or Windows Server 2008 R2.
SharePoint requires a SQL Server database, but that database doesn't have to reside on the same server as SharePoint. SharePoint 2010 still requires SQL Server, but Microsoft has made some important changes.
SharePoint 2010 requires the database to be running a 64-bit edition of SQL Server 2005 or 2008. This is true whether or not the database is installed locally on the SharePoint server.
Although they're not technically part of a system requirement, you may want to consider the Web browsers you use. SharePoint 2010 is designed to make better use of Web standards. This means that users should be able to get a consistent experience regardless of whether they're using Internet Explorer or Firefox (3.x or higher). One caveat to this is that SharePoint 2010 has limited support for IE6. IE6 users shouldn't have any trouble viewing SharePoint content, but content authoring requires IE7 or higher (or Firefox 3.x or higher).
In-Place Upgrades
SharePoint 2010 allows for in-place upgrades from SharePoint 2007. But because SharePoint 2010 is 64-bit only, you can only perform an in-place upgrade if your existing SharePoint 2007 server is running on top of a 64-bit version of Windows Server 2008. If your existing SharePoint servers meet the necessary system requirements, you can perform an in-place upgrade on every server in your SharePoint farm.
Although SharePoint fully supports these upgrades, I'd only recommend an in-place upgrade if you have a simple SharePoint deployment and haven't made any customizations. Full migrations are recommended in more complex environments because doing so gives you a higher degree of control over the upgrade process. They're also advisable for environments in which you've made customizations so you don't accidentally overwrite those customizations.
A migration usually involves building an entirely new SharePoint farm running SharePoint 2010. After doing so, you can attach your existing SharePoint databases to the new farm. You can also use a hybrid migration strategy, which combines in-place upgrades and brand new SharePoint 2010 servers.
Pre-Upgrade Checker
Whether you're doing an in-place upgrade or a migration, you'll need to do some planning and preparation before you actually begin the process. Running the Pre-Upgrade Checker is one of the most important steps in preparing to upgrade to SharePoint 2010.
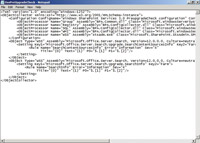
[Click on image for larger view.] |
| Figure 1. The Pre-Upgrade Checker uses an XML-based rules file. |
Before releasing SharePoint 2007, Microsoft came out with a utility called Prescan that helped you ensure your SharePoint deployment was in a healthy state prior to upgrading to SharePoint 2007. While Prescan was a good tool in its day, it isn't really suitable for a pre-deployment analysis for SharePoint 2010. That being the case, Microsoft has provided us with a new tool called the Pre-Upgrade Checker. The Pre-Upgrade Checker is an improvement over Prescan. For starters, the Pre-Upgrade Checker is read-only, so you don't have to worry about it making any changes to your SharePoint servers.
What really makes the Pre-Upgrade Checker useful is that it does a much more thorough job of detecting problems than its predecessor, Prescan. It's also extensible. The Pre-Upgrade Checker comes with a set of rules that it uses when it analyzes your SharePoint servers. These rules are in XML format, which means that you can create your own custom rules should the need ever arise. Using XML-based rules also makes it easy for Microsoft to update the Pre-Upgrade Checker should its recommended best practices ever change.
Arguably the best thing about the Pre-Upgrade Checker, though, is the information it compiles. Even though Microsoft designed the Pre-Upgrade Checker as a tool for preparing for an upgrade to SharePoint 2010, some organizations are using it for other purposes. One organization actually uses the Pre-Upgrade Checker as a part of its disaster recovery plan. The utility doesn't actually do anything to help salvage a failed SharePoint server, but the information it collects can be invaluable if you should ever find yourself having to rebuild a SharePoint deployment (just make sure that you run the tool before the failure happens).
Similarly, another organization has used the Pre-Upgrade Checker as a tool for making sure its SharePoint servers are configured in a consistent manner. By running the Pre-Upgrade Checker on each of its SharePoint servers, the organization is able to compare the reports from each server and look for any individual configuration elements that don't adhere to the corporate policy.
So where can you get the Pre-Upgrade Checker? Chances are, you probably already have it. Microsoft included the Pre-Upgrade Checker in SP2 for SharePoint 2007. Contrary to what you might expect, though, the Pre-Upgrade Checker is not a standalone tool. Instead, Microsoft built it into the STSADM.EXE utility. Incidentally, after applying SP2, I had to reboot my test server a couple of times before Windows would allow me to access the new STSADM.EXE functionality.
With that said, I'll tell you how the Pre-Upgrade Checker works. As I mentioned earlier, the Pre-Upgrade Checker works by parsing an XML-based rule file, and then using those rules as a basis for analyzing your SharePoint deployment. The Pre-Upgrade Checker comes with a built-in set of rules. These rules, which are based on the Best Practice Analyzer, exist within a file called OssPreUpgradeCheck.xml.
When you invoke the Pre-Upgrade Check, you don't have to explicitly call this rule file. The Pre-Upgrade Checker will call it by default. You do have the option of using custom rule files. The full syntax for the Pre-Upgrade Checker is as follows:
STSADM.EXE -O PreUpgrade Check
[[-RuleFiles "<rule file name&rt;"] [-ListRuleFiles]] [-LocalOnly]
As you can see in the syntax above, the only required parameters are the -O and the words PreUpgradeCheck. The -RuleFiles parameter is optional and is only used if you want to manually specify a rules file to be used. Likewise, you can use the -ListRuleFiles parameter to display the rules files that are available to you. Finally, you can use the -LocalOnly parameter to run the rules against only the local SharePoint server.
I began by opening a Command Prompt window and navigating through the directory structure to C:\Program Files\Common Files\Microsoft Shared\Web Server Extensions\12\BIN. From there, I ran the following command:
STSADMIN.EXE -O PreUpgrade Check
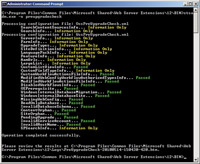
[Click on image for larger view.] |
| Figure 2. The Pre-Upgrade Checker tests your SharePoint deployment. |
The Pre-Upgrade Checker performs a number of different tests against the SharePoint deployment. The results of each test are color-coded. Red indicates a failed test and green indicates your server has passed a test. Informational items are marked with yellow.
Obviously, the Pre-Upgrade Checker output isn't exactly verbose -- it only tells you if a test has passed or failed, and you don't get any detailed information. However, you do get a message indicating that you can review the results by looking at an HTML file located in the C:\Program Files\Common Files\Microsoft Shared\Web Server Extensions\12\ Logs folder.
Each time you run the Pre-Upgrade Checker, it creates three separate log files. One of these is the HTML file referred to at the end of the upgrade check, but there's also a LOG file and a XML file. You can use any of these, but the HTML file is the easiest to read.
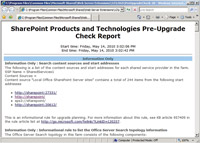
[Click on image for larger view.] |
| Figure 3. The Pre-Upgrade Checker results can be viewed using a Web browser. |
Identify Customizations
Another critical step in the upgrade planning process is to identify any customizations you've made to your SharePoint servers. Regardless of whether you're performing an in-place upgrade or a migration, it's easy to accidentally overwrite your customizations. Therefore, you should document your customizations and make a backup of just those files so they can be easily reapplied after the upgrade, should the need arise.
Hopefully, you've thoroughly documented all of your customizations as your SharePoint environment has evolved. Realistically though, it can be tough to keep track of all of the changes to your SharePoint environment. Therefore, take some time to review your customization log, even if you think that all of your customizations have been well documented.
Unfortunately, SharePoint doesn't contain any built-in tools for identifying customizations. This doesn't mean that you'll have to manually review every file on your SharePoint servers, though.
One way you can find out about any customizations is to use a technique called differencing. The idea behind this technique is, you set up a stock SharePoint 2007 Server -- make sure it's running the same patches as your production servers -- and then use a differencing program to see which files on your production servers are different from a pristine SharePoint server.
Microsoft recommends using WinDiff, but there are a number of differencing utilities available, many of which have a more extensive feature set than WinDiff.
Test the Upgrade Process
As you prepare to make the transition to SharePoint 2010, there will eventually come a point in which you develop a plan for how to perform the upgrade. Assuming you've addressed any issues that were reported by the Pre-Upgrade Checker, then the upgrade process should go relatively smoothly.
Deploy SharePoint 2007 in an isolated lab environment and try out your upgrade plan in the lab before you attempt to upgrade any of your production servers. Using a lab can help you to become familiar with the upgrade process, and it can help you to identify issues that may present problems when it comes time for the real upgrade.
The best approach in small to midsize organizations is to set up virtual servers and then restore backups of your production servers to the lab servers. This will let you try out your upgrade plan in an environment that's nearly identical to your production environment.
In larger organizations, creating an exact duplicate of the production SharePoint deployment may be impractical. In these types of situations, you might set up a small-scale environment configured in a manner that's similar to your production deployment. You might also try restoring backups from some, but not all, of your SharePoint servers, to a lab environment. While this may seem as though it leaves a lot to chance, remember that you're probably not going to convert the entire deployment to SharePoint 2010 in one sitting. Therefore, try focusing on one area of your deployment at a time.
The last step before you begin an upgrade to SharePoint 2010 is to verify that your backups are functioning correctly. Just this week, I had to help someone who thought that he had been diligently backing up his servers, but found out the hard way the backups were inadequate. Don't let this happen to you. Test your backups, and make sure they can be restored.
About the Author
Brien Posey is a 22-time Microsoft MVP with decades of IT experience. As a freelance writer, Posey has written thousands of articles and contributed to several dozen books on a wide variety of IT topics. Prior to going freelance, Posey was a CIO for a national chain of hospitals and health care facilities. He has also served as a network administrator for some of the country's largest insurance companies and for the Department of Defense at Fort Knox. In addition to his continued work in IT, Posey has spent the last several years actively training as a commercial scientist-astronaut candidate in preparation to fly on a mission to study polar mesospheric clouds from space. You can follow his spaceflight training on his Web site.