Posey's Tips & Tricks
How To Track Activities in Office 365
Keep track on users in Office 365 with this easy setup.
The auditing of administrator activities has been a staple of IT security for decades. In fact, Microsoft supported administrative activity auditing way back in the '90s in its Windows NT operating system. It should therefore come as little surprise that Microsoft has made it possible to log administrative activities in Office 365.
Enabling activity logging for Office 365 is easy to do. Begin the process by choosing the Security and Compliance tile from the Office 365 menu, as shown in Figure 1. This will cause the Office 365 portal to display the Security and Compliance Center, which you can see in Figure 2.
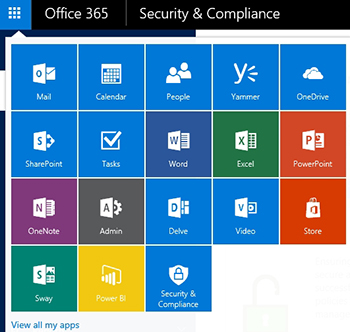 [Click on image for larger view.] Figure 1. Click on the Security and Compliance tile.
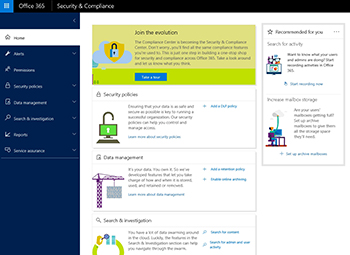 [Click on image for larger view.] Figure 2. The Security and Compliance center provides a number of different security options.
As you look at the figure above, you will notice that there is a section labeled Recommended for You. One of the items that is listed in this section is Search for Activity. If you want to enable activity logging, you must click the Start Recording Now link that is located in this section. Upon doing so, you will see a message asking you if you really want to being recording user and admin activities to the Office 365 audit log, as shown in Figure 3. Click the Turn On button to enable the logging of user and admin activity. Several seconds after clicking the button you should see a confirmation message indicating that user and admin activities are now being recorded, as shown in Figure 4.
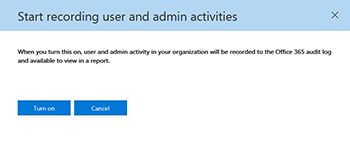 [Click on image for larger view.] Figure 3.Click the Turn On button to enable activity logging.
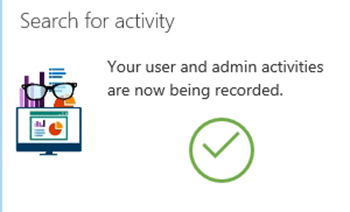 [Click on image for larger view.] Figure 4. User and Admin activities are now being recorded.
If you look back at Figure 2, you will notice that the menu on the left side of the screen contains a Reports section. Clicking on Reports causes the interface to expand the Reports container, revealing several reporting options. Office 365 currently offers seven different types of reports, although not all of these reports are related to Office 365 auditing. The available reports include:
- Office 365 audit log report
- Azure AD reports (paid Office 365 subscription required)
- Exchange audit reports
- Device compliance reports
- Supervisor review reports
- DLP policy and rule matches
- DLP false positives and overrides
To access the activity logs, click on the Office 365 Audit Log Report link. Upon doing so, Office 365 will display the Audit Log Search screen, which you can see in Figure 5.
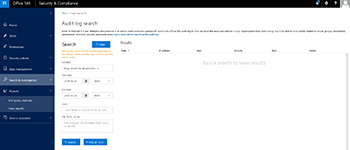 [Click on image for larger view.] Figure 5. You can use the Audit Log Search screen to find audit log entries.
As you look at the figure above, the first thing that you will probably notice is the warning message indicating that because logging was only recently enabled, some activities may not show up in the search results. This warning message should go away after about a day.
The search interface is relatively straightforward and self-explanatory. The console provides a number of different filtering criteria by which you can narrow down the scope of your search. For example, you can search for events that occurred between two specific dates and times. The console also gives you the ability to search based on user name or on file, folder or site.
Of course the search screen also allows you to search based on activity. The list of activity types that you can search on is impressive to say the least. In fact, activities are organized into categories, because there are so many different types of activities that can be examined. The activity categories include:
- File and folder activities
- Sharing and access request activities
- Synchronization activities
- Site administration activities
- Exchange mailbox activities
- Sway activities
- User administration activities
- Group administration activities
- Application administration activities
- Role administration activities
- Directory administration activities
You might have noticed in the previous figure, that the Audit Log Search screen contains a button labeled Add an Alert. You can create an alert that will notify you (or someone else) of a specific event. For example, you could create an alert that sends an e-mail notification if someone changes the administrative password.
Creating an alert is really easy to do. You must simply enter a name for the alert that you are creating, and specify one or more recipients. You can also provide an optional description of the alert that you are creating. Finally, you must choose the action on which you want to base the alert. For instance, if you wanted to be alerted to administrative password changes, then you would choose Change User Password as the action, and then select the administrator as the user.
As you can see, auditing can provide you with a great deal of insight into the activities that are taking place within your Office 365 environment. The feature can also help you to meet your security and compliance goals.
About the Author
Brien Posey is a 22-time Microsoft MVP with decades of IT experience. As a freelance writer, Posey has written thousands of articles and contributed to several dozen books on a wide variety of IT topics. Prior to going freelance, Posey was a CIO for a national chain of hospitals and health care facilities. He has also served as a network administrator for some of the country's largest insurance companies and for the Department of Defense at Fort Knox. In addition to his continued work in IT, Posey has spent the last several years actively training as a commercial scientist-astronaut candidate in preparation to fly on a mission to study polar mesospheric clouds from space. You can follow his spaceflight training on his Web site.