Posey's Tips & Tricks
Managing Office 365 Message Archiving Settings
Tweak how long Exchange Online keeps e-mails before archiving them.
One of the big questions that users often have after an Office 365 migration is "what happened to my mail?" Exchange Online uses a default policy that automatically archives old messages after a couple of years. This behavior is controlled by a retention policy.
To adjust the Exchange Online retention policy, log into the Office 365 Admin center and then navigate through the console tree to Admin | Exchange. This will take you to the Exchange Admin Center. Now, click on the Retention Policies link, found in the Compliance and Management section, as shown in Figure 1.
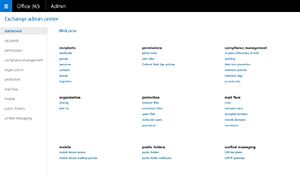 [Click on image for larger view.] Figure 1. The retention settings are found within the Compliance and Management section.
Before I go on, I need to give you a quick crash course in retention policies and retention tags. As the name implies, a retention policy controls the length of time that mailbox items are retained and what happens to those items after they expire.
A retention policy is made up of a series of retention tags. A retention tag is a collection of individual policy elements that can be applied to folders. For example, the default Junk Email tag retains items for 30 days and then deletes those items. Similarly, the Deleted Items tag causes deleted messages to be retained for 30 days and then removed. Exchange Online currently has 12 built in retention tags that are created by default. You can access these retention tags through the Retention Tags tab, which you can see in Figure 2.
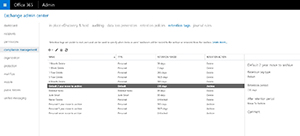 [Click on image for larger view.] Figure 2. These are the built-in retention tags.
As you can see in the figure above, Exchange Online gives you the ability to create your own retention tags by clicking on the Add icon. You can also edit or delete existing retention tags.
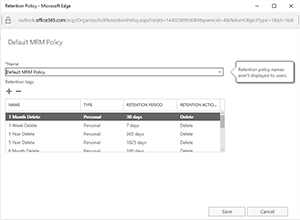
The most important thing to understand about retention tags is that they do not do anything by themselves. It's actually the retention policies that control message retention. A retention policy is applied to each mailbox and is made up of one or more retention tags that can be applied to individual folders within the mailbox. As you can see in Figure 3, Exchange Online includes a default retention policy named Default MRM Policy, but you have the option of creating additional policies. Doing so can be helpful when some of your mailboxes are subject to stricter retention requirements than others.
 [Click on image for larger view.] Figure 3. Exchange Online includes a default retention policy named Default MRM Policy.
You can edit a retention policy by selecting the policy and then clicking on the Edit icon (the icon that looks like a pencil). For example, Figure 4 shows what happens when I edit the Default MRM Policy.
 [Click on image for larger view.] Figure 4. This is the Default MRM Policy.
As you can see in the figure above, a retention policy is really nothing more than a collection of retention tags. It could almost be thought of as a group for retention tags. So with that being the case, how does a retention policy control message retention?
If you look back at Figure 2, you will notice that the list of retention tags includes a column called Type. One of these retention tags has its type set to Default. This means that unless you (or a user) has specifically assigned another retention tag, the Default tag is used. In this case, the default tag tells Exchange Server to hang onto an item for two years and then move it to the archive. You can of course edit this behavior. You can see the retention tag editor in Figure 5. As you can see in the figure, you can set the retention action and the retention period.
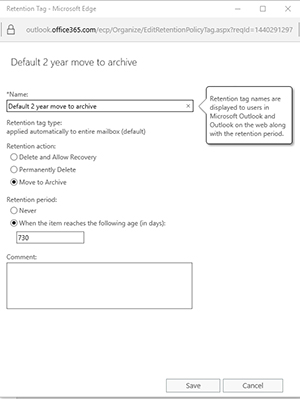 [Click on image for larger view.] Figure 5. You can set the retention action and the retention period for a tag.
So how do you assign a retention policy to a mailbox? Well, the default policy is assigned to each mailbox automatically. If however, you need to create a new retention policy and assign it to a mailbox, you can select a mailbox's retention policy by going to the Recipients tab, selecting a mailbox, and clicking Edit. When the User Mailbox dialog box appears, go to the Mailbox Features tab. As you can see in Figure 6, this tab allows you to choose the retention policy for the mailbox.
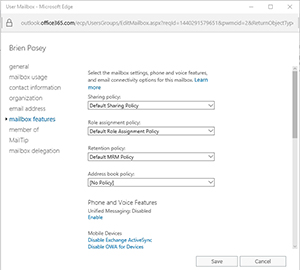 [Click on image for larger view.] Figure 6. Retention policies can be assigned on a per mailbox basis.
So what about assigning retention tags to specific mailbox items? Well, that's another subject for another time.
About the Author
Brien Posey is a 22-time Microsoft MVP with decades of IT experience. As a freelance writer, Posey has written thousands of articles and contributed to several dozen books on a wide variety of IT topics. Prior to going freelance, Posey was a CIO for a national chain of hospitals and health care facilities. He has also served as a network administrator for some of the country's largest insurance companies and for the Department of Defense at Fort Knox. In addition to his continued work in IT, Posey has spent the last several years actively training as a commercial scientist-astronaut candidate in preparation to fly on a mission to study polar mesospheric clouds from space. You can follow his spaceflight training on his Web site.