Posey's Tips & Tricks
Getting Started with Microsoft Teams
Here's a step-by-step guide to setting up Microsoft Teams for video conferencing.
Next week, I am scheduled to spend time in zero gravity, working with a team that will be testing hardware that is going to be used on the International Space Station and performing various experiments.
It's an exciting gig, for sure, but there is one downside: I have to travel to Canada, and my cell phone plan is not valid outside of the United States.
When I have worked in Canada in the past, I have used Skype for Business to stay in touch with everyone at home. This time, however, I decided to try out Microsoft Teams. In this column, I'll show you how I set up Microsoft Teams for video conferencing.
To get started, log in to the Office 365 portal and then click on the icon for the Teams app, which you can see in Figure 1. When you access Teams for the first time, you will be presented with a short tutorial. You can either check out the tutorial or click the close icon to skip it.
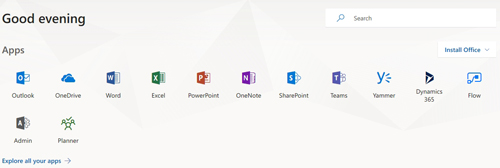 [Click on image for larger view.] Figure 1: Click on the Teams icon.
At this point, you will be taken into the Teams interface. After a few seconds, you will see a message like the one shown in Figure 2 telling you that Microsoft recommends downloading the desktop app. My plan is to use this desktop app while I am on the road, so let's go ahead and take a look at it.
 Figure 2: Microsoft recommends downloading the Teams desktop app.
Oddly enough, when I downloaded Teams for the first time, I received a Defender SmartScreen error like the one shown in Figure 3. If you happen to get this error, just click on More Info, followed by Run Anyway.
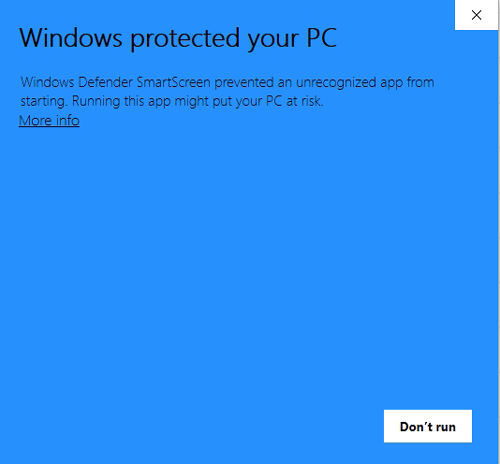 Figure 3: For some odd reason, I received a Defender SmartScreen warning.
Once you get past the Windows Defender warning, you don't have to do anything else (aside from possibly clicking Run) to install the Teams application.
There isn't anything difficult about using the Teams app. In fact, Microsoft even includes a virtual assistant to help you. As you can see in Figure 4, the chat interface includes a user called T-Bot. If you need help using Teams, just click on Chat and ask T-Bot your question. In the figure, for instance, the question "How do I send a private message?" is given as an example.
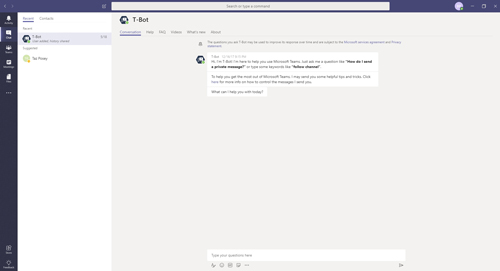 [Click on image for larger view.] Figure 4: T-Bot can provide help via the chat interface.
One thing that I want to point out before I move on is that the figure above indicates that T-Bot may occasionally send you various tips and tricks. If you would rather not have T-Bot nagging you, then click on the "here" link within the message. As of right now, the link points to a Web page that is still under construction, but presumably there will eventually be an interface for controlling T-Bot.
If you want to use Teams for video conferencing like I do, then click on the Teams icon and then click on the Join or Create a Team link. This will take you to the screen shown in Figure 5. As you can see in the figure, there is a large icon that you can click on to create a team.
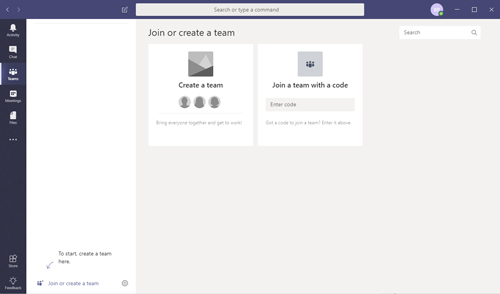 [Click on image for larger view.] Figure 5: This is where you go to create a team.
At this point, you will be prompted to enter a name and a description for the team that you are creating. You can also choose the privacy setting that you wish to apply to the team.
Once you create the team, the next step is to add team members. To do so, just enter a user name, the name of a security group or the name of a distribution group, and then click Add. Once you have added the appropriate users to the team, click on the Close button, as shown in Figure 6.
 Figure 6: This is the interface used to add users to the team.
Now that you have created a team and added some users to that team, the next step in the process is to create a channel. To do so, click on the Channels tab and then click the Add Channel button, shown in Figure 7. When prompted, enter a name for the channel and click Add.
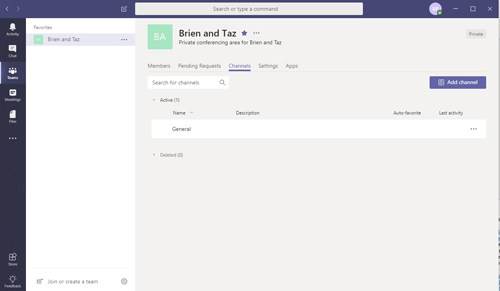 [Click on image for larger view.] Figure 7: Click on the Add Channel button.
Figure 8 shows what the channel looks like once created. As you can see in the figure, the channel is mostly geared toward instant messaging. If you want to have a voice or video call, however, you can do so by clicking on the Meet Now icon at the bottom of the screen.
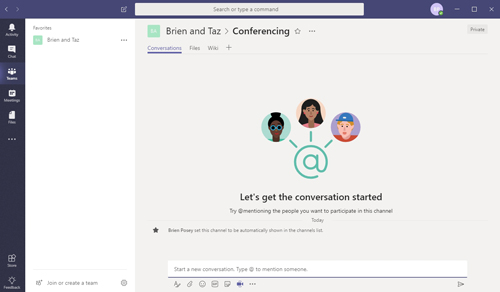 [Click on image for larger view.] Figure 8: This is what a channel looks like.
About the Author
Brien Posey is a 22-time Microsoft MVP with decades of IT experience. As a freelance writer, Posey has written thousands of articles and contributed to several dozen books on a wide variety of IT topics. Prior to going freelance, Posey was a CIO for a national chain of hospitals and health care facilities. He has also served as a network administrator for some of the country's largest insurance companies and for the Department of Defense at Fort Knox. In addition to his continued work in IT, Posey has spent the last several years actively training as a commercial scientist-astronaut candidate in preparation to fly on a mission to study polar mesospheric clouds from space. You can follow his spaceflight training on his Web site.