Posey's Tips & Tricks
Enabling Microsoft Search Within Office 365
As your organization's Office 365 dataset grows, it becomes increasingly difficult for users to find the data they're looking for. This is where Microsoft Search comes into play.
If you have been using Office 365 for a while, you have probably noticed that over time, your organization can accumulate a large amount of Office 365 data.
This data is spread across a variety of Office 365 applications. For example, there may be files stored in SharePoint Online, messages and contacts stored in Exchange Online, and the list goes on.
The problem with this is that as your organization's Office 365 dataset grows, it can become increasingly difficult for users to find the data that they are looking for. This is where Microsoft Search comes into play.
Microsoft elaborated on its vision for Microsoft Search at last month's Ignite conference. Microsoft Search, as the name implies, is a search engine that users can use to locate applications, files, contacts and other types of data within Office 365.
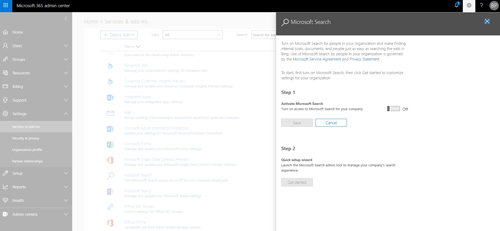
The first thing that you will need to do is to turn on Microsoft Search. To do so, open the Office 365 Admin Center. Now go to Settings and then click on Services & Add-Ins. The Admin Center will now display a list of all of the various Office 365 services. Locate and then click on Microsoft Search. This will bring up the Microsoft Search window, shown in Figure 1.
 [Click on image for larger view.] Figure 1: Click on Microsoft Search.
At this point, you will need to turn on Microsoft Search by using the slide bar shown in Figure 2. Click the Save button, followed by the Get Started button.
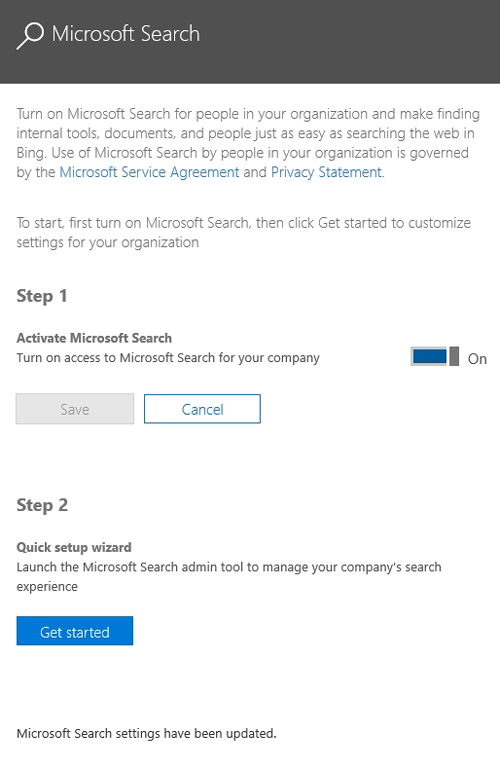 Figure 2: Click Save and then click Get Started.
Now the Admin Portal will launch the Microsoft Search Quick Setup wizard. Click on the Get Started button and you will see a list of the various Microsoft services that can be connected to Microsoft Search. As you can see in Figure 3, you can enable or disable the services on an individual basis.
 [Click on image for larger view.] Figure 3: You can choose which services to connect to Microsoft Search.
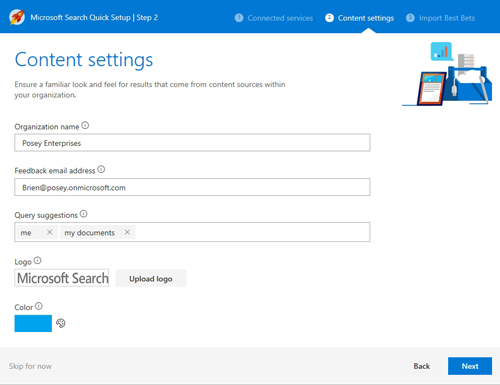
Click Next and you will be taken to the Content Settings screen. You don't really have to do anything on this screen other than verify your organization name and the feedback e-mail address. This screen also gives you the ability to specify a custom color and a custom Microsoft Search logo if you wish, as shown in Figure 4. When you are done, click Next.
 [Click on image for larger view.] Figure 4: The Content Settings screen allows you to customize Microsoft Search.
Now you are taken to the Import Best Bets screen. This screen gives you the opportunity to import your existing SharePoint Promoted Results Query Rules from the sharepoint.com and sharepoint.com/search sites collections. You don't have to import these collections, but if you do want to import them, then all you have to do is click on the Import button. Click Next to continue.
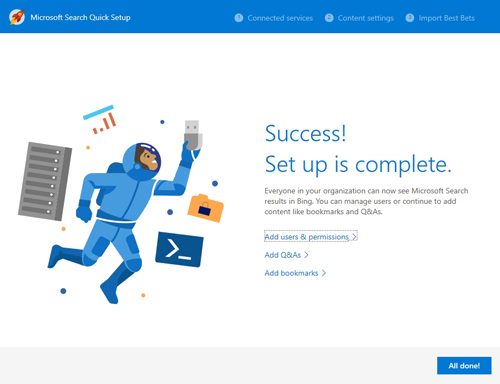
You should now see a screen similar to the one shown in Figure 5 indicating that setup is complete. As you can see in the figure, the screen contains links that you can use to add users and permissions, Q&As or bookmarks. When you are finished, click the All Done button.
 [Click on image for larger view.] Figure 5: Setup is complete.
When you are done, you will be taken into the Microsoft Search Admin Portal. As you can see in Figure 6, this portal allows you to manage bookmarks, Q&As, users and permissions, connected services and content settings.
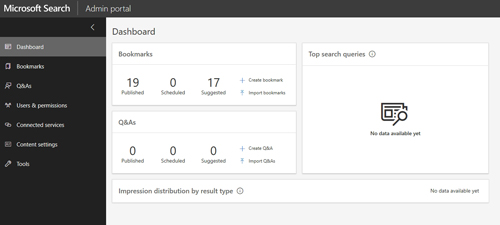 [Click on image for larger view.] Figure 6: This is the Microsoft Search dashboard within the admin portal.
Once you have finished setting up Microsoft Search, it can take up to 48 hours for the search engine to populate all of the data. The indexing process could conceivably complete more quickly, however, if you have a relatively small amount of data within your Office 365 environment.
Using the search interface is simple. When you log in to Office 365, the portal screen displays a search interface. When you enter a query into the search box, Office 365 will display a variety of data types within the results. If you look at Figure 7, for example, you can see that I typed one character and the search results instantly displayed a mixture of apps, files, people and sites.
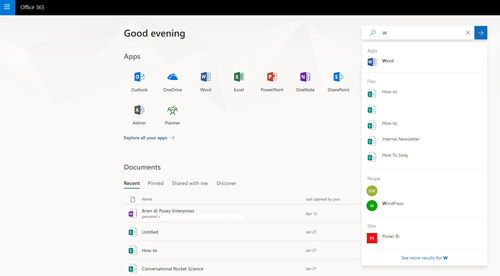 [Click on image for larger view.] Figure 7: These are the types of search results you can expect to receive.
About the Author
Brien Posey is a 22-time Microsoft MVP with decades of IT experience. As a freelance writer, Posey has written thousands of articles and contributed to several dozen books on a wide variety of IT topics. Prior to going freelance, Posey was a CIO for a national chain of hospitals and health care facilities. He has also served as a network administrator for some of the country's largest insurance companies and for the Department of Defense at Fort Knox. In addition to his continued work in IT, Posey has spent the last several years actively training as a commercial scientist-astronaut candidate in preparation to fly on a mission to study polar mesospheric clouds from space. You can follow his spaceflight training on his Web site.