Posey's Tips & Tricks
Navigating IMAP Migrations for Office 365 Exchange
IMAP is almost universally supported, making it a good method for migrating from a non-Exchange Server platform to Office 365. But there are several limitations you need to know about before getting started.
One of the Office 365 migration methods that tends not to get a lot of attention is an IMAP migration.
IMAP stands for Internet Message Access Protocol. IMAP is almost universally supported. Consequently, if you need to migrate mail from a non-Exchange Server platform to Office 365, then it is a safe bet that you will probably be able to use an IMAP migration to get the job done.
Even though IMAP migrations will work for nearly any e-mail platform, there is one significant limitation to this migration method that you need to be aware of: IMAP migrations are only capable of migrating mail items.
In other words, this migration technique is able to migrate users' inboxes, as well as any other mail folders, but you won't be able to use this technique to migrate contacts, calendar items or task lists. If you need to migrate these types of items from a non-Exchange mail platform, then there are couple of things that you can do.
One possible option is to use .PST files as a migration tool. You can copy a user's messages, contacts, et cetera to a .PST file, and then migrate the .PST file contents to the user's newly created Office 365 mailbox. (You will have to create the mailboxes yourself, as they are not created automatically.)
Another option is to look for a third-party migration tool. There are several vendors that offer tools for migrating mail from various platforms to Office 365.
There are two other limitations that you need to be aware of. First, this process is only able to migrate 500,000 items per mailbox. If more than 500,000 items exist within a mailbox, then the oldest items will be omitted from the migration. The other limitation is that you cannot migrate messages that are over 35MB in size. This limitation shouldn't be an issue for most people, but it is still something to be aware of.
Before you will be able to perform an IMAP migration, you are going to need to create a .CSV file with entries for each mailbox that you intend to migrate. The .CSV file not only tells Office 365 which mailboxes need to be migrated, but it also provides Office 365 with the credentials needed to log in to the mailboxes and download the mail. This means that you are going to need each user's mail password. If you don't have the passwords, then you can always reset the passwords to a known value and then create the .CSV file.
The CSV file requires three columns: EmailAddress, UserName and Password. You can find the documentation for creating this file here.
To perform the actual migration, you will need to go into the Exchange Admin Center and create a migration batch (you can use PowerShell as an alternative). To do so, click on Recipients, then go to the Migration tab. Next, click on the plus icon, then choose the Migrate to Exchange Online option. As you can see in Figure 1, the resulting dialog box contains an option to perform an IMAP migration. Choose this option and click Next.
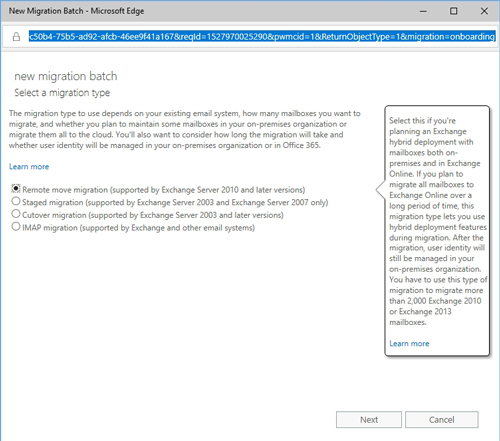 [Click on image for larger view.] Figure 1: Choose the IMAP Migration option.
On the following screen, you will be prompted to specify the .CSV file containing the mailboxes that you want to migrate. Make sure that after doing so, the dialog box indicates the correct number of mailboxes to migrate, as shown in Figure 2, and then click Next.
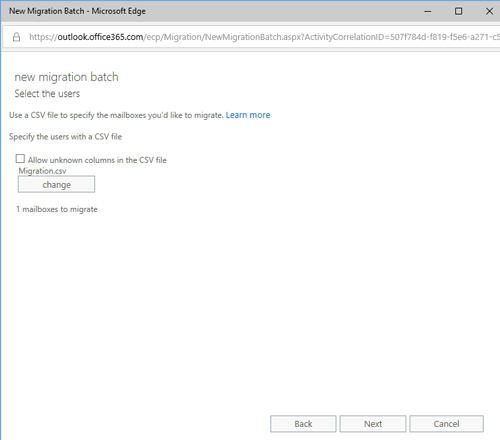 [Click on image for larger view.] Figure 2: The dialog box should show you how many mailboxes will be migrated.
Click Next, and you will be prompted to specify some information about the IMAP server. Specifically, you will need to provide the IMAP server's fully qualified domain name, the authentication and encryption type, and the port number. You can see what this looks like in Figure 3.
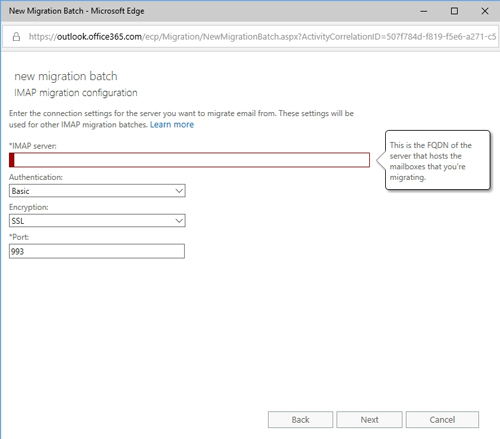 [Click on image for larger view.] Figure 3: You will have to point Office 365 to your IMAP server.
The following screen prompts you to name the migration batch. Enter a name and click Next. From there, simply specify which mailbox should receive the migration report when the migration is finished, and then choose the option to automatically start the batch.
Keep in mind that this is just a brief overview of the migration process. A real-world migration usually requires a significant amount of planning. Before you attempt an IMAP migration, I recommend checking out Microsoft's documentation here.
About the Author
Brien Posey is a 22-time Microsoft MVP with decades of IT experience. As a freelance writer, Posey has written thousands of articles and contributed to several dozen books on a wide variety of IT topics. Prior to going freelance, Posey was a CIO for a national chain of hospitals and health care facilities. He has also served as a network administrator for some of the country's largest insurance companies and for the Department of Defense at Fort Knox. In addition to his continued work in IT, Posey has spent the last several years actively training as a commercial scientist-astronaut candidate in preparation to fly on a mission to study polar mesospheric clouds from space. You can follow his spaceflight training on his Web site.