Posey's Tips & Tricks
Adding Metadata to SharePoint Document Libraries
How to let SharePoint users add just the right amount of information to make searching for files easier, without going overboard.
Although SharePoint is primarily marketed as a collaboration platform, I know of at least a few organizations that use SharePoint and its document libraries as an alternative to traditional file servers. The idea behind doing so is that SharePoint provides a nice interface and indexing capabilities that make it easy for users to find the files that they need.
Even so, it is possible to further improve SharePoint's file-indexing capabilities by associating better metadata with the individual files.
Before I show you how to do this, let me first say that SharePoint is not always a good alternative to traditional file servers. The amount of file data that needs to be stored and the types of files both play a huge role in determining SharePoint's suitability.
But that's another subject for another day. For now, let's assume that a SharePoint document library is being used primarily for the storage of Microsoft Office documents, and take a look at how to associate useful metadata with those documents.
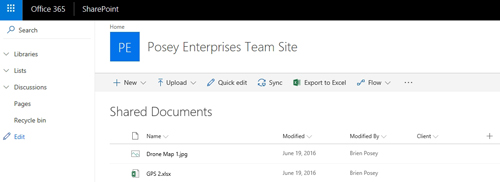
When a user uploads a document to a SharePoint document library, there is some document metadata that is created by default. If you look at Figure 1, for example, you can see that I have selected an Excel spreadsheet within a document library. Upon doing so, the pane on the right side of the screen displays some of the document's metadata, such as the file type, the date of the most recent modification and the file size.
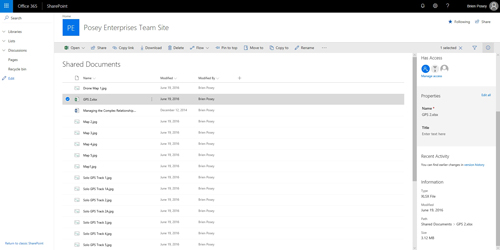 [Click on image for larger view.] Figure 1: Some metadata is automatically created when a document is added to a document library.
The default metadata makes for a good start, but you can greatly improve a user's ability to locate the documents that they need by associating custom metadata that better describes the document. When doing so, however, you will need to strike a balance by asking the user for enough metadata to improve the document's searchability, but not burdening the data by asking for too much metadata. Otherwise, users may populate metadata fields with meaningless information in an effort to avoid a tedious and time-consuming task.
The bottom line is that you need to think long and hard about the meta that will be most helpful to users within the organization. A good place to start is by asking the users what type of search information would make it easier for them to locate documents.
So with that said, let's get started. If you look at the previous figure, you can see that there is a header row above the list of documents. The header row displays headers such as Name, Modified and Modified By. Just to the right of these column headers, you will notice that there is an icon that looks like a plus sign. Clicking this icon allows you to add custom metadata fields to the document library. If you look at Figure 2, for example, you will see options for things like a single line of text, multiple lines of text and numbers. Each of these options pertains to a specific type of metadata.
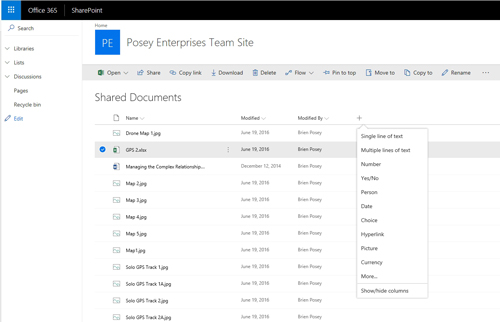 [Click on image for larger view.] Figure 2: You can add custom metadata fields by clicking the plus icon.
When you create a custom metadata field, the options that you are shown will vary depending on the metadata type that you have selected. For the sake of illustration, I chose the single-line-of-text option. As you can see in Figure 3, this causes SharePoint to prompt me to provide a name for the new metadata column, a description of the column's purpose and the metadata type. There is even an option to provide a default value.
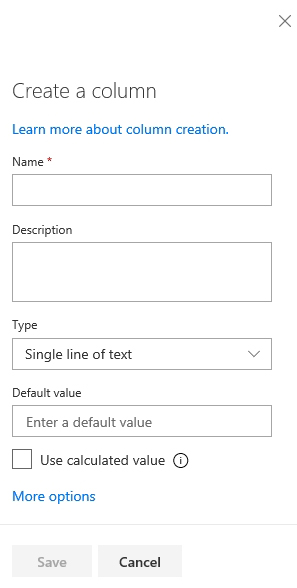 Figure 3: The Create a Column window provides options for creating a custom metadata field.
One more thing that is worth paying attention to is the More Options link, shown at the bottom of the figure above. Clicking on More Options exposes additional options, which may vary by data type. In this case, SharePoint provides options to specify the maximum number of characters that can be entered, require the column to contain information, and enforce unique values, as shown in Figure 4. The most important of these options is the one to require that the column contain information. Otherwise, users will be able to upload documents without populating the metadata field.
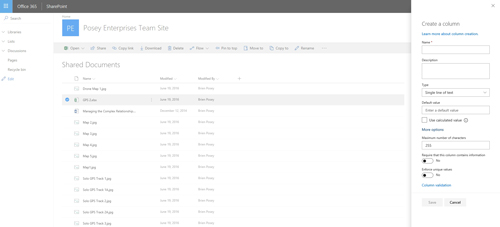 [Click on image for larger view.] Figure 4: These are the additional options that are available.
To further illustrate how custom metadata works, I have created a custom field called Client. You can see in Figure 5 that the document library now contains a Client column. Incidentally, you can force SharePoint to show or hide individual columns on an as-needed basis.
 [Click on image for larger view.] Figure 5: I have added a custom column to the document library.
If I go back and flag the column as being required, then SharePoint displays a warning message for all files that do not have an associated client. If I upload a new file, I am prompted to enter a client name, within the file properties, as shown in Figure 6.
 [Click on image for larger view.] Figure 6: This is what happens when you make a column mandatory.
About the Author
Brien Posey is a 22-time Microsoft MVP with decades of IT experience. As a freelance writer, Posey has written thousands of articles and contributed to several dozen books on a wide variety of IT topics. Prior to going freelance, Posey was a CIO for a national chain of hospitals and health care facilities. He has also served as a network administrator for some of the country's largest insurance companies and for the Department of Defense at Fort Knox. In addition to his continued work in IT, Posey has spent the last several years actively training as a commercial scientist-astronaut candidate in preparation to fly on a mission to study polar mesospheric clouds from space. You can follow his spaceflight training on his Web site.