In-Depth
How To Create Azure Storage Blobs in PowerShell
Upload and transfer files to the Azure cloud in a few easy steps.
- By Adam Bertram
- 02/24/2016
One of the most basic, common activities when using a cloud service like Microsoft Azure is to simply upload some files. Even though the cloud seems like some complicated entity in which you can't relate traditional terms like "file server" to, that's simply not true. At the most basic level, you can do simple transfer files from your computer into Azure just as you would with a traditional file copy. It's not quite that simple, but you get the picture.
If you're first getting started understanding Azure terminology you might see references to blobs, or binary large objects. In a roundabout way, this is simply a fancy term for files. Whenever you transfer a file from your computer into Azure, it technically now becomes a blob -- but don't get too caught up on the terminology. For now, just think of a blob as a file.
To create Azure storage blobs I'll use PowerShell. There are a number of different ways to upload files into Azure but for demonstration purposes, I will use PowerShell.
First of all, I'm going to assume you already have an Azure subscription. This is a requirement, obviously. Next, storage blobs are located in Azure storage accounts. You must have a storage account created in your subscription in order to upload files into Azure. Once you've got a subscription and a storage account created you are now able to begin uploading files into Azure.
Before you can upload files into Azure you must first create a storage container. To do this, you'll need to log into the portal using your credentials. Once in the portal, you'll now need to browse to your storage accounts. Once you arrive at your storage accounts, you'll see a window called Containers. Containers can be thought of as folders. You will need to create a container to storage your files in.
To create a container, simply click on the Containers window and you'll be prompted to create a new container with an access type. For now, I'm going to choose a private access type. I'm doing this because I don't want my files being publicly accessible. (Note: Storage containers are case sensitive! All container names must be in all lowercase.)
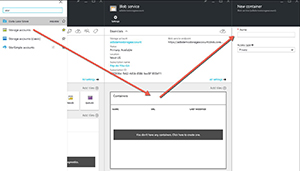 [Click on image for larger view.] Figure 1. Building the container.
Once you've got the container built you now have a spot to upload your files. Unfortunately, you cannot upload files directly in the Azure portal. Instead, I'll use PowerShell, as I mentioned earlier.
To do this, first ensure you have the Azure PowerShell module installed. Once you do, you will have a cmdlet available to you called Set-AzureStorageBlobContent. This cmdlet allows you to specify a file on your local file system, an Azure container and the name of what your blob will be called once it arrives in the Azure cloud.
This cmdlet is very easy to use. For example, perhaps I have a file called C:\MyFile.txt on my local C drive. I've previously created a storage container called mycontainer previously in the Azure portal in my storage account called adbdemostorageaccount. Once it's in Azure, I'll want it to keep the same name. To do this, I would run the Set-AzureStorageBlobContent using the appropriate parameters.
Because the Set-AzureStorageBlobContent command doesn't know which storage account to upload to, I'll first need to retrieve that with the Get-AzureRmStorageAccount cmdlet and pipe it to our Set cmdlet as shown below.
Get-AzureRmStorageAccount –Name adbstorageaccount | Set-AzureStorageBlobContent –Container mycontainer –File C:\MyFile.txt –Blob MyFile.txt
When you start the upload you will immediately see a handy progress bar:
 [Click on image for larger view.] Figure 2.
When it's completed you will get a summary of the file upload:
 [Click on image for larger view.] Figure 3.
You've now uploaded your first file to Azure and created your first Azure blob!
About the Author
Adam Bertram is a 20-year veteran of IT. He's an automation engineer, blogger, consultant, freelance writer, Pluralsight course author and content marketing advisor to multiple technology companies. Adam also founded the popular TechSnips e-learning platform. He mainly focuses on DevOps, system management and automation technologies, as well as various cloud platforms mostly in the Microsoft space. He is a Microsoft Cloud and Datacenter Management MVP who absorbs knowledge from the IT field and explains it in an easy-to-understand fashion. Catch up on Adam's articles at adamtheautomator.com, connect on LinkedIn or follow him on Twitter at @adbertram or the TechSnips Twitter account @techsnips_io.